
3 Tier Rolling Cart Ideas for Stylish Storage
Few furniture pieces work as hard as the humble 3-tier rolling cart. In my design projects, I often turn to these mobile units when a client is dealing with “dead zones” or awkward gaps between appliances. They are the ultimate problem solvers for renters and homeowners alike.
These carts bridge the gap between permanent cabinetry and temporary storage. They offer a specific industrial-meets-modern aesthetic that works in almost any room, provided you style them correctly. If you treat them like a junk drawer on wheels, they will look cluttered; if you zone them properly, they become a design feature.
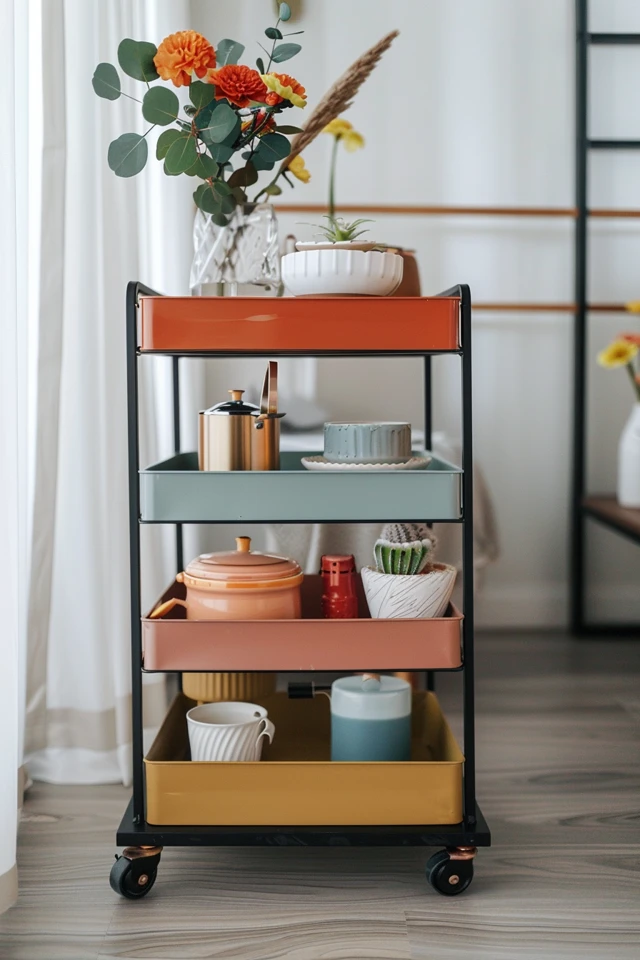
For a visual breakdown of the setups discussed below, check out the Picture Gallery at the end of the blog post.
1. The Kitchen Command Center
The kitchen is the most common habitat for the rolling cart, and for good reason. Counter space is real estate gold. By offloading specific tasks to a cart, you free up your primary prep surfaces for actual cooking. The key here is to create a dedicated “zone” rather than a general catch-all.
The Coffee or Bar Station
I frequently design “morning stations” for clients with small kitchens. A rolling cart is perfect for this because it can be wheeled to the dining table during brunch or tucked away when not in use.
Top Tier: This is your active surface. Place your coffee maker or electric kettle here. If you are using a standard metal cart, I recommend placing a wooden butcher block board over the top mesh to create a stable, flat surface for machinery. This prevents wobbling and spills.
Middle Tier: This is for grab-and-go consumables. Store mugs, sugar bowls, and coffee pods here. Use clear acrylic bins to coral tea bags or pods so you can see your inventory at a glance.
Bottom Tier: Store the heavy overflow. This is the place for bags of coffee beans, extra gallons of water, or larger carafes. Keeping the heaviest items at the bottom lowers the center of gravity, making the cart smoother to roll.
The Pantry Overflow
If you lack a walk-in pantry, a cart can serve as a dedicated baking or spice station. This is particularly useful for renters who cannot install new shelving.
Pro Rule of Thumb: Leave at least 36 inches of clearance around the cart if you plan to park it as a permanent island. If you are tucking it into a niche, measure the width of the cart and add 2 inches to ensure you don’t scrape the paint off your walls when pulling it out.
Designer’s Note: Dealing with Visual Noise
The biggest issue with open storage in a kitchen is visual clutter. Packaging is designed to grab attention in a grocery store, not to look peaceful in your home.
The fix: Decant everything. Pour pasta, rice, and flour into matching glass or plastic canisters. Uniformity makes even a crowded cart look curated and high-end. If decanting isn’t realistic for you, use opaque baskets on the middle and bottom tiers to hide the branded packaging.
2. The Bathroom Spa & Storage Unit
In powder rooms with pedestal sinks or older apartments with zero vanity storage, a rolling cart is a lifesaver. However, bathrooms present a unique challenge: humidity.
Material Selection Matters
When selecting a cart for a bathroom, verify the finish. You want powder-coated steel or rust-resistant aluminum. Avoid untreated wood or wicker, which will warp and grow mold in a steamy environment.
Top Tier: Reserve this for daily essentials that need to be within arm’s reach. Think hand soap, a small tray for jewelry, and perhaps a candle. I always place a small tray on the mesh to keep small bottles from tipping over.
Middle Tier: This is ideal for towel storage. Tightly roll hand towels and washcloths. Rolling them creates a spa-like aesthetic and maximizes space compared to folding. You can typically fit 6-8 rolled hand towels on a standard tier.
Bottom Tier: Store taller bottles (shampoo backups, cleaning supplies) or toilet paper here. Because toilet paper packaging is unattractive, I recommend removing the plastic and stacking the rolls in a wire or seagrass basket that fits inside the shelf.
Common Mistakes + Fixes
Mistake: Overloading the top shelf with tall bottles.
Fix: Tall items on the top shelf visually block the rest of the cart and look precarious. Always graduate height from bottom to top. Tallest items go on the bottom, medium in the middle, and shortest (or flat items) on top.
Mistake: Letting moisture accumulate.
Fix: If your cart has mesh bottoms, water from the shower steam can drip down. Line the shelves with clear shelf liners. This makes them wipeable and prevents metal toiletries from rusting onto the cart itself.
3. The Mobile Office & Craft Station
Since the shift to remote work, many of my clients don’t have a dedicated room for an office. They might be working from a dining table or a corner of the bedroom. A “cloffice” (closet office) on wheels allows you to pack your work away at 5:00 PM, which is vital for mental separation.
Organizing for Productivity
The goal here is accessibility. You should be able to reach a pen or a stapler without standing up.
Top Tier: Keep your immediate tools here. A pencil cup, a notepad, and your daily planner. If you use a laptop, you can use the top tier as a charging station by threading the charger through the mesh bottom.
Middle Tier: This is for paper management. Standard hanging file organizers often don’t fit perfectly in these carts, so I suggest vertical magazine holders. You can fit 3-4 standard magazine files side-by-side to sort mail, invoices, and active project files.
Bottom Tier: Bulky tech storage. This is where the printer paper, noise-canceling headphone case, and bulky reference books live.
Cable Management Tricks
Electronic clutter ruins the look of a sleek cart. Use velcro cable ties to secure your charging cords to one of the vertical legs of the cart. This keeps them from dragging on the floor and getting caught in the wheels.
What I’d Do in a Real Project
If I were styling an art cart for a client, I would use magnetic hooks on the exterior sides of the metal cart. This utilizes vertical space that usually goes to waste. You can hang scissors, tape rolls, or small buckets for paintbrushes on the outside, freeing up the interior shelves for paper and sketchbooks.
4. The Indoor Garden & Plant Nursery
Biophilic design is not just a trend; it is a standard for wellness in interiors. However, finding surface space for plants near a window can be difficult. A rolling cart allows you to chase the light.
Light and Rotation
The beauty of a cart is mobility. You can move the cart to a south-facing window in the morning and pull it back in the evening. This is excellent for finicky plants that need specific light conditions.
Top Tier: Place your trailing plants here. Pothos, Philodendrons, or String of Pearls look incredible cascading over the sides. The elevation gives the vines room to grow without touching the floor.
Middle Tier: This spot receives less direct overhead light because of the shelf above it. Choose plants that tolerate shade or filtered light, such as Snake Plants (Sansevieria) or ZZ plants. Alternatively, use this shelf for propagation stations—glass jars with cuttings rooting in water.
Bottom Tier: Use this for utility. Watering cans, misters, bags of soil, and extra pots. To keep it looking stylish, store the soil in a metal bin with a lid rather than the plastic bag it came in.
Drainage Logistics
Never water your plants directly on the cart unless you have waterproof liners. The metal mesh will let water pour through to the shelf below (and your floor). Always use saucers under your pots.
Designer’s Note: Scale and Balance
When mixing pots, follow the “Rule of Three.” Group three pots of varying heights and textures on one shelf. For example, a tall terracotta pot, a medium white ceramic pot, and a small glass propagation vessel. This creates a balanced vignette rather than a cluttered collection.
5. The Nursery & Kids’ Chaos Tamer
For new parents, a 3-tier cart is often used as a breastfeeding or diaper station. As the child grows, the cart transitions into an art supply station or Lego storage.
The Diaper Station Phase
Safety First: If you have a toddler who is pulling up on furniture, you must ensure the wheels are locked. If the cart is lightweight, consider weighing down the bottom shelf with heavy books to prevent tipping.
Top Tier: Diapers and wipes. Remove diapers from the plastic packaging and stack them in rows. It looks cleaner and makes them easier to grab with one hand.
Middle Tier: Creams, lotions, and burp cloths. Use fabric dividers here to keep small tubes from rolling around.
Bottom Tier: Extra blankets and backup supplies.
The Toy Transition
As the child ages, this becomes the “Art Cart.”
Sorting Logic: Use clear, lidded plastic bins for crayons, markers, and play-dough. Lids are essential because if the cart gets knocked over, you don’t want 64 crayons exploding across the rug.
Color Coding: I love arranging art supplies by color (ROYGBIV) in clear jars on the top shelf. It looks like a decor element and encourages kids to put things back where they belong.
Final Checklist: What I’d Do in a Real Project
If I were bringing a cart into your home today, this is the exact process I would follow to ensure it serves you well for years.
- Measure the “Parking Spot”: Before buying, I measure the nook where the cart will live. I look for a width clearance of at least 1-2 inches on either side.
- Select the Finish: I match the metal finish to the room’s hardware. If your kitchen has matte black handles, get a matte black cart. If your bathroom has chrome faucets, go with white or chrome. This makes the cart look like built-in furniture.
- Purchase Inserts Immediately: A cart without dividers is just a bucket. I always buy 3-4 small drawer organizers or acrylic bins at the same time I buy the cart.
- Weight Test: I load the bottom shelf first. If the cart feels rickety or the wheels stick, I redistribute the weight. High-quality casters are crucial—if the stock wheels are plastic and stiff, I often replace them with rubber rollerblade-style casters for smooth gliding on hardwood floors.
- Style the Top: The top shelf is the only one visible from a standing distance. I treat it like a coffee table—leaving 20% negative space so it doesn’t look cluttered.
FAQs
How much weight can a standard 3-tier cart hold?
Most metal utility carts are rated for about 20 to 44 pounds per shelf. However, I never recommend maxing this out. For mobility’s sake, try to keep the total load under 50 pounds. If the shelves start to bow or the wheels drag, you have overloaded it.
Can I paint a metal cart to match my room?
Absolutely. Since most of these carts come powder-coated, you cannot just brush paint over them. You must lightly sand the surface with fine-grit sandpaper to create a “key,” wipe it down, and then use a spray paint designed for metal (like Rust-Oleum). Apply several thin coats rather than one thick coat to avoid drips.
How do I stop things from falling through the mesh bottom?
This is a common frustration. You can buy specific chopping boards that fit over the top, or cork liners designed for shelves. For a budget DIY fix, cut a standard plastic placemat to size. It provides a solid surface and is easy to wipe clean.
What is the best way to clean a cart used for makeup or art supplies?
If you have spills like foundation or paint, remove everything. Take the cart outside or into the shower. Spray it down with a mild degreaser or dish soap and water, scrub with a soft brush, and rinse. Dry it immediately with a towel to prevent rust, especially around the screws and wheel joints.
Conclusion
The 3-tier rolling cart is a testament to the idea that good design is functional. It adapts to your life phases, moving from a bar cart to a nursery station to a craft organizer with ease. By following the rules of scale, weight distribution, and proper zoning, you can turn this utilitarian object into a stylish, indispensable part of your home.
Whether you are renting a studio apartment or organizing a sprawling family home, the key is to be intentional. Don’t let it become a junk magnet. Give every tier a purpose, use organizers within the shelves, and keep the styling loose and accessible.
Picture Gallery


