
5 Creative Home Bar Lights Ideas
Lighting is the silent mood-maker of any interior space, but nowhere is it more critical than in a home bar. I often tell my clients that you can have the most expensive marble countertops and custom cabinetry, but if you light it like a cafeteria, the magic is instantly gone. The right illumination turns a simple beverage station into a destination.
In my design practice, I treat the home bar as a jewelry box. It is a distinct zone that allows for a bit more drama and moodiness than the adjacent kitchen or living room. You want a glow that feels inviting, sophisticated, and just functional enough to mix a martini without squinting.
Whether you are remodeling a wet bar or styling a simple bar cart, layering your light sources is the key to success. For plenty of visual inspiration, make sure you scroll down to our curated Picture Gallery included at the end of this blog post.
1. The Drama of Statement Pendants
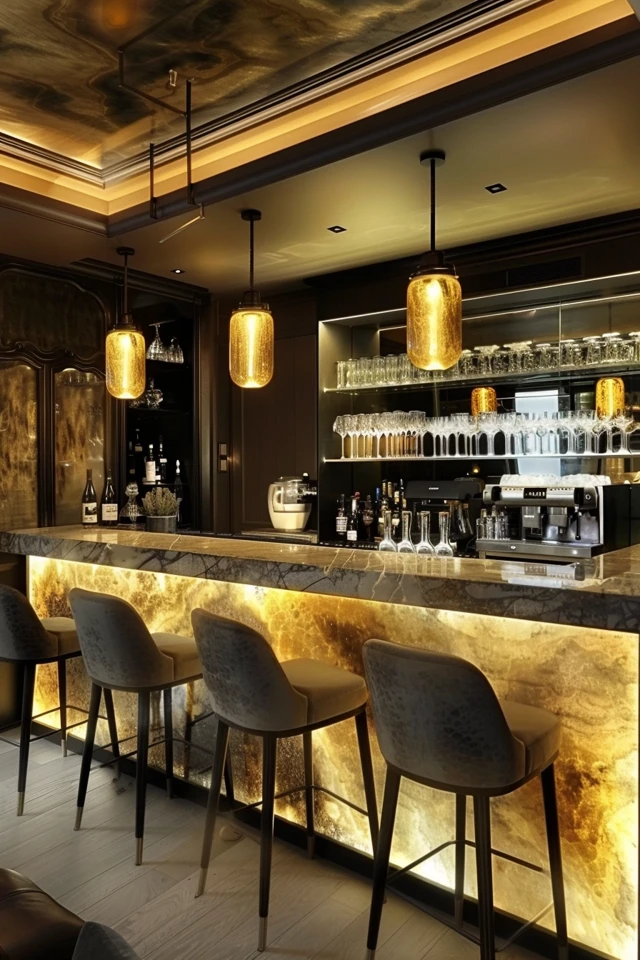
Pendants are often the first thing people think of for bar lighting, and for good reason. They act as the visual anchor of the space. However, the difference between a “nice” bar and a “wow” bar usually comes down to the scale and height of these fixtures.
In a recent project, we had a small dry bar tucked into a niche. Instead of using recessed cans, I dropped a single, oversized brass pendant with a darkened shade. It instantly created a focal point and lowered the visual ceiling, making the nook feel intimate and exclusive.
Rules of Thumb for Pendant Placement
When hanging pendants over a bar, you need to balance line-of-sight with aesthetics.
- Height: Generally, the bottom of the pendant should sit 30 to 36 inches above the countertop. If you are tall, lean toward 36 inches so you aren’t staring directly into the fixture while mixing drinks.
- Spacing: If you are installing multiple pendants, space them 30 to 32 inches apart, measured from the center of one bulb to the center of the next.
- Edge Distance: Leave at least 6 to 10 inches of clearance from the edge of the counter to the side of the fixture to prevent it from feeling crowded.
Designer’s Note: The Importance of Scale
The most common mistake I see is homeowners choosing pendants that are too small. They end up looking like dinky earrings on a large face.
If you are debating between two sizes, almost always choose the larger one. A substantial fixture feels intentional and expensive. If your bar is small (under 5 feet wide), stick to one large statement piece rather than trying to squeeze in two small ones.
Common Mistakes + Fixes
- Mistake: Buying clear glass shades with Edison bulbs that blind your guests.
- Fix: Use a frosted bulb or install a dimmer switch. Better yet, choose a fixture with a metal or linen shade that directs light downward (task lighting) rather than outward (glare).
2. Architectural Layers with Under-Cabinet LED Strips
If you want that high-end, boutique hotel look, you need integrated linear lighting. This is the secret sauce of modern interior design. LED strips hidden under shelves or cabinets provide a soft, wash of light that highlights your glassware and bottles without creating harsh shadows.
This type of lighting is primarily architectural. It defines the shape of the bar and adds depth to the room. When the overhead lights are off during a party, these strips provide a moody glow that guides guests to the drinks.
Technical Specs That Matter
Not all LED strips are created equal. Buying cheap tape lights online will often result in a sickly green or blue hue that makes your expensive bourbon look unappealing.
- Color Temperature (Kelvin): Stick to 2700K or 3000K. 2700K is warm and cozy, similar to incandescent bulbs. Anything over 3000K will look clinical and cold.
- CRI (Color Rendering Index): Look for a CRI of 90 or higher. This ensures that the colors of your wood finishes, backsplash, and wine labels look true to life.
- Diffusion: Never stick a bare LED tape strip where it can be seen. The reflection will look like a series of dots. Always use an aluminum channel with a frosted diffuser lens to create a solid line of light.
What I’d Do in a Real Project
If I am designing a bar with floating shelves, I route a channel into the underside of the wood shelf to recess the LED strip flush.
If you are a renter or working with existing cabinets, you can surface-mount a slim LED channel behind the front lip of the cabinet. It hides the fixture and throws the light backward onto your backsplash, creating a beautiful silhouette effect.
3. Wall Sconces for a “Speakeasy” Vibe
Wall sconces are my favorite way to save counter space while adding character. They bring the light source down to face level, which is universally flattering. Everyone looks better in a room lit by sconces than one lit by overhead cans.
Sconces are particularly effective in “dry bars” or shallow niches where you might not have the depth for hanging pendants. They draw the eye to the back wall, making the space feel deeper.
Mounting Height and Positioning
Getting the electrical box in the right spot is crucial because moving it later is a messy drywall repair.
- Standard Height: I usually position the center of the junction box roughly 60 to 66 inches from the finished floor. If there is a backsplash or shelf involved, I adjust so the fixture sits centered in the open vertical space.
- Orientation: Down-lights work well for task lighting (seeing what you are pouring). Up-lights are better for general ambiance as they bounce light off the ceiling.
Designer’s Note: The Swing-Arm Advantage
I love using articulating (swing-arm) sconces in bar areas. They add a functional, slightly industrial edge. Plus, you can physically move the light source closer to your work surface when you are slicing limes, and then push it back against the wall when the party starts.
Common Mistakes + Fixes
- Mistake: Ignoring the projection depth. Some sconces stick out 8 or 10 inches. If your bar counter is shallow (standard is 24 inches), a deep sconce might feel like it’s poking you in the forehead.
- Fix: Check the “projection” or “depth” spec on the tear sheet. Ideally, keep it under 6 inches for shallow bar areas.
4. Elevating the Scene with Art & Picture Lights
This is a strategy often overlooked in average homes but standard in luxury design. If you have a backsplash that doesn’t have upper cabinets, or perhaps a mirror or a piece of art above the bar, install a picture light.
Picture lights are sophisticated and unexpected in a bar setting. They cast a very focused, intimate wash of light that highlights texture. If you have a moody wallpaper, a brick wall, or a beautiful oil painting above your bar cart, this is the way to go.
Material Coordination
Since picture lights are usually metal, you need to consider the other finishes in the room.
- The Mixed Metal Rule: You do not need to match your cabinet hardware perfectly. If you have matte black cabinet pulls, an unlacquered brass picture light looks stunning.
- Texture: If your bar is glossy (lacquer, glass, polished stone), consider a matte finish on the light fixture to provide contrast.
Sizing the Fixture
The light fixture should generally be about 1/2 to 2/3 the width of the artwork or the mirror it is illuminating. If it is too wide, it looks heavy. If it is too narrow, it looks like an afterthought.
What I’d Do in a Real Project
I often use a picture light over a large antique mirror behind the bar. The light reflects into the room, effectively doubling the brightness without adding more bulbs. It creates a shimmering, candle-lit effect that is perfect for evening entertaining.
5. Renter-Friendly Magic with Portable Table Lamps
Not every home bar project involves an electrician and a permit. Sometimes, the best lighting solution is a simple, portable table lamp. This is especially true for bar carts or antique sideboards repurposed as drink stations.
Small table lamps add warmth and personality. They make the bar feel like a furnished room rather than a utility station. With the rise of high-quality cordless LED lamps, you don’t even need an outlet nearby.
Cordless vs. Corded
If your bar is on a floating island or a cart in the middle of the room, a rechargeable cordless lamp is a lifesaver. Look for brands that offer “warm dim” technology, so the light gets warmer as you dim it down.
If your bar is against a wall with an outlet, I prefer a corded lamp for reliability. You can put it on a smart plug and control it with your phone, ensuring you never walk into a dark room.
Styling the Lamp
- Scale: Choose a lamp with a small footprint. Bar tops are valuable real estate for bottles, glasses, and cutting boards. A tall, slender buffet lamp is often better than a wide gourd lamp.
- Shade Material: A darker shade (black, navy, or metal) will direct light down onto the bottles, creating drama. A white linen shade will diffuse light into the whole room. Decide which vibe you want.
Designer’s Note: The “Lamp O’Clock” Rule
I always encourage clients to turn off overhead lights after dinner. The bar lamp should be the brightest point in the corner. It draws guests in like moths to a flame.
Final Checklist: Designing Your Bar Lighting Plan
Before you buy a single fixture, run through this checklist to ensure you are thinking like a pro.
- Check the Color Temperature: Ensure all bulbs in the area (pendants, under-cabinet, sconces) are the same Kelvin temperature. I recommend 2700K for residential bars.
- Install Dimmers: This is non-negotiable. A bar needs to transition from bright prep-work to moody lounge vibes. Every light switch should be a dimmer.
- Measure Twice: Map out the fixture placement with painter’s tape on the wall or ceiling before installation to visualize the scale.
- Layer the Light: Aim for at least two sources of light (e.g., overhead + under-cabinet, or sconce + table lamp). Single-source lighting feels flat.
- Watch the Glare: Sit on your barstools and check if the light hits your eyes. Adjust height or shade opacity accordingly.
FAQs
How bright should bar lighting be?
For a home bar, you do not need stadium lighting. Aim for a total of 1,500 to 3,000 lumens depending on the size of the space. However, the ability to dim is more important than maximum brightness. You want enough light to read a label, but low enough to feel cozy.
Can I mix metal finishes on my lighting and hardware?
Absolutely. In fact, I encourage it. If your faucet and cabinet pulls are polished nickel, a matte black or antique brass light fixture adds depth. Just try to keep one “dominant” metal and use the second one as an accent.
What is the best height for a chandelier over a bar?
If you are using a linear chandelier or multiple pendants, the bottom of the fixture should generally be 30 to 36 inches above the countertop. If you have very high ceilings (over 9 feet), you can raise the fixture slightly, about 3 inches for every extra foot of ceiling height.
How do I light a bar cart that doesn’t have an outlet?
Rechargeable LED table lamps are the best solution here. They come in stylish designs now that mimic high-end hardwired fixtures. Alternatively, you can use battery-operated puck lights attached to the underside of the cart shelves to illuminate bottles from below.
Is 3000K or 2700K better for a bar?
I almost exclusively specify 2700K for bars, living rooms, and bedrooms. It mimics the warmth of sunset and candlelight. 3000K is crisper and whiter, which is great for bathrooms and active kitchens, but it can kill the “vibe” of a relaxing bar area.
Conclusion
Lighting a home bar is about balancing utility with atmosphere. You are creating a space that needs to function for mixing cocktails but also needs to set the stage for relaxation and connection. By layering your lighting—using a mix of overhead pendants, architectural LED strips, and intimate accent lights—you create a rich, versatile environment.
Don’t be afraid to go bold with scale or finish. The bar is one of the few places in the home where you can take a design risk without overwhelming the main living areas. Treat the lighting as the jewelry of the room, pay attention to color temperature, and always, always install a dimmer.
Picture Gallery


