
Title: 5 Elegant Home Bar Counter Design Ideas
Introduction
Designing a dedicated space for drinks and entertainment is one of the most requested upgrades I see in residential projects today. It shifts the center of gravity in a home, moving guests out of the busy kitchen work zones and into a designated area for relaxation. Whether you have a sprawling basement or a modest alcove off the dining room, the right design elevates the entire hosting experience.
I once worked with a client who insisted a simple cart would suffice, only to realize six months later that they had nowhere to wash glasses or store wine at the proper temperature. We eventually retrofitted a stunning wet bar that became the architectural focal point of their living area. If you are looking for visual inspiration, you can visit the Picture Gallery at the end of the blog post.
In this guide, I will walk you through five distinct design approaches for an elegant home bar. We will cover critical measurements, material durability, and lighting rules that separate amateur DIY projects from professional installs. Let’s dive into the details that make these spaces function as beautifully as they look.
1. The Classic Built-In Wet Bar
The classic built-in wet bar is the gold standard for home entertainment. This design typically features upper and lower cabinetry, a prep sink, and a dedicated beverage cooler. It is best suited for basements, large living rooms, or dens where plumbing access is feasible.
To achieve an elegant look here, symmetry is your best friend. I usually center the sink and frame it with glass-front upper cabinets to display premium glassware. The goal is to make it look like a seamless piece of furniture rather than a transplanted kitchen cabinet.
The Golden Rules of Measurements
When designing a built-in, scale is everything. Standard lower cabinets are 24 inches deep, but for a bar, I often reduce this to 18 or 21 inches if space is tight. This saves floor space without sacrificing too much storage.
For the sink, avoid full-sized kitchen models. A 15-inch square or round prep sink is ideal. It provides enough room to rinse a shaker or dump ice but preserves valuable counter space for slicing limes or mixing drinks.
Material Selection
Durability is key for the countertop. Alcohol and citrus juices are acidic and can etch natural stones like marble instantly.
For a classic look without the maintenance headache, I recommend:
- Honed Quartz: mimics limestone or slate but resists staining.
- Quartzite: A natural stone that is harder than granite and offers beautiful veining.
- Sealed Granite: Choose a leathered finish for a sophisticated, tactile texture.
Designer’s Note: The Lighting Layer
A common mistake is relying solely on overhead recessed cans. This creates harsh shadows that are unflattering for a lounge atmosphere.
What usually goes wrong: People install shelving without lighting, making the bar feel like a dark cave.
How to prevent it: Install LED tape lighting inside glass cabinets and under the floating shelves. If you use wall sconces, mount them roughly 60 to 66 inches from the floor to eye level. This creates a warm, inviting glow that highlights your bottle collection.
2. The Moody Speakeasy Nook
If you have a smaller footprint, such as a closet conversion or an awkward niche under a staircase, the “Speakeasy” style is a perfect fit. This design relies on dark, saturated colors, rich textures, and dramatic lighting to create an intimate vibe.
This is where you can take risks that might feel overwhelming in a main kitchen. Think navy blues, forest greens, or even charcoal black for the cabinetry. The counter serves as a jewel box in this setting.
Creating Depth with Mirrors
Since these spaces are usually small, we need to fake depth. I almost always specify an antique mirror backsplash for speakeasy bars. It reflects the ambient light and makes the bottle display look twice as deep.
Standard mirror glass can look too modern or bathroom-like. Look for “foxed” or “smoked” mirror finishes. These have a vintage patina that screams elegance and hides splashes or streaks better than clear glass.
Hardware and Fixtures
In a dark moody bar, the metal finishes act as the jewelry. Unlacquered brass is a stunning choice that ages beautifully over time.
My go-to hardware checklist:
- Faucet: High-arc bar faucet in unlacquered brass or polished nickel.
- Cabinet Pulls: Heavy, knurled textures that feel substantial in the hand.
- Railings: A brass gallery rail on open shelves prevents bottles from sliding off and adds a vintage touch.
Common Mistakes + Fixes
Mistake: Ignoring the ceiling.
Fix: In a small, moody nook, paint the ceiling the same color as the walls and cabinetry. This “color drenching” technique blurs the boundaries of the room, making it feel cozy rather than cramped.
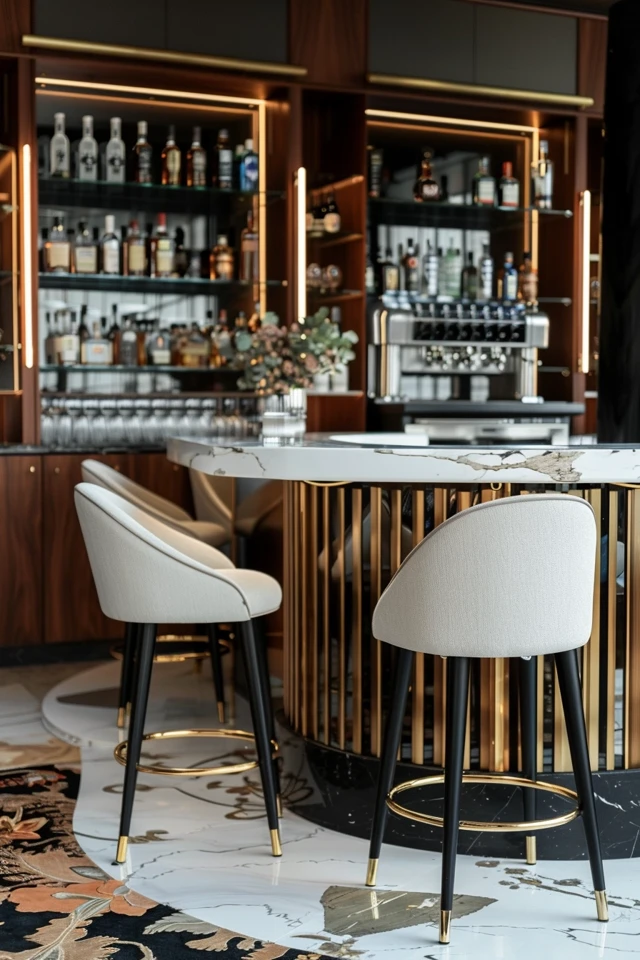
3. The High-Contrast Marble Statement
For those seeking pure luxury, a high-contrast marble bar is the ultimate showstopper. This design focuses on the stone itself as the primary art piece. It works exceptionally well in modern or transitional homes with open floor plans.
The defining feature here is the “waterfall edge.” This is where the countertop material continues down the side of the cabinet to the floor at a 90-degree angle. It creates a clean, continuous line that looks incredibly expensive and architectural.
Handling Natural Stone
I mentioned earlier that marble is prone to etching. However, for some clients, the beauty of real Calacatta or Carrara marble is worth the patina. If you choose real marble, you must commit to professional sealing every 6 to 12 months.
If you love the look but hate the risk, look for premium porcelain slabs. Technology has advanced significantly, and large-format porcelain can mimic the dramatic veining of marble with zero porosity. It is virtually indestructible.
Bar Stool Spacing
If your marble counter includes a seating overhang, you need to calculate space for stools.
- Clearance: Allow 24 inches of width per person for comfortable seating.
- Depth: The overhang should be at least 12 to 15 inches deep so knees don’t hit the cabinet wall.
- Height: Ensure you buy the right chairs. “Counter height” stools (24-26 inches seat height) are for 36-inch counters. “Bar height” stools (30 inches seat height) are for 42-inch raised bars.
Designer’s Note: Electrical Placement
What usually goes wrong: The beautiful waterfall edge is installed, and then the electrician realizes there is nowhere to put the mandatory outlet required by code.
How to prevent it: Plan for pop-up outlets on the countertop surface or tuck outlets underneath the overhang on the cabinet face. Never cut a standard white plastic outlet into the side of a waterfall leg; it ruins the aesthetic immediately.
4. The Transitional Beverage Center
Not every home has space for a dedicated room. The Transitional Beverage Center is often an extension of the kitchen or dining area. It utilizes the same cabinetry style as the kitchen but differentiates itself through hardware or countertop selection.
This design is highly functional for families. It usually includes a built-in coffee machine, a wine fridge, and drawers for snacks. It serves as a “self-serve” station that keeps guests and kids out of the main cooking triangle.
Zoning the Space
To make this area feel like a bar and not just “more kitchen,” I often change the backsplash. If the kitchen has white subway tile, the beverage center might get a stone slab splash or a herringbone mosaic.
Upper cabinets are often replaced with floating wood shelves to lighten the visual load. This allows you to display nice coffee mugs or wine glasses, signaling that this area is for leisure.
Appliance Ventilation
This is a critical technical detail. You cannot simply shove a standard mini-fridge into a cabinet. Built-in beverage coolers front-vent, meaning they blow hot air out the toe kick.
Practical constraint: If you use a freestanding unit in a tight space without ventilation, the compressor will overheat and fail. Always check the manufacturer’s specs for “built-in” capability before buying.
Common Mistakes + Fixes
Mistake: No landing space.
Fix: Ensure there is at least 15 to 18 inches of clear counter space next to the coffee maker or wine fridge. You need a place to set the glass down while you pour.
5. The Floating Minimalist Bar
This design is ideal for apartments, condos, or modern homes where floor space is at a premium. Instead of heavy base cabinets, we use a wall-mounted floating console or thick floating shelves to create a bar area.
It feels light, airy, and sophisticated. Because there are no base cabinets, the floor remains visible, which makes the room feel larger.
Structural Support
A floating counter that holds heavy bottles requires serious structural support. You cannot just screw brackets into drywall anchors.
The Rule of Thumb: You must hit the studs. For a stone or heavy wood floating shelf, I recommend heavy-duty steel brackets that are mounted directly to the studs before the drywall is finished (if you are renovating). If you are retrofitting, look for “blind shelf supports” that drill into the back of a solid wood shelf.
Curating the Display
Since there is no closed storage to hide clutter, curation is essential. This is not the place for the half-empty plastic bottle of tonic water.
Styling Checklist:
- Decanters: Pour disparate liquors into matching glass decanters for a uniform look.
- Trays: Use a tray to group small items like bitters, jiggers, and stirrers. It makes the arrangement look intentional.
- Greenery: A small potted succulent or fern adds life to the stone and glass surfaces.
Designer’s Note: Height Matters
Mount a floating bar console slightly higher than a standard table. I prefer 36 inches off the floor (standard counter height) or 42 inches (bar height). This allows it to function as a standing leaning station during parties.
Final Checklist: What I’d Do in a Real Project
If I were managing your home bar project today, this is the exact order of operations I would follow to ensure success.
1. Functionality Audit
Determine if you need a “wet” bar (sink included) or a “dry” bar. Adding plumbing increases the budget by $1,500 to $3,000 typically.
2. Appliance Selection
Select your wine fridge and ice maker before ordering cabinets. Cabinetry widths must be customized to fit these appliances perfectly.
3. Rough-In
Have the electrician place outlets for appliances, under-cabinet lights, and countertop blenders. Have the plumber run lines for the sink and the ice maker drain (ice makers need a drain, usually gravity-fed or pumped).
4. Cabinetry & Countertop Installation
Ensure the installers level the cabinets perfectly. Stone countertops will crack if the base is not level.
5. Lighting Trim-Out
Install the decorative sconces and LED strips. Connect them to a dimmer switch. Dimming is non-negotiable for a bar atmosphere.
6. Styling
Add the final layers: bar stools with back support, a durable rug, and glassware.
FAQs
What is the standard height for a home bar counter?
There are two standards. “Counter height” is 36 inches, which matches kitchen counters. “Bar height” is 42 inches. A raised 42-inch bar is great for standing and leaning, while 36 inches is better for integrated appliances and prep work.
How much overhang do I need for bar stools?
You need a minimum of 12 inches of overhang for knee clearance. If you have tall family members, 15 inches is much more comfortable.
Can I use a regular fridge for a home bar?
You can, but under-counter beverage centers are preferred for design. If you choose a solid door fridge, it looks like a kitchen appliance. A glass door beverage center displays the wine and beer, adding to the ambiance.
What is the best lighting temperature for a home bar?
Aim for 2700K (Kelvin). This is a warm, soft white light that mimics candlelight and incandescent bulbs. Anything over 3000K will look too blue and clinical, ruining the mood.
How deep should bar shelves be?
Liquor bottles vary, but most fit on a shelf that is 10 to 12 inches deep. Avoid making them deeper than 12 inches, or bottles will get lost in the back rows.
Conclusion
Creating an elegant home bar is about more than just stocking good liquor. It requires a thoughtful balance of ergonomics, lighting, and material selection. Whether you opt for a dramatic speakeasy vibe with dark brass accents or a crisp, modern marble waterfall, the key is consistency.
Start by defining how you will actually use the space. Will you be mixing complex cocktails requiring a sink, or just pouring wine? Once the function is set, let the design follow.
Don’t be afraid to mix metals or use darker paint colors than you would in the rest of your home. The bar is a destination—a place to escape the routine. Make it special, keep the lighting dim, and ensure those bar stools are comfortable enough for long conversations.
Picture Gallery


