
5 Home Bar Area Ideas for a Fun Gathering Spot
Creating a dedicated spot for drinks and conversation is one of the most requested features I see in residential projects today. The shift from going out to entertaining at home has changed how we view our living spaces. Homeowners want a designated zone where they can play bartender, display their glassware collection, and offer guests a drink without having to clutter the main kitchen work triangle.
I recall a specific project where a client felt their living room was too small for any “fun” additions. By simply re-evaluating an awkward alcove under the stairs, we installed a custom dry bar that completely transformed the energy of the home. It went from a dead zone to the magnetic center of every dinner party. If you are looking for visual inspiration to spark your creativity, be sure to scroll all the way down to the Picture Gallery at the end of this blog post.
Whether you are dealing with a sprawling basement, a compact apartment, or a transition space between indoors and out, there is a solution that fits. A home bar does not need to be a massive construction project; it just needs to be intentional. Below, I have outlined five distinct approaches to designing a home bar, complete with the measurements and design rules I use in my own practice.
1. The “Hidden Gem” Closet Bar
One of the most effective ways to add a bar without sacrificing floor space is converting an existing closet. This is often referred to as a “pocket bar.” It is an excellent solution for dining rooms or hallways where a coat closet might be underutilized. The beauty of this design is that it can be closed off when not in use, keeping visual clutter to a minimum.
Design Guidelines and Measurements
Because this space is enclosed, you can take bold risks with design that you might be afraid to use in a larger room. I often recommend high-gloss lacquer paint or a dark, moody wallpaper for the interior back wall. It creates a jewel-box effect when the doors are opened.
For the layout, you typically want a base cabinet height of 36 inches, matching standard kitchen counters. However, since closets are often shallow, you may need custom cabinetry with a depth of 18 to 21 inches rather than the standard 24 inches. If you go shallower than 18 inches, you will struggle to fit a standard wine fridge or bar sink.
Designer’s Note: Ventilation is Key
The biggest failure I see in closet conversions is a lack of ventilation for appliances. Beverage centers and wine refrigerators generate heat. If you enclose them in a tight closet with the doors closed, the compressor will overheat and fail prematurely. Always install a ventilation grille in the toe kick or ensure there is adequate air gap clearance specified by the appliance manufacturer.
Common Mistakes + Fixes
- Mistake: Using standard swing doors that block traffic when open.
- Fix: Install pocket doors or bi-fold doors. These slide out of the way, allowing the bar to remain “open for business” during a party without blocking the hallway.
- Mistake: Poor lighting inside the closet.
- Fix: Install motion-sensor LED strips inside the cabinet frames or an overhead puck light that turns on automatically when the door opens.
What I’d do in a real project:
- Remove the existing header to run cabinets to the ceiling.
- Install a mirrored backsplash to make the shallow closet feel twice as deep.
- Use antique brass hardware to warm up the small space.
2. The Built-In Wet Bar with Floating Shelves
If you have an empty wall in a living room, basement, or dining area, a built-in wet bar is the gold standard. This setup usually involves base cabinetry, a countertop, a sink (making it “wet”), and open shelving above. This look is timeless and allows you to display your best decanters and glassware as part of the room’s decor.
Scale and Spacing Rules
For a functional wet bar, you need a minimum width of 48 inches, though 60 to 72 inches is ideal. This allows space for a 15-inch bar sink and enough counter space on either side for prep work. The standard distance between the countertop and the bottom of the first shelf should be 18 inches. This mimics standard kitchen clearance and accommodates tall bottles or blenders.
If you are installing floating shelves, depth matters. I specify shelves that are 10 to 12 inches deep. Anything deeper than 12 inches looks heavy and can overshadow the countertop workspace below. Anything shallower than 10 inches risks dinner plates or large mixers not fitting securely.
Material Selection for Durability
Alcohol, specifically red wine and citrus juices, acts like acid on natural stone. If you choose marble for your bar top, it will etch. For high-traffic bars, I prefer honed quartzite or a high-quality quartz. These materials offer the look of natural stone but are non-porous and resistant to staining from lime juice or spilled Merlot.
Designer’s Note: The Sink Choice
Do not install a full-sized kitchen sink in a home bar; it kills the scale. Look for a prep sink or bar sink that is roughly 15 inches wide. Go for an undermount style for easy cleanup—you can wipe spills directly into the sink.
Common Mistakes + Fixes
- Mistake: Placing the shelves too high to reach.
- Fix: Mount the highest usable shelf at roughly 72 inches from the floor for the average user, or keep everyday items on the lower shelf.
- Mistake: Forgetting electrical outlets.
- Fix: Plan for outlets on the backsplash for blenders or cocktail machines. Hide them under the upper shelves or use pop-up outlets in the counter to keep the backsplash clean.
3. The Freestanding Furniture Piece (Renter Friendly)
Not everyone can tear down walls or run plumbing. For renters or those on a stricter budget, a freestanding credenza, sideboard, or bar cart is the perfect solution. This allows for flexibility; you can move the “bar” to different rooms depending on the event.
Selecting the Right Piece
When shopping for a sideboard to use as a bar, look for a piece that is 30 to 36 inches tall. Anything lower than 30 inches will require you to stoop uncomfortably to pour drinks. The surface area is critical. Ensure the top is at least 16 inches deep to accommodate a tray of bottles and a cutting board.
Styling Logic: The Triangle Rule
To keep a bar cart from looking cluttered, I use the triangle rule. Arrange your tallest items (usually bottles) in the back corner. Place medium-height items (ice bucket, shaker) in the middle, and low items (rocks glasses, bowls of citrus) in the front. This creates a visual triangle that leads the eye and feels organized.
Designer’s Note: Protecting Your Investment
Most furniture pieces are wood, which hates moisture. Always use a large decorative tray to define the “wet zone.” If you are using a vintage wood piece, I recommend having a local glass shop cut a piece of clear glass to fit the top perfectly. This costs very little but makes the piece waterproof and wipeable.
Common Mistakes + Fixes
- Mistake: Overcrowding the surface with every bottle you own.
- Fix: Only display the bottles you actually drink or that have beautiful labels. Store the “backstock” inside the cabinet doors or in a pantry.
- Mistake: Wobbling wheels on bar carts.
- Fix: If buying a cart with wheels, ensure they have locking mechanisms. You do not want the cart rolling away while someone is trying to slice a lime.
4. The Butler’s Pantry Pass-Through
This idea works best for homes with a layout that connects the kitchen to the dining room via a small hallway or pantry. Converting this pass-through into a beverage station is one of the highest ROI (Return on Investment) updates you can make. It encourages flow and keeps guests out of the main kitchen cooking zone.
Layout and Flow
The walkway in a butler’s pantry should be at least 36 inches wide, though 42 to 48 inches is preferred if you expect people to be mixing drinks while others walk by. If the space is tight, avoid hardware that sticks out. Use recessed finger pulls on drawers to prevent hip-checking knobs as you walk through.
Lighting Layers
Because this area is often windowless, lighting is paramount. You need two layers: task lighting and accent lighting.
1. Under-cabinet lighting: Essential for seeing what you are pouring. Use LED tape light with a diffuser channel.
2. Interior cabinet lighting: If you have glass-front upper cabinets, light the inside to create a warm glow that acts as a nightlight for the hallway.
What I’d do in a real project:
- Install a dedicated wine fridge under the counter.
- Use wire mesh inserts on cabinet doors instead of glass for a texture change that still allows visibility.
- Paint the cabinetry a different color than the kitchen (e.g., navy blue or charcoal) to signal a zone change.
5. The Indoor-Outdoor Connection Bar
If you have a kitchen window that faces a patio or deck, you have the potential for an incredible indoor-outdoor bar. This involves replacing a standard window with a pass-through window (accordion, bi-fold, or strut window) and extending the countertop outside.
Countertop Mechanics
For this to work, the exterior countertop needs to be weather-resistant. Concrete, granite, or specific porcelain slabs work well. The countertop height should be 36 inches (standard kitchen height) on the inside. On the outside, if you want people to sit on stools, you have two options:
1. Keep it flush: The outside counter remains at 36 inches. You will need “counter height” stools (seat height 24-26 inches).
2. Raise it up: You can add a bar bracket to raise the exterior ledge to 42 inches. You will need “bar height” stools (seat height 30 inches).
The overhang for the exterior seating should be between 10 to 15 inches to allow for knee clearance.
Designer’s Note: The Screen Situation
The biggest oversight in these designs is insects. If you live in an area with mosquitoes, an open window is a problem. I always specify a retractable phantom screen that pulls down from the top of the window frame. It stays hidden when not in use but keeps the bugs out when you are serving margaritas.
Common Mistakes + Fixes
- Mistake: Forgetting about roof overhangs.
- Fix: Ensure the exterior bar stools are covered by an eave or awning. Nobody wants to sit at a wet bar in the rain, and sun exposure will fade your materials.
- Mistake: Poor connection between indoor/outdoor materials.
- Fix: Use the same countertop material inside and out if possible (ensure the material is UV stable) to blur the line between the two spaces.
Final Checklist for Your Home Bar
Before you commit to a layout or start buying furniture, run through this final checklist to ensure you haven’t missed a critical functional detail.
- Electrical: Have you accounted for the wine fridge, blender, ice maker, and lighting? Do you need a dedicated circuit?
- Plumbing: If adding a sink, do you have access to a drain line? (This is often the most expensive part of a retro-fit).
- Lighting Temperature: Stick to 2700K or 3000K bulbs. Anything cooler (4000K+) will look like a sterile hospital operating room, which kills the vibe.
- Clearance: Is there at least 36 inches of clearance behind the bar for the bartender to move?
- Surface Durability: Is your countertop resistant to acid (citrus/wine)? If using wood, is it sealed?
- Bottle Height: Have you measured your tallest liquor bottle? Ensure shelf spacing is at least 14 inches high.
FAQs
Do I really need a sink in my home bar?
No, you do not. A “dry bar” functions perfectly well for mixing drinks. The only inconvenience is that you have to walk to the kitchen to dump ice or rinse a shaker. If you are close to the kitchen, a sink is a luxury, not a necessity.
What is the best depth for a home bar cabinet?
Standard kitchen depth is 24 inches, which is ideal for under-counter appliances. However, for dry bars in tight spaces, you can get away with 18 to 21 inches. Just be aware that most wine fridges require 24 inches of depth.
Should I use a mirror for the backsplash?
Mirrors are a classic choice for bars because they reflect light and bottles, making the collection look larger and the room deeper. Antique mirror (distressed glass) is my preferred choice as it hides smudges and splashes better than a pristine clear mirror.
How much space do I need per bar stool?
Allow 24 inches of width per person (measured from the center of one stool to the center of the next). This ensures guests aren’t bumping elbows while drinking.
Conclusion
Designing a home bar is about more than just alcohol storage; it is about creating a ritual of hospitality. Whether you build a full wet bar with custom cabinetry or style a vintage cart in the corner of your living room, the goal is to create a space that invites connection. By following the measurements and material rules outlined above, you can ensure your gathering spot is as functional as it is beautiful.
Remember to consider your constraints—space, budget, and plumbing access—before diving in. Start small if you need to, perhaps with a well-curated tray on a sideboard, and evolve the space as your entertaining style grows. Cheers to creating a home that is ready for a party at a moment’s notice.
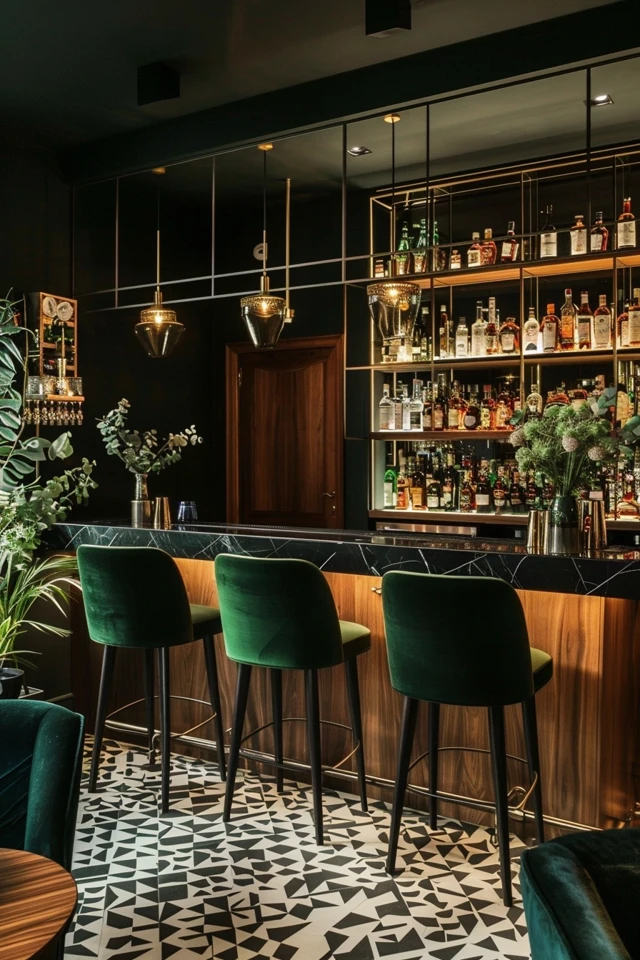
Picture Gallery


