
5 Home Bar Backsplash Ideas for a Bold Statement
When designing a home, most rooms require a delicate balance of neutrality and timelessness. However, the home bar is the “jewel box” of the house where the rules of caution do not apply. This is the one space where I encourage every client to take a significant aesthetic risk.
A backsplash in a main kitchen needs to be durable enough for spaghetti sauce and subtle enough to span a decade of trends. A home bar backsplash, conversely, has a different job description. Its primary function is to set a mood, reflect low light, and create a backdrop for beautiful glassware and bottles. It is less about utility and more about atmosphere.
In this guide, I will walk you through five specific materials and design strategies that elevate a wet bar from a functional corner to a design destination. Be sure to scroll to the very end of this post to see the full Picture Gallery for visual inspiration.
1. Antiqued or Smoked Mirror
Using a mirror as a backsplash is one of the oldest tricks in the designer’s handbook, but it is particularly effective in a bar setting. It instantly doubles the visual depth of the shelving and reflects the amber and jewel tones of your liquor bottles.
However, you must avoid standard, clear silver mirrors. A standard mirror in a small alcove can look too clinical, resembling a bathroom or a gym. Instead, opt for “antiqued” or “smoked” glass. The distressing on an antiqued mirror softens the reflection, making the space feel moody and vintage rather than sharp and bright.
From a technical standpoint, this material is fantastic for narrow spaces. If your bar is located in a pass-through hallway or a small closet conversion, the reflection prevents the cabinetry from feeling heavy.
Designer’s Note: The Outlet Problem
The biggest ruin of a beautiful mirrored backsplash is a white plastic electrical outlet staring back at you. If you are in the construction phase, move your outlets to the side walls or install plug molding strips tucked under the upper cabinets. If the outlets must be on the backsplash, have the glazier cut holes for them and use mirrored cover plates to camouflage them completely.
Common Mistakes + Fixes
- Mistake: Installing the mirror in small tiles with heavy grout lines.
- Fix: Order a single, custom-cut sheet of glass. The seamless look feels much more expensive and is significantly easier to clean when you splash mixer.
- Mistake: Ignoring lighting placement.
- Fix: Install puck lights or LED tape aimed downward. The mirror will bounce this light back into the room, effectively doubling your lumen output without adding more fixtures.
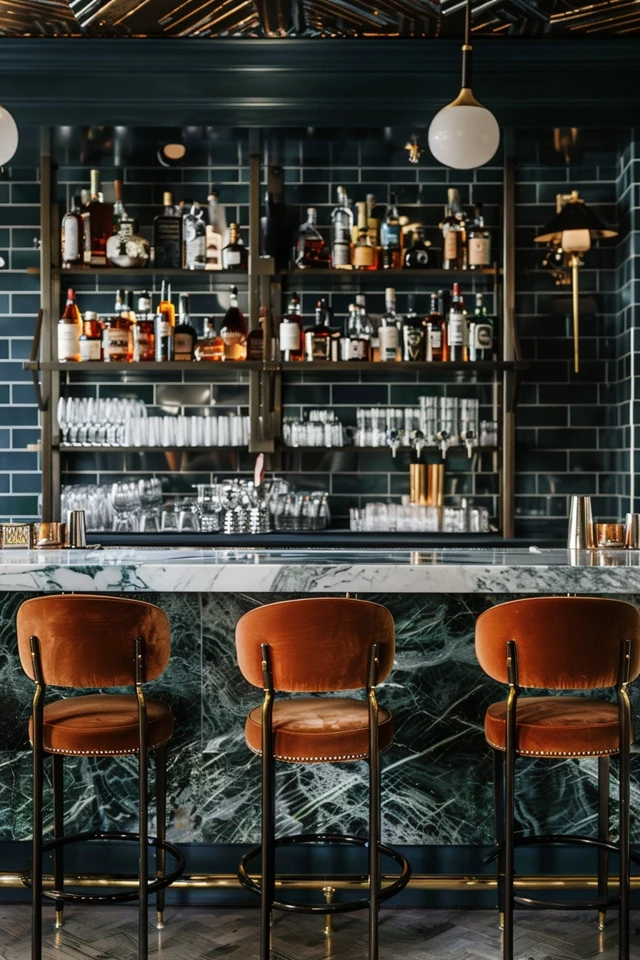
2. Dramatic Natural Stone Slabs
If your budget permits, running the countertop material up the wall as a full-height backsplash is the ultimate luxury move. For a bar, I steer clients away from quiet white Carrara marble and toward stones with high drama.
Look for materials like Viola marble (heavily veined with purple and burgundy), black soapstone, or exotic quartzites with green or gold veining. The goal is to view the stone as a piece of art. Because bar areas usually have less square footage than a kitchen, you can often afford a more expensive stone per square foot since you need less of it.
If you choose a natural marble, you must understand the chemistry of a bar. Alcohol, citrus (lemon/lime juice), and tomato juice are acidic. They will etch unsealed marble instantly. “Etching” is not a stain; it is a dull mark on the surface where the polish has been eaten away.
What I’d Do in a Real Project
If this were my house, I would choose a honed finish rather than a polished one. A honed (matte) finish hides etching much better than a high-gloss finish. I would also mandate a 22-inch clearance between the counter and the first shelf or cabinet. Standard kitchen clearance is 18 inches. However, many premium liquor bottles and decanters are tall. You need that extra vertical negative space to really show off the stone veining.
Maintenance Checklist for Stone
- Sealant: Re-seal natural stone every 6 to 12 months in a high-use bar area.
- Wiping: Wipe spills immediately. Do not let a lime wedge sit on the counter.
- Material Alternative: If you want the look without the maintenance, look for large-format porcelain slabs. They mimic stone perfectly but are impervious to acids.
3. Dark and moody Beadboard or Paneling
Not every bold statement requires expensive stone or custom glass. Sometimes, the boldest move is architectural texture drenched in a monochromatic color. Vertical paneling, such as beadboard, V-groove, or shiplap, provides excellent rhythm and texture.
The secret to making this look “high-end bar” and not “farmhouse laundry room” is the paint finish and color. I specify high-gloss or semi-gloss paint for bar paneling. The sheen catches the light from your sconces and makes the wood durable against splashes.
Regarding color, go dark. Navy, charcoal, forest green, or even aubergine work beautifully here. When you paint the cabinets and the backsplash the same dark color, the cabinetry recedes, and the bottles and brass hardware pop.
Installation Rule of Thumb
Ensure your carpenter uses moisture-resistant MDF or real wood if there is a sink involved. Standard MDF can swell if water seeps into the seams near the countertop. I always prescribe a 2-inch to 4-inch “scribe” or splash of the countertop material at the bottom before the wood starts. This protects the wood from standing water on the counter.
Rental Friendly Option
This is the most accessible option for renters. You can buy beadboard wallpaper or peel-and-stick wood panels. Since it is painted, you can achieve a very convincing built-in look without damaging the drywall, provided you use the correct adhesive for your lease terms.
4. Metallic Tile or Sheet Metal
A bar is an evening space. It relies on artificial light rather than daylight. Metallic surfaces interact with artificial light better than almost any other material. Copper, unlacquered brass, or stainless steel can bring a speakeasy warmth to the room.
You have two main routes here: metallic tiles (like penny rounds or subway tiles in a metallic finish) or full sheet metal. I recently designed a bar using a sheet of hammered copper. Over time, the copper develops a living patina, changing from bright penny-orange to browns and greens. It tells a story.
If you prefer tiles, look for a “stainless steel mosaic.” These are incredibly durable and hygienic. They are impervious to red wine stains and won’t chip if you bang a bottle against them.
Lighting Coordination
If you use a metallic backsplash, color temperature is critical. Use warm LEDs (2700K or 3000K). If you use cool daylight bulbs (4000K+) with a copper or brass backsplash, the metal will look cheap and sickly. Warm light makes the metal glow like embers.
Common Mistakes + Fixes
- Mistake: Using abrasive sponges.
- Fix: Metal finishes scratch easily. Only use microfiber cloths and mild soap.
- Mistake: Clashing metals.
- Fix: You can mix metals, but do it intentionally. If your faucet is polished nickel, a copper backsplash adds nice contrast. If your faucet is chrome, a brass backsplash might feel disjointed unless tied together with hardware.
5. Glazed Zellige or Handcrafted Tile
Uniform, machine-made subway tile belongs in a sterile kitchen. For a bar, you want texture and imperfection. Moroccan Zellige tiles are handmade clay tiles where no two pieces are exactly identical. They have an undulating surface that shimmers under dim lighting.
The “bold statement” here comes from the texture and the installation pattern. Instead of a standard brick lay, try a vertical stack or a basketweave pattern. This modernizes the look instantly.
Regarding color, emerald green or cobalt blue Zellige tiles are stunning in a bar setting. Because the glaze is glass-like, it is very easy to clean. However, the edges of these tiles are often chipped or irregular—that is the intended aesthetic.
Designer’s Note: Grout Selection
Do not use bright white grout with dark Zellige tile in a bar. Red wine or coffee liqueur splashes will stain white grout immediately. I always specify a dark gray or charcoal grout for bar areas. It hides stains and frames the tile beautifully.
The “Lippage” Factor
Because handcrafted tiles vary in thickness, you will have “lippage” (where one tile sticks out further than its neighbor). In a kitchen, this is annoying because appliances don’t sit flush. In a bar, it is less of an issue, but warn your installer. They need to use a thicker mortar bed to level it out as much as possible.
Final Checklist: Before You Install
Before you commit to a purchase, run through this mental checklist to ensure the backsplash will function as well as it looks.
1. Check Your Bottle Heights: Measure your tallest spirit bottle (usually around 12-14 inches) and your tallest decanter. Ensure your shelving or upper cabinets allow them to fit.
2. Lighting Plan: Have you routed channels for LED tape light? Lighting should be installed before the tile or stone goes in.
3. Outlet Placement: Have you moved outlets out of the sightline? If not, have you ordered color-coordinated cover plates?
4. The “Lean” Test: Will you be leaning on this bar? If so, avoid rough stone textures that will snag clothing.
5. Sample Test: Buy one sample of the tile or stone. Pour red wine and lemon juice on it. Leave it overnight. See what happens. If you can’t live with the result, switch materials.
FAQs
What is the standard height for a home bar backsplash?
While the standard is 18 inches, I prefer 20 to 24 inches for home bars. This creates a more spacious feel and accommodates tall liquor bottles on the countertop without them looking cramped under the cabinetry.
Can I use wallpaper as a backsplash?
Yes, but with a caveat. Wallpaper alone is not durable enough for a wet bar. You must install a piece of tempered glass over the wallpaper to protect it from splashes. This allows you to use wild, bold patterns while maintaining a wipeable surface.
How do I handle the transition where the backsplash ends?
This is a common pain point. Ideally, the backsplash should end exactly where the upper cabinets or shelves end. If you have an open wall, use a metal Schluter strip for a clean, modern edge, or use “bullnose” tile pieces that have a rounded, finished edge. Never leave a raw cut tile edge exposed.
Is it expensive to add a bar sink?
Adding the plumbing (water lines and drain) is the expensive part. If you are not near an existing water source (like a kitchen or bathroom), the cost to trench plumbing can be significant. However, a “dry bar” (no sink) can still be beautiful and functional; you just have to mix drinks elsewhere.
Conclusion
The home bar is your opportunity to break the rules. It is a space dedicated to leisure and entertainment, so the design should reflect that energy. Whether you choose the moody depth of smoked mirror, the organic luxury of stone, or the tactile warmth of metallic tile, the goal is to create a destination within your home.
Don’t be afraid of dark colors or high-gloss finishes. In a small space like a bar, these elements blur the corners and make the room feel expansive and intimate at the same time. Measure twice, light it well, and choose a material that makes you want to mix a drink and stay a while.
Picture Gallery


