
5 Home Bar Furniture Ideas to Elevate Your Decor
Creating a dedicated space for drinks and entertaining is one of the most requested features I get from clients. It signals a shift from purely functional living to a lifestyle that embraces hospitality and relaxation. Whether you are mixing a complex craft cocktail or just pouring a glass of wine after a long Tuesday, the environment matters just as much as the drink.
Many homeowners hesitate because they think they need a sprawling basement or a spare room to accommodate a home bar. In reality, some of the most charming setups I have designed were tucked into unused alcoves or anchored by a single piece of statement furniture. The key is blending functionality with your existing aesthetic so the bar feels like a deliberate design choice, not an afterthought.
For a dose of visual inspiration, scroll down to the Picture Gallery at the end of the blog post.
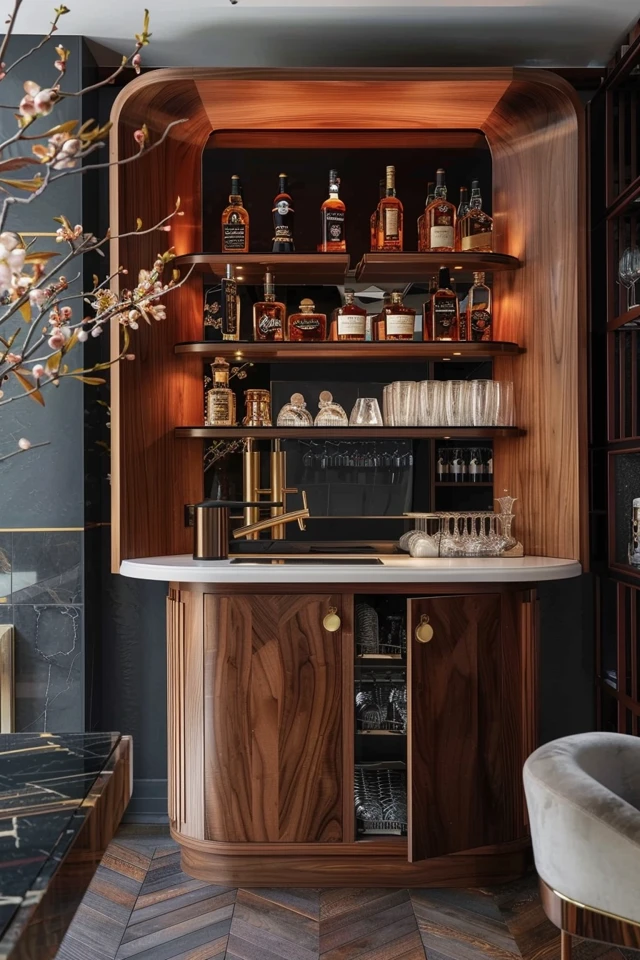
1. The Custom Built-In Wet Bar
If you are a homeowner looking to add permanent value to your property, a built-in wet bar is the gold standard. This goes beyond furniture; it is architectural. When I design these spaces, I treat them like “jewel box” moments in a home. Because the footprint is usually smaller than a kitchen, this is where you can splurge on moody wallpaper, unlacquered brass faucets, or that exotic quartzite slab you loved but couldn’t afford for a massive kitchen island.
The Layout and Flow
The most critical error I see in DIY built-ins is depth. Standard kitchen cabinets are 24 inches deep, but for a home bar, that often feels too bulky. I usually specify cabinets that are 18 to 21 inches deep. This saves valuable floor space while still providing ample room for glassware and bottles.
However, you must be careful with appliances. If you plan to install a beverage fridge or wine cooler, you generally need that full 24-inch depth unless you buy specialized shallow-depth appliances. A common workaround I use is pulling the base cabinetry out to 24 inches for the appliance section and stepping back the upper shelving to 12 inches to keep the visual weight light.
Designer’s Note: The Lighting Layer
Do not rely on overhead can lights alone. They cast shadows exactly where you are trying to pour. I always install under-cabinet LED tape lighting. Aim for a color temperature of 2700K (warm white) rather than 3000K or higher. A bar should feel moody and intimate, not like a sterile operating room. If you have glass-front upper cabinets, light the interiors to showcase your stemware.
Common Mistakes + Fixes
Mistake: Placing the wine fridge directly against a wall.
Fix: Most beverage coolers need the door to open past 90 degrees to pull out the shelves. Always include a 2-inch to 3-inch “filler strip” of wood between the appliance and the wall so the door can swing freely.
2. The Statement Armoire or Highboy
For those who want a substantial bar but want to hide the clutter when not in use, a repurposed armoire, secretary desk, or “highboy” cabinet is a brilliant solution. This is often my go-to strategy for dining rooms where we need storage for linens and serving platters in addition to liquor.
The “Hidden Bar” Appeal
This approach works beautifully in traditional or transitional homes. You can open the doors to reveal a mirrored back, sparkling glass shelves, and internal lighting during a party. When the party ends, you close the doors, and the visual noise disappears. This is particularly helpful for households with curious children or pets, as you can easily install locks on cabinet doors.
Modification for Function
To make a standard cabinet work as a bar, you likely need to do some retrofitting.
- Shelf Clearance: Standard shelves are often set too low for tall bottles. You need at least 14 inches of vertical clearance for bottles like Grey Goose or St-Germain. Measure your tallest bottle and add two inches before fixing shelf heights.
- Surface Protection: Wooden antique furniture ruins easily with citrus juice or alcohol spills. I always recommend cutting a piece of glass or mirror to fit exactly on the mixing surface. Alternatively, use a large, high-sided decorative tray to contain spills.
Real Project Checklist
When sourcing a vintage piece for a client, I look for:
- Sturdy Hinges: Can the doors swing open 180 degrees? If they only open 90 degrees, they might block traffic flow in a tight room.
- Weight Capacity: A dozen liquor bottles and forty glasses are heavy. I often reinforce the internal shelving with L-brackets hidden underneath.
- Back Panel Access: I usually drill a neat hole in the back panel to thread a cord for a small table lamp or LED strip inside the cabinet.
3. The Curated Rolling Bar Cart
The bar cart is the chameleon of furniture design. It is perfect for renters, small apartments, or anyone who likes to change their room layout frequently. However, because everything is exposed, a bar cart requires a higher level of curation. It is not just storage; it is a display.
Scale and Proportion
The biggest issue I see is “dinky” carts. If you have a large sectional sofa or high ceilings, a tiny, delicate brass cart will look like a toy.
- Height: Look for a cart that is at least 30 to 32 inches high. It should feel like a substantial piece of furniture.
- Materials: Match the materials to the “weight” of the room. A Lucite or acrylic cart is great for small spaces because it visually disappears, making the room feel larger. A wood and iron cart adds warmth and grounding to a stark, modern space.
Styling Rule of Thumb
To keep it from looking messy, follow the “heavy bottom, light top” rule.
- Bottom Shelf: Place your heavy liquor bottles, larger mixers, and any unsightly tools here. The visual weight anchors the cart.
- Top Shelf: Reserve this for your prettiest glassware, a nice decanter, and fresh garnishes. Leave at least 40% of the top surface empty. You need actual space to set down a glass and pour a drink.
Designer’s Note: Mobility
Check the wheels (casters). Many decorative carts have cheap plastic wheels that can scratch hardwood floors or get stuck on thick wool rugs. If you plan to actually roll it around, look for rubberized casters. If it will stay stationary, I recommend using caster cups to protect your flooring.
4. The Console Table Behind the Sofa
In open-concept floor plans where the living room floats in the middle of the space, placing a console table behind the sofa is a classic design move. Converting this console into a bar is an excellent use of space that bridges the gap between the living zone and the rest of the room.
Height and Depth Mechanics
This setup requires precise measurements to look right.
- Height Matching: The console table should be level with or slightly lower than the back of your sofa. It should never stick up higher than the sofa frame, or it will look awkward.
- Depth: You generally want a console that is 12 to 16 inches deep. If you plan to tuck stools underneath it for seating, you need a depth of at least 18 to 20 inches for knee clearance, and the table must be open underneath (no lower shelves).
Zoning the Space
This placement creates a “social edge” to the room. Guests can sit on stools behind the sofa and watch TV or chat with people on the couch without feeling left out.
Lighting the Console
Since you cannot rely on wall sconces here, table lamps are your best friend. I typically place two tall, slender lamps on either end of the console to frame the bar area. This adds a glow that separates the living area from the dining or kitchen area behind it. Just ensure you have a floor outlet or a way to run cords under the rug and sofa so you don’t create a tripping hazard.
5. Floating Shelves and Vertical Displays
If floor space is at an absolute premium, look up. A vertical bar using wall-mounted floating shelves is incredibly space-efficient and draws the eye upward, making ceilings feel taller. This works exceptionally well in dining room niches or awkward corners.
Installation Essentials
Liquor and glass are heavy. Do not use drywall anchors for this. You must locate the studs.
- Bracket Choice: Use heavy-duty internal brackets (blind shelf supports) if you want the floating look. If you are going for a bistro vibe, visible iron brackets are decorative and very strong.
- Spacing: Standard spacing between shelves is usually 12 inches, but for a bar, I recommend 15 to 18 inches. This accommodates tall bottles and allows you to stack glassware without it looking cramped.
The “Work Surface” Problem
The downside of shelves is the lack of a pouring surface. I usually pair floating shelves with a small, narrow cabinet or a tray stand underneath. If that isn’t possible, designate a specific “pouring tray” that you can pull off the shelf and place on the dining table when it is time to serve.
Safety Feature
If you live in an earthquake-prone area or have high foot traffic, look for shelves with a small “gallery rail” or lip on the front edge. This prevents expensive bottles from vibrating off the edge over time.
Final Checklist: What I’d Do in a Real Project
Before you finalize your purchase or renovation plan, run through this checklist. These are the steps I take to ensure a client’s bar is actually usable.
- The Electrical Audit: Is there an outlet nearby for a blender, wine fridge, or lamp? If not, how will we hide the extension cord?
- The Floor Protection: If the bar is on a rug, is it a material that cleans easily (like wool or a performance blend)? Red wine stains on viscose or silk are permanent.
- The Height Check: If buying stools, did you check the counter height? Standard counters are 36 inches high (needing 24-inch “counter height” stools). Bar tops are 42 inches high (needing 30-inch “bar height” stools). Mixing these up is the most common furniture mistake I see.
- The Tool Audit: Do you have a jigger, a shaker, a strainer, and a bottle opener? Designate a specific drawer, bowl, or box for these so they don’t wander into the main kitchen drawers.
Frequently Asked Questions
What is the best countertop material for a home bar?
For durability, Quartzite (natural stone) or Quartz (engineered) are top choices because they resist staining. Marble is classic and beautiful, especially Carrara or Calacatta, but be warned: it etches immediately upon contact with lemon, lime, or wine. If you choose marble, you must embrace the “patina” of use, or choose a honed finish which hides etching better than polished surfaces.
How much space do I need for a home bar?
For a bar cart, you only need about 3 feet by 2 feet of floor space. For a built-in, a 4-foot to 5-foot wide section of wall is usually sufficient to include a small sink and under-counter fridge.
How do I style a bar if I don’t drink alcohol?
The “coffee bar” or “mocktail station” is a huge trend. The furniture principles remain the same. Instead of wine glasses, display beautiful ceramic mugs. Instead of liquor, stock high-end syrups, sparkling waters, and fresh citrus. A high-quality espresso machine creates just as much of a focal point as a tray of bourbon.
Can I put a bar in the living room?
Absolutely. In fact, I prefer it over the kitchen. It keeps guests out of the “work zone” of the kitchen while you are cooking. A bar in the living room encourages guests to settle in and relax on the sofas rather than hovering around the kitchen island.
Conclusion
Integrating a home bar into your decor is about more than just storage for bottles; it is about creating a welcoming atmosphere. Whether you opt for a custom built-in that adds architectural interest or a simple, stylish cart that offers flexibility, the right choice depends on your space constraints and how you like to entertain.
Start by measuring your available space and being realistic about your budget. Remember that the best design is one that is used. A perfectly styled cabinet that is annoying to open will gather dust, while a well-placed console table that invites guests to pour a drink can change the whole dynamic of your gatherings.
Picture Gallery


