
5 Home Bar Inspiration Ideas for a Unique Space
Introduction
Designing a home bar is one of the most rewarding projects in interior design because it is purely dedicated to leisure and hospitality. Unlike a kitchen, which is a workhorse, or a bathroom, which is utilitarian, a home bar is about atmosphere and experience. I often tell my clients that this space should feel like a departure from the rest of the home, a place where the mood shifts the moment you pour a drink.
One of my favorite projects involved turning a dark, unused space under a staircase into a jewel-box wine bar. We used high-gloss paint, unlacquered brass, and moody lighting to create a destination within the home. It proved that you do not need a massive basement to create a professional-grade entertaining zone. Whether you are working with a sprawling bonus room or a tiny alcove, the principles of scale, material durability, and lighting remain the same.
In this guide, I will walk you through five distinct concepts for home bars, complete with the technical details you need to execute them. For visual examples of these layouts, please note that there is a curated Picture Gallery at the end of the blog post. Let’s dive into the design logic that makes these spaces function as beautifully as they look.
1. The “Hidden Gem” Closet Conversion
One of the most efficient ways to integrate a bar into a smaller home or apartment is by repurposing a reach-in closet. This “pocket bar” concept allows you to hide the clutter when not in use, but reveal a stunning focal point when entertaining. It is an excellent solution for renters who cannot tear down walls or homeowners who want to maximize existing square footage.
The key here is utilizing the vertical space. Since floor space is limited, you need to build up. I recommend installing a countertop at standard height (36 inches) with upper cabinetry or open shelving that goes all the way to the ceiling. This draws the eye up and makes the small enclosure feel grand rather than cramped.
Designer’s Note: The Door Dilemma
The biggest point of failure in closet conversions is the door swing. Standard hinged doors block traffic when open, killing the flow of a party.
The Fix: If structural changes allow, install pocket doors that slide into the wall. If you are retrofitting without demolition, use bifold doors that tuck away neatly, or high-quality artisanal hardware that allows the doors to slide completely out of the way.
Lighting the Niche
Lighting is critical in a windowless closet. Relying on a ceiling can light behind you will cast shadows on your workspace.
- LED Strip Lighting: Route a channel under the shelves to hide LED strips. This provides task lighting for mixing drinks and highlights your glassware.
- Motion Sensors: Install a door-activated switch so the lights turn on automatically when the bar is opened. It adds a “wow” factor every time.
- Color Temperature: Stick to 2700K to 3000K warm white. Anything cooler will make your liquor bottles look clinical rather than inviting.
Common Mistakes + Fixes
Mistake: Forgetting electrical outlets before installing the backsplash.
Fix: You will likely want a small wine fridge or a blender eventually. Ensure you have at least two outlets at counter height and one dedicated outlet inside the lower cabinetry for appliances.
2. The Moody Butler’s Pantry
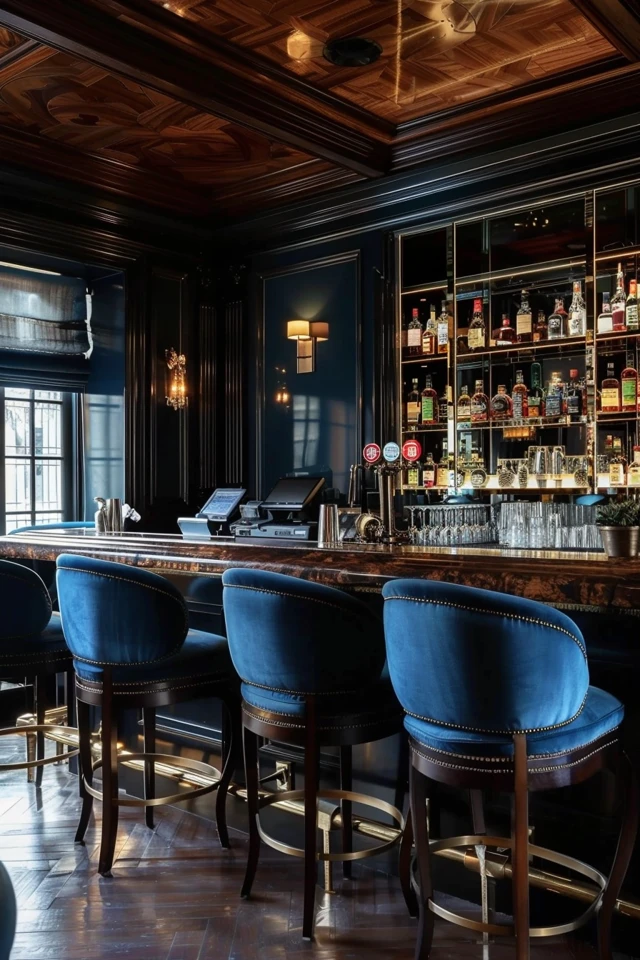
The butler’s pantry serves as a transitional space between the kitchen and the dining room. Because it is a pass-through area, it is the perfect place to take massive design risks that might feel overwhelming in a main living room. I always encourage clients to go dark, dramatic, and moody here.
For this look, monochromatic color schemes work best. Paint the cabinets, walls, and even the ceiling in the same deep hue—think navy, forest green, or charcoal. This technique, known as color drenching, blurs the boundaries of the room and makes the glassware and hardware pop.
Material Selection: The Countertop
This is a wet zone, meaning it will see ice, water, and citrus. Citrus acid is the enemy of polished marble.
- The Risk: If you use polished Carrara or Calacatta marble, a squeeze of lime will etch the surface instantly, leaving a dull mark.
- The Professional Choice: Opt for Soapstone or honed Granite. Both are incredibly durable and fit the moody aesthetic. If you must have the marble look, choose a high-quality Quartz or compact sintered stone (like Dekton) that is impervious to acid.
- Finish: A honed or leathered finish hides fingerprints and water spots better than a high-gloss polish in a bar setting.
What I’d Do in a Real Project
If I were designing this space today, here is the exact mini-checklist I would follow:
- Sink Selection: Install a small hammered copper or brass prep sink. It hides wear and adds warmth against dark cabinets.
- Cabinet Inserts: Use wire mesh grilles on upper cabinet doors instead of glass. It allows air circulation for wine storage and adds an antique texture.
- Hardware: Oversized pulls. I would use 6-inch or 8-inch pulls on drawers to match the scale of the drama.
3. The Basement Lounge & Wet Bar
When you have the luxury of a basement or bonus room, you can design a full wet bar with seating. This is where spacing guidelines become critical. A common amateur mistake is cramping the seating area or the bartender’s aisle.
The goal is to create a “destination” that feels like a real pub or lounge. This usually involves an island or a peninsula layout. Durability is paramount here because this area often sees higher traffic and heavier use during parties or game nights.
Critical Measurements for Layout
To make the bar comfortable, you must adhere to specific industry standards for spacing.
- The Bartender’s Aisle: You need a minimum of 36 inches between the back bar (wall cabinets) and the front bar (island). Ideally, aim for 42 inches if you have a dishwasher or beverage fridge opening into that aisle.
- Bar Overhang: For guests to sit comfortably, the countertop overhang must be at least 12 to 15 inches. Anything less and knees will knock against the front panel.
- Bar Height vs. Counter Height: A standard bar top is 42 inches high, requiring 30-inch barstools. A standard kitchen counter is 36 inches high, requiring 24-inch counter stools. Do not mix these up, or the ergonomics will be off.
Designer’s Note: The Foot Rail
People often forget where their feet go when sitting at a high bar. Without a footrest, guests will hook their heels on the rungs of your stools, which ruins the furniture.
The Fix: Install a brass or steel foot rail along the bottom of the bar front. It should be placed roughly 6 to 8 inches off the floor. Not only does this protect the cabinetry from scuff marks, but it also provides immediate physical comfort for guests.
4. The Library Dry Bar
Not every home requires plumbing for a successful bar. The “Library Bar” creates a sophisticated, multi-functional space within a living room or study. This concept mixes books, art, and spirits, treating liquor bottles as display objects alongside decor.
This setup works best with a built-in console or a credenza flanked by bookshelves. Since there is no sink, you do not need to worry about plumbing costs, which makes this a more budget-friendly renovation. The focus here is entirely on millwork and styling.
Styling the Shelves
Styling a library bar requires balance so it does not look like a liquor store.
- The Rule of Thirds: Dedicate one-third of the shelf space to books, one-third to accessories (sculpture, art), and one-third to barware and bottles.
- Depth Requirements: Ensure your shelves are at least 12 inches deep. Most wine bottles are close to 12 inches tall, but some premium spirits have wider bases.
- Mirror Backing: I often install an antique mirror on the back panel of the shelving behind the bottles. It reflects light, makes the room feel larger, and doubles the visual impact of your crystal glassware.
Common Mistakes + Fixes
Mistake: Using wood surfaces for mixing drinks.
Fix: Alcohol ruins wood finishes. Even in a dry bar, the mixing surface needs protection. Use a beautiful stone tray or a leather mat designated for pouring. Alternatively, have a piece of glass custom-cut to sit on top of the wooden credenza to protect the surface entirely.
5. The Indoor-Outdoor Pass-Through
Connecting the interior to the landscape is a massive trend in modern home design. An indoor-outdoor bar utilizes a pass-through window, allowing you to serve drinks to guests on the patio while standing in your kitchen or indoor bar area. This effectively doubles your entertaining space without adding square footage.
This requires specific windows—usually accordion, bi-fold, or gas-strut awning windows that open fully. The counter runs continuously from inside to outside, blurring the line between the two spaces.
Weatherproofing and Materials
The materials you choose must withstand the elements.
- Stone Selection: Do not use Quartz (engineered stone) for the outdoor portion. The resin in Quartz turns yellow and degrades under direct UV sunlight. Natural granite, soapstone, or concrete are superior choices for outdoor exposure.
- Overhangs: An exterior overhang or awning is necessary to protect the window track from driving rain. It also provides shade for the guests sitting on the outdoor stools.
- Sealing: Ensure the window installer pays close attention to the sill sealing. This is a common leak point. The countertop usually needs a slight interruption or a specialized track system to prevent water from wicking inside.
What I’d Do in a Real Project
- Heat Control: I would install a flush-mount heater in the patio ceiling directly above the bar seating. This extends the usability of the space into the fall.
- Screening: If you live in a buggy area, consider a retractable phantom screen that can pull down when the window is open, so you can serve drinks without letting in mosquitoes.
- Flooring: Ensure the indoor flooring near the window is slip-resistant tile or wood with a high-durability finish, as wet feet and splashes are inevitable.
Final Checklist
Before you commit to a contractor or start buying materials, run through this final checklist to ensure you haven’t missed a critical detail.
- Clearance Check: Do you have at least 36″ of walking space behind the bar?
- Electrical Plan: Have you accounted for the fridge, ice maker, blender, and decorative lighting?
- Plumbing: If adding a sink, is there a drain line nearby, or will you need a pump?
- Height Check: Have you matched your stool height (24″ or 30″) to your counter height?
- Surface Durability: Is your countertop material acid-resistant (for citrus) and UV stable (for outdoors)?
- Lighting Layers: Do you have both ambient light (mood) and task light (prep)?
- Storage Height: Did you measure your tallest liquor bottle to ensure it fits on the shelf?
FAQs
Does a home bar add value to a house?
Generally, yes, but it depends on the execution. A permanent, high-quality wet bar in a basement or bonus room is a desirable feature for homebuyers. However, converting a bedroom closet into a permanent bar might lower value if it removes necessary storage. Ensure the renovation fits the scale of the home.
What is the best flooring for a home bar?
Durability is key. Luxury Vinyl Plank (LVP), porcelain tile, or sealed slate are excellent choices because they are waterproof and stain-resistant. If you use hardwood, ensure it has a high-traffic polyurethane finish. Avoid carpet in the immediate bar area due to inevitable spills.
Do I need a wine fridge and a beverage center?
They serve different purposes. A wine fridge maintains a temperature around 55°F with controlled humidity for corks. A beverage center gets much colder (around 38°F) for beer and soda. If you only have space for one, decide what you drink most. There are dual-zone units available, but they are pricier and hold less overall.
How deep should open shelves be for liquor bottles?
Standard depth is 12 inches. This accommodates almost all standard wine and spirit bottles. If you plan to store oversized magnum bottles or deep decanters, consider increasing the depth to 14 or 15 inches.
Conclusion
Creating a unique home bar is about more than just stocking alcohol; it is about carving out a space that facilitates connection. Whether you choose a hidden closet conversion, a dramatic butler’s pantry, or an indoor-outdoor pass-through, the success of the project lies in the details.
Remember that function must come first. The most beautiful marble counter is useless if it is etched by lime juice in a week, and a stunning bar stool is regrettable if it doesn’t fit under the counter. By following the measurements and material guidelines outlined above, you can avoid the common pitfalls and build a space that stands the test of time.
Take these ideas as a starting point. Look at the architecture of your own home and see where you can steal a few square feet for leisure. Cheers to designing a space that makes staying in feel like a night out.
Picture Gallery


