
Title: 5 Home Bar Kitchen Counter Ideas
Introduction
The kitchen is inevitably the center of gravity in any home, but that gravitational pull can get crowded when you are trying to chop vegetables while guests are trying to pour wine. Integrating a home bar directly into your kitchen counter design is the most effective way to manage traffic flow during a gathering. It creates a dedicated zone that separates the “host at work” from the “guest at leisure.”
I remember a project in a tight urban brownstone where the clients loved to entertain but had a galley layout that felt like a bottleneck. By carving out a dedicated beverage station at the end of a peninsula run, we redirected guests away from the stove and created a social anchor point that relieved the pressure on the cook. To help you visualize these layouts, I have curated a Picture Gallery that is located at the very end of this blog post.
Whether you are working with a sprawling open-concept island or a modest nook, the key is balancing functionality with aesthetic transition. A great kitchen bar isn’t just about storing bottles; it is about creating a moment of hospitality within your daily workspace.
1. The “Wet” Island Extension
One of the most seamless ways to incorporate a bar is to dedicate one end of your primary kitchen island specifically to beverage service. This “wet” bar setup usually involves a secondary prep sink and under-counter refrigeration. This allows guests to access ice and water without crossing into your cooking triangle.
Layout and Zoning
In a professional layout, I typically designate the 24 to 36 inches at the far end of an island for this purpose. If your island is at least 8 feet long, you have enough room to create this zone without cramping your meal prep area. The visual cue here is crucial; use a change in cabinet hardware or a subtle shift in countertop material to signal that this area is for drinks.
Plumbing and Dimensions
For the sink, I recommend a square prep sink that is at least 15 inches wide and deep enough to fill a pitcher. Avoid the tiny “vegetable” sinks that are too shallow for practical bar use. Ensure your faucet is a high-arc gooseneck style, which makes washing wine glasses significantly easier and minimizes breakage.
Designer’s Note: Real-World Lesson
A common failure point here is the lack of a “landing zone.” I once saw a DIY renovation where the sink took up the entire end of the island. There was nowhere to set a glass down while pouring.
The Fix: Always leave at least 12 to 15 inches of clear counter space on one side of the bar sink. This creates a safe spot for setting down bottles and glasses.
Common Mistakes + Fixes
- Mistake: Placing the wine fridge directly next to the dishwasher.
- Fix: Heat generated by the dishwasher can force the wine fridge to overwork and burn out. Separate them with a cabinet box or at least a 3-inch filler strip.
- Mistake: Using standard counter stools for a bar-height overhang.
- Fix: Measure twice. Standard counters are 36 inches high (requiring 24-inch stools). Elevated bar tops are 42 inches high (requiring 30-inch stools).
2. The Hidden “Appliance Garage” Station
For clients who prefer a minimalist aesthetic or have a smaller footprint, the hidden appliance garage is a brilliant solution. This concept utilizes a section of countertop that sits behind retractable doors. When the doors are open, it is a fully functioning bar; when closed, the clutter of bottles, shakers, and espresso machines disappears completely.
Cabinetry Mechanics
The success of this design relies entirely on the door hardware. Standard swing-out doors are a nuisance because they block the walkway when open. I strictly specify pocket doors (which slide back into the cabinet walls) or bi-fold doors that lay flat against adjacent cabinetry. This keeps the traffic path clear.
Electrical and Depth Requirements
This is not a standard upper cabinet. To accommodate a coffee machine or a blender for cocktails, the cabinet needs to be brought down to the countertop. Standard upper cabinets are 12 inches deep, but a functional bar station needs to be 18 to 24 inches deep. You also need to plan for electrical outlets inside the cabinet cabinet back.
Surface Materials
Since this area is often enclosed, humidity can build up if you are using a coffee maker or leaving damp bar tools out. I always recommend lining the interior of the “garage” with the same stone or quartz used on the countertop, running it up the back wall. This prevents steam damage to wood veneers and makes cleanup a breeze.
What I’d Do in a Real Project
- Interior Lighting: Install a motion-sensor LED strip inside the cabinet. It turns on automatically when the doors open, adding instant drama and utility.
- Vertical Storage: Use the upper portion of the cabinet for glass storage using adjustable shelving.
- Power: I would install a quad outlet with USB ports to ensure you never have to unplug the espresso machine to plug in the blender.
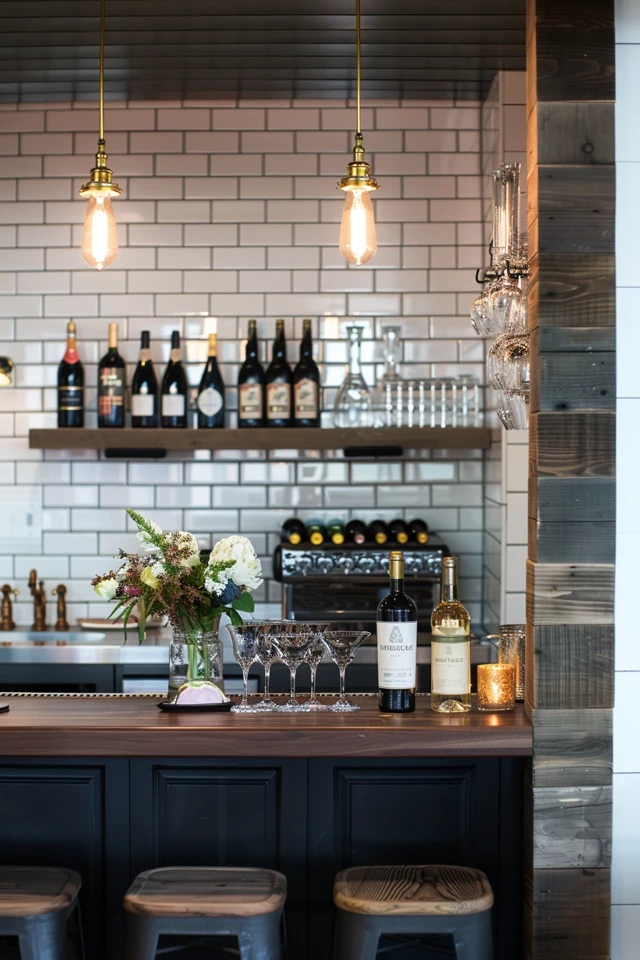
3. The High-Contrast Alcove
If your kitchen layout includes a recessed niche or a short wall that feels disconnected from the main work triangle, this is the perfect spot for a high-contrast dry bar. The goal here is to treat this small section like a jewel box. It should feel related to the kitchen but distinct enough to stand on its own as a design feature.
Material Selection
This is where you can break the rules of your main kitchen design. If your kitchen has white cabinets and quartz counters, paint this alcove a moody charcoal or navy and use a darker natural stone like soapstone or honed granite. This visual separation defines the space without requiring physical walls.
Mirror and Lighting
Because alcoves are often recessed, they can feel dark. My go-to trick is using an antiqued mirror as the backsplash. This reflects light back into the room and makes the glassware sparkle, creating a speakeasy vibe. Pair this with under-cabinet lighting and perhaps a single, small-scale pendant light if the ceiling height allows.
Designer’s Note: The “Scale” Rule
In a small alcove (usually 36 to 48 inches wide), standard kitchen hardware can look clunky.
The Rule: Downsize your hardware scale. If you use 6-inch pulls in the main kitchen, switch to knobs or smaller 3-inch pulls for the bar drawers. This subtle shift helps the furniture piece feel more refined and less like a utilitarian storage box.
Common Mistakes + Fixes
- Mistake: Forgetting the “bottle height” constraint.
- Fix: Standard shelf spacing is often too short for top-shelf liquor bottles or tall decanters. Measure your tallest bottle (usually Grey Goose or similar tall vodkas) and set your first shelf height to at least 15 inches clearance.
- Mistake: Using porous stone like marble without realizing the risk.
- Fix: Alcohol and citrus (lemons/limes) are acidic and will “etch” marble instantly. If you must use marble, use a composite quartz lookalike or accept the patina.
4. The Butler’s Pantry Passthrough
The hallway connecting the kitchen to the dining room—often called a butler’s pantry—is historically the most functional place for a bar. It serves as a staging ground. By turning this transitional space into a bar counter, you encourage guests to grab a drink on their way to the dining table, effectively pulling them out of the hot kitchen zone.
Width and Flow
The critical constraint here is the walkway width. Since this is a high-traffic corridor, you must maintain a clear path. I require a minimum of 42 inches of walking space between the counter edge and the opposite wall. If you have less than that, avoid handles that protrude; use recessed finger pulls to prevent snagging clothing.
Glass Cabinetry
Since this area is often narrow, solid cabinetry can make it feel like a tunnel. I almost always use glass-front upper cabinets here. It displays your stemware, which is functional decor, and adds depth to the narrow room. Reeded or fluted glass is a great option if you want to obscure the contents slightly while still keeping the airy feel.
The “Wet” Factor
If budget allows, add a small bar sink here. However, unlike the kitchen island, a sink here is less for washing and more for dumping ice buckets or rinsing a glass. A 12-inch round sink is sufficient. If plumbing is too expensive to route to this area, a “dry” bar works perfectly fine as long as you have a durable countertop for pouring.
What I’d Do in a Real Project
- Drawer Inserts: I would specify custom felt-lined drawers for wine keys, stoppers, and cocktail napkins.
- Lighting Control: This area needs its own dimmer switch. During a dinner party, the pantry should glow dimly, not blaze with task lighting.
- Counter Space: Keep the counter clear of appliances. This surface often doubles as a dessert serving station during large holidays.
5. The Two-Tiered Peninsula
For a long time, interior design trends moved toward single-level flat islands. However, the two-tiered peninsula (a lower prep counter and a higher bar counter) is making a comeback for specific use cases. It is excellent for hiding the mess of drink preparation from the guests seated on the other side.
Height Dynamics
The standard configuration is a 36-inch high kitchen-side counter and a 42-inch high guest-side bar. This 6-inch rise creates a backsplash that hides used lemons, empty bottles, and spills. It creates a physical barrier that says, “This side is for working, that side is for relaxing.”
Overhang and Knees
Comfort is non-negotiable. For a 42-inch high bar top, you need an overhang of at least 10 to 12 inches for knee clearance. Anything less, and your guests will be leaning forward awkwardly or knocking their knees against the paneling.
Material Transitions
You can keep the material consistent for a monolithic look, or you can use the tiered height to introduce a new material. A popular choice is a durable quartz for the lower prep surface and a warm wood slab for the upper bar top. The wood is softer to the touch and feels more like furniture, encouraging guests to lean and linger.
Designer’s Note: Structural Support
Do not underestimate the weight of a stone overhang.
The Rule: If your stone overhang exceeds 10 inches, you need support brackets. You can use invisible steel plates routed into the plywood sub-top for a floating look, or decorative corbels if you prefer a traditional aesthetic. Never rely on the stone’s tensile strength alone.
Common Mistakes + Fixes
- Mistake: Placing outlets on the guest side of the riser.
- Fix: Hide electrical outlets on the kitchen side of the riser or use pop-up outlets on the surface. Visible outlets on the “pretty” side ruin the aesthetic.
- Mistake: Neglecting footrests.
- Fix: High bar stools can be uncomfortable if feet dangle. Ensure your stools have sturdy foot rails, or install a brass foot rail along the bottom of the peninsula wall.
Final Checklist
If I were reviewing your floor plan today, this is the checklist I would run through to ensure your home bar counter is actually buildable and usable.
1. Traffic Flow
- Is the bar located away from the oven and refrigerator triangle?
- Is there at least 42 inches of clearance behind the stools for people to walk past?
2. Electrical & Plumbing
- Have you planned for the ice maker line? (It needs a drain or a pump if not gravity-fed).
- Are there outlets for blenders/mixers above the counter?
- Is the wine fridge vented properly? (Front-venting units are required for built-ins).
3. Lighting Layers
- Task lighting: Under-cabinet LEDs to see what you are pouring.
- Ambient lighting: Pendants or sconces on a dimmer for atmosphere.
- Accent lighting: Inside glass cabinets to showcase glassware.
4. Surface Durability
- Have you selected a material resistant to acid (citrus) and staining (red wine)?
- If using wood, is it sealed with a marine-grade varnish or high-quality oil?
FAQs
What is the best countertop material for a home bar?
Quartzite or engineered Quartz are the top choices. Natural marble creates a beautiful, classic look, but it is highly susceptible to etching from lemon juice, lime juice, and wine. If you want the look of marble without the maintenance anxiety, go with a high-quality engineered Quartz. If you prefer natural stone, Soapstone is incredibly dense and non-porous, making it chemically resistant to acids.
What is the difference between Bar Height and Counter Height?
This is the most common purchasing mistake. “Counter Height” refers to a surface that is 36 inches off the floor (the same as a standard kitchen counter); this requires a stool with a seat height of 24 to 26 inches. “Bar Height” is 42 inches off the floor; this requires a stool with a seat height of 30 inches. Always measure your surface before buying stools.
Do I need a sink in my home bar?
It depends on proximity to the main kitchen sink. If your bar is within 4 to 5 steps of the main sink, you can skip it to save money on plumbing. However, if the bar is in a separate room, a basement, or just far away, a small bar sink is essential. Without it, you will be constantly carrying sticky glasses and buckets of melted ice across the house.
How wide does a home bar counter need to be for one person?
Allow 24 inches of width per person for comfortable seating. If you have a 6-foot counter, you can comfortably seat three people. If the stools have arms or are particularly wide, you may need to increase this to 28 or 30 inches per person.
Conclusion
Designing a home bar counter is about more than just finding a place to store wine bottles. It is about psychology and flow. It is about creating a space that invites guests to relax while simultaneously keeping them out of the cook’s way.
Whether you choose a hidden appliance garage for a sleek look or a dedicated wet bar island for maximum utility, the details matter. Pay attention to your clearances, lighting, and material durability. When these elements come together, the bar becomes the natural heart of the party, allowing you to host with grace and ease.
Picture Gallery


