
5 Home Bar Makeover Ideas for a Fresh Look
I once worked with a client who treated their home bar as a complete afterthought. It was essentially a dark corner of the living room with a lonely wine rack and a dusty countertop that collected mail rather than cocktails. By the time we finished the renovation, that little nook became the most popular gathering spot in the entire house, proving that square footage matters much less than atmosphere and intent.
Designing a home bar is distinct from designing a kitchen. In a kitchen, utility reigns supreme, but a home bar is about mood, hospitality, and a touch of theater. You have the freedom to take risks with darker colors, richer textures, and dramatic lighting that you might hesitate to use in a high-traffic family room.
Whether you have a dedicated wet bar, a converted closet, or just a focused corner in your dining room, a fresh look is easier to achieve than you might think. For plenty of visual inspiration, make sure to check out the curated Picture Gallery located at the very end of this blog post.
1. Go Dark and Moody with Color Drenching
One of the most effective ways to separate your bar area from the rest of the room is through color. Home bars benefit immensely from “color drenching,” a technique where you paint the cabinets, walls, and sometimes even the ceiling in the same rich hue.
This creates a designated zone without needing physical barriers. If your bar is part of an open-plan living area, this technique signals that the space has a different function. Deep navy, charcoal, forest green, or even eggplant can make the glassware sparkle and the brass hardware pop.
When painting cabinetry, surface preparation is the difference between a pro finish and a peeling mess. You must sand the existing finish to create a “tooth” for the primer. Use a high-quality bonding primer before applying your topcoat.
For the finish, I generally recommend a satin or semi-gloss enamel for bar cabinetry. Matte looks beautiful but shows greasy fingerprints from chip bowls and olive jars instantly. A slight sheen is much easier to wipe down after a party.
Designer’s Note: The Lighting Balance
When you go dark with paint, you must compensate with lighting. Dark walls absorb light, so a single overhead bulb will leave the space feeling like a cave. You need to increase your lumen output or add reflective surfaces like mirrors or metallic hardware to bounce light around.
Common Mistakes + Fixes
- Mistake: Stopping the paint at the corner.
- Fix: Paint the trim and baseboards the same color as the walls. This modernizes the look and makes small bar nooks feel larger because the visual breaks are removed.
What I’d Do in a Real Project
- Sand existing cabinets with 220-grit sandpaper.
- Apply one coat of oil-based bonding primer for durability.
- Paint cabinets, walls, and trim in “Hale Navy” or “Green Smoke.”
- Swap out standard knobs for unlacquered brass hardware to contrast the dark paint.
2. Install Statement Shelving with Proper Spacing
Open shelving is a staple in modern home bar design, but it often becomes a cluttered catch-all. The goal is to create a display that is functional yet styled. Replacing heavy upper cabinets with floating shelves immediately makes a bar feel airier and more inviting.
The material of the shelf sets the tone. Reclaimed wood adds warmth to a stark white space, while glass shelves with brass brackets feel vintage and glamorous. If you are renting, you can achieve a similar effect by removing cabinet doors and painting the interiors, though floating shelves generally look cleaner.
The critical factor here is spacing. A common failure in DIY projects is mounting shelves without measuring the actual height of the bottles. Standard wine bottles are about 12 inches tall, but spirits like vodka or whiskey can reach 14 inches or more.
I always recommend leaving at least 15 to 18 inches of clearance between shelves. This allows you to grab a bottle from the back without knocking over the glasses in the front. It also gives the arrangement “negative space,” which prevents the area from looking cluttered.
Designer’s Note: The Weight Issue
Bottles are heavy. A single liter of liquid weighs over 2 pounds, and glass bottles add weight. Do not use standard drywall anchors for bar shelving. You must anchor brackets into studs or use heavy-duty toggle bolts rated for at least 50 lbs per point of contact.
Common Mistakes + Fixes
- Mistake: Overcrowding the shelves with every glass you own.
- Fix: Apply the rule of three. Group items in odd numbers. Store the bulk of your pint glasses in closed storage and display only your best crystal or unique tumblers.
What I’d Do in a Real Project
- Remove bulky upper cabinets.
- Install two rows of walnut floating shelves.
- Set the bottom shelf 18 inches above the counter.
- Set the top shelf 16 inches above the first shelf.
- Style with a mix of glassware, two potted trailing plants (like Pothos), and premium liquor bottles.
3. Upgrade the Backsplash with Mirror or Texture
The backsplash is the focal point of a home bar. Because the square footage is usually small—often less than 10 to 15 square feet—you can afford to splurge on high-end materials that would be cost-prohibitive in a full kitchen renovation.
Antiqued mirror is my secret weapon for small home bars. It reflects light, which is crucial if you have followed the advice to use darker paint colors. It also adds depth, making a shallow nook look twice as deep. The “antique” finish hides splashes and streaks much better than a standard clear mirror.
If mirrors aren’t your style, consider a heavily textured tile. Zellige tiles, which are handmade glazed terracotta, reflect light beautifully due to their uneven surface. A dark, glossy subway tile laid in a herringbone pattern can also elevate the space significantly.
For a budget-friendly or renter-friendly option, peel-and-stick wallpaper has come a long way. Look for vinyl options that are water-resistant. A bold botanical print or a geometric art deco pattern can act as the backsplash, provided you aren’t splashing massive amounts of water around.
Designer’s Note: The Grout Factor
If you choose tile, pay attention to the grout color. In a bar, you are dealing with red wine, coffee, and dark sodas. White grout on a bar top or backsplash is a risk. I almost always specify a light gray or warm beige grout, or I seal the white grout with a commercial-grade sealer immediately.
Common Mistakes + Fixes
- Mistake: Ending the backsplash at an awkward height.
- Fix: Take the tile or mirror all the way to the ceiling or the bottom of the lowest shelf. Stopping halfway up the wall cuts the visual line and makes the ceiling feel lower.
What I’d Do in a Real Project
- Measure the area between the counter and the ceiling.
- Order custom-cut antiqued mirror panels.
- Install using mirror mastic (adhesive).
- Ideally, install the mirror before the floating shelves, so the shelves can be mounted through the mirror for a seamless look (this requires a professional glazier).
4. Layered Lighting for Ambiance
Lighting makes or breaks the “vibe” of a bar. You never want to mix a cocktail under the harsh glare of a cool-white 5000K bulb. The goal is a warm, lounge-like atmosphere, which usually means a color temperature of 2700K.
You need three layers of light: task, ambient, and accent. Task lighting is crucial for seeing what you are pouring. Under-cabinet LED tape lights are perfect for this. They are invisible when off but illuminate the countertop workspace perfectly when on.
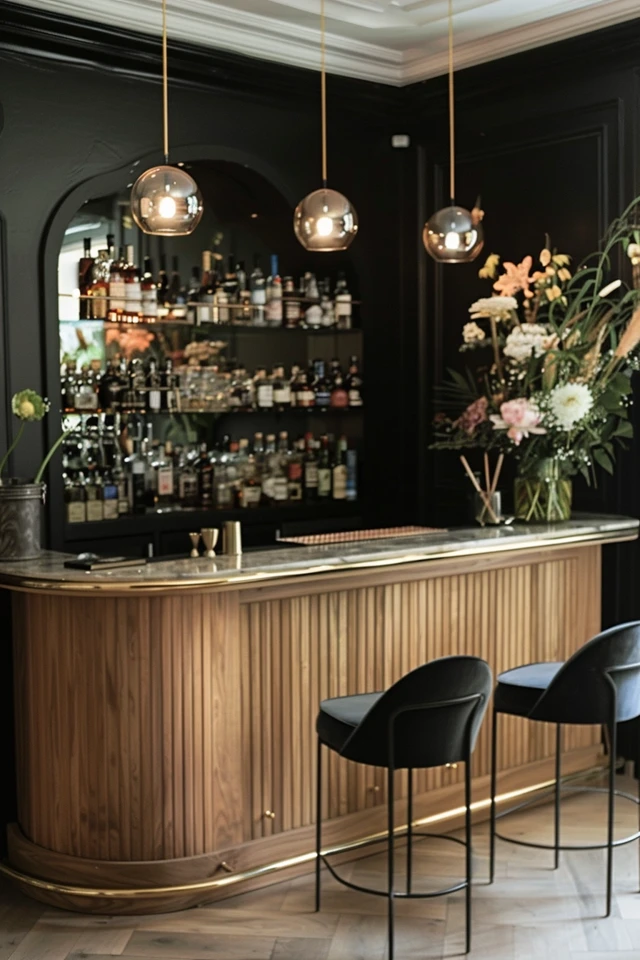
Ambient lighting usually comes from ceiling fixtures. If you have a pendant light, ensure it hangs at the right height. For a bar counter, the bottom of the pendant should be roughly 30 to 32 inches above the countertop surface.
Accent lighting is where you can have fun. A small, portable table lamp on the bar top adds immediate coziness. Picture lights mounted above your shelving can highlight your bottle collection and turn your liquor display into art.
Designer’s Note: Dimmers are Non-Negotiable
Every light source in a bar area must be on a dimmer switch. This allows you to transition the space from “prep mode” (bright cleaning light) to “party mode” (moody and dim) in seconds. It is the single cheapest upgrade with the highest impact.
Common Mistakes + Fixes
- Mistake: Using “Daylight” bulbs.
- Fix: Swap every bulb in the vicinity to “Warm White” (2700K). The warmer light complements the amber tones of whiskey and wood, making everything look expensive.
What I’d Do in a Real Project
- Install dimmable LED tape light under the floating shelves.
- Swap the main overhead can light for a semi-flush mount fixture with a brass finish.
- Add a small, battery-operated lamp on the counter for a glow that doesn’t require a cord.
5. Rethink the Countertop Surface and Hardware
If you are ready for a slightly larger renovation, changing the countertop is transformative. However, you must choose your material based on how you drink. This sounds funny, but it is a practical design constraint.
If you love margaritas, lemonade, or gin and tonics, you are dealing with citrus. Citrus acid etches marble instantly. A beautiful Carrara marble top will have dull white rings within a month if you aren’t hyper-vigilant. For a “wet” bar with a sink, quartz is generally the best balance of durability and aesthetics.
If you don’t have plumbing and are just doing a “dry” bar, you can get away with more porous materials like wood (butcher block) or marble, provided you use coasters and cutting boards.
Don’t forget the sink faucet if you have one. A standard kitchen faucet is often too large for a small bar sink (prep sink). Look for a “bar faucet,” which has a shorter reach and a higher arc. The high arc allows you to fit a tall pitcher or wine decanter underneath it, which is the primary functional need in this zone.
Designer’s Note: Hardware Coordination
Mixing metals is trendy, but it requires a delicate hand. If your faucet is polished nickel, your cabinet pulls don’t have to match, but they should coordinate. A good rule of thumb is to keep the “undertone” similar or go for high contrast. Matte black goes with everything. Brass goes well with nickel. Chrome and brushed nickel often look like a mistake when placed side-by-side.
Common Mistakes + Fixes
- Mistake: Ignoring the “knee space” or overhang.
- Fix: If you want people to sit at your bar, you need an overhang of at least 12 to 15 inches. Anything less and your guests will be knocking their knees against the cabinets.
What I’d Do in a Real Project
- Replace an old laminate top with a remnant piece of black soapstone or honed black quartz.
- Install a high-arc bridge faucet in unlacquered brass.
- Select cabinet pulls that have some weight to them—knurled brass or leather-wrapped handles add tactile luxury.
Final Checklist for Your Bar Makeover
Before you start tearing out cabinets or buying paint, run through this quick checklist to ensure you haven’t missed a critical logistical detail.
- Measure your tallest bottle: Ensure your shelf height accommodates your favorite spirits.
- Check electrical access: Do you have an outlet for a wine fridge or table lamp?
- Audit your glassware: Donate chipped glasses or mismatched promotional cups to make room for a cohesive set.
- Test paint samples: Look at the color at night with your artificial lighting, not just during the day.
- Verify weight limits: Ensure your wall anchors or brackets can hold the weight of full bottles.
- Plan for trash: Is there a spot for a small waste bin for lime rinds and napkins?
FAQs
What is the standard height for a home bar?
There are two standards. “Counter height” is 36 inches, which is the same as a standard kitchen counter. “Bar height” is 42 inches. If you are buying stools, ensure you get the right size. Counter stools generally have a seat height of 24–26 inches, while bar stools are 28–30 inches.
Can I put a wine fridge in a standard cabinet opening?
Be very careful here. Most mini-fridges are freestanding units that vent heat out of the back. If you shove one into a cabinet, it will overheat and die. You must buy a “built-in” or “undercounter” unit that vents out the front toe-kick.
How do I style a bar if I don’t drink alcohol?
A “dry bar” or coffee bar uses the same design principles. Swap liquor bottles for high-end syrups, sparkling water in glass bottles, and jars of coffee beans. The focus is on the ritual of preparing a drink, regardless of the content.
Do I need a sink in my home bar?
It is a luxury, not a necessity. A sink (wet bar) makes cleanup easier and allows for dumping ice. However, running plumbing is expensive. A dry bar is perfectly functional if you are close to the kitchen. Just keep a nice tray handy for carrying dirty glasses back to the dishwasher.
Conclusion
Renovating a home bar is one of the most rewarding small projects you can undertake. It is a contained space that allows for high drama and personal expression without the disruption of a full kitchen remodel.
By focusing on mood through lighting, maximizing vertical storage with shelving, and choosing durable but beautiful finishes, you create a destination within your home. Remember that the best home bar isn’t just about how it looks in a photo; it’s about how it functions when you have friends over. It should facilitate conversation, make serving drinks effortless, and make you feel relaxed the moment you step into the zone.
Take your time with the details—the dimmer switches, the shelf spacing, and the hardware—and you will end up with a professional-grade result that serves you for years to come.
Picture Gallery


