
5 Japandi Home Bar Ideas for a Zen Space
Creating a home bar usually brings to mind images of dark, cluttered pubs or flashy, mirrored shelving units. However, the modern homeowner often craves something that quiets the mind rather than stimulating it. This is where Japandi design steps in, bridging the gap between entertaining and relaxing.
Japandi is the harmonious hybrid of Japanese rustic minimalism and Scandinavian functionality. It relies on clean lines, bright spaces, and a deep appreciation for raw materials. When applied to a home bar, the result is a sophisticated station that feels more like a piece of art than a place to just pour a drink.
In this guide, I will walk you through five specific design concepts to achieve this look. For visual inspiration, remember that a curated Picture Gallery is at the end of the blog post to help you visualize these layouts.
1. The Slatted Wood Niche
One of the most defining textures in Japandi design is vertical wood slatting. It adds architectural interest without introducing visual chaos. Using wood slats to define your bar area creates a sense of height and warmth, especially in open-concept living rooms where the bar needs to blend in.
I often use this technique to turn awkward alcoves into functional features. The vertical lines draw the eye upward, making standard 8-foot ceilings feel much grander. This approach works best with light woods like white oak, ash, or maple.
The Design Strategy
To execute this, you want the slat wall to serve as the backdrop for your cabinetry. Install a floating countertop or a lower cabinet unit in a matching wood tone. The slats should run from the top of the counter all the way to the ceiling.
For the shelving, use thin, floating shelves made of the same wood or matte black metal. The key here is “thin.” Heavy, chunky shelves will disrupt the Zen aesthetic. I recommend shelves with a thickness of no more than 1 inch.
Designer’s Note: Scale and Spacing
I learned this the hard way on a project in Seattle: spacing is everything with slats. If the slats are too narrow, the wall looks busy and vibrates visually.
I recommend slats that are 1.5 inches wide with a 0.5-inch gap between them. This ratio provides enough shadow depth to look high-end but isn’t so dense that it becomes a dust nightmare.
Common Mistakes + Fixes
Mistake: Installing LED strips directly facing the viewer.
Fix: Use a router to create a channel on the back of your shelves or the side of the slats. Indirect lighting that washes down the wood texture creates that moody, lounge atmosphere essential for a bar.
What I’d Do in a Real Project
- Base Material: White Oak or Rift Sawn Oak (for a straighter grain).
- Counter Depth: 20 to 24 inches for a standard reach.
- Lighting: 2700K warm white LED tape light installed in a diffuser channel.
- Hardware: Finger pulls or push-to-open latches to keep the front completely flat.
2. The Hidden “Pocket” Bar
True minimalism often means hiding functionality when it is not in use. A hidden pocket bar allows you to have a fully stocked wet bar that disappears completely, leaving only a sleek wall of cabinetry. This is the ultimate expression of the Japanese concept of “Ma” (negative space) and Scandinavian organization.
This solution is perfect for multi-purpose rooms. When the doors are closed, it looks like a wardrobe or linen closet. When open, it reveals a jewel-box interior that can be slightly more dramatic than the rest of the room.
Structural Considerations
The mechanics are the most critical part of this design. Standard hinged doors will block traffic flow when the bar is open. You must use “pocket door” hardware or “flipper door” slides that allow the doors to retract into the cabinet body.
Because the doors slide back, you lose about 2 to 3 inches of internal width on each side. If you need a 36-inch wide workspace, your cabinet box needs to be roughly 42 inches wide to accommodate the hardware mechanisms.
Interior Styling
Since the bar is hidden, you can afford to use a moodier palette inside without darkening the whole room. I love using a dark charcoal or slate laminate for the interior cabinet box. It makes the crystal glassware and amber liquor bottles pop.
Ensure your internal countertop is at a standard comfortable working height, which is 36 inches from the floor. Leave 18 inches of clearance between the counter and the first upper shelf to allow for tall bottles and cocktail shakers.
Common Mistakes + Fixes
Mistake: Ignoring the electrical plan.
Fix: You will likely want a wine fridge or a small blender inside. Plan for outlets inside the cabinet back panel before installation. Ensure the cabinet back is vented if you are enclosing a refrigerator, or the motor will burn out.
3. The Floating Stone Console
For a lighter, more airy approach, consider a floating stone console. This design moves away from heavy wood cabinetry and leans into the geological elements of Japandi. It treats the bar as a sculptural ledge rather than a storage unit.
This is ideal for dining rooms where you want a buffet surface that doubles as a drink station. The lack of legs makes the floor area look larger, which is a massive plus for smaller apartments or condos.
Material Selection
Travertine, limestone, or honed marble are the heroes here. Polished granite is too shiny and cold for Japandi. You want a stone with a matte or satin finish that feels soft to the touch.
Travertine is particularly trendy right now for its warm, beige tones. However, it is porous. If you use real stone, you must seal it with a high-quality impregnating sealer to prevent red wine stains.
Installation Logistics
Floating a heavy stone slab requires serious structural support. You cannot just use drywall anchors. You need steel brackets mounted directly into the wall studs.
For a console that is 12 to 15 inches deep, I typically specify steel L-brackets spaced every 32 inches (every other stud). The stone then sleeves over or sits on top of these brackets. If you are renting, you can achieve a similar look with a legged console table that has a stone top, provided the legs are thin and unobtrusive.
Designer’s Note: The “Rule of Three” Styling
A floating bar has no hiding spots, so styling is critical. Do not line up bottles like a grocery store shelf. Group items in odd numbers.
- Group 1: A tall ceramic vase with a single branch or dried floral.
- Group 2: A tray containing your three most-used spirits and a jigger.
- Group 3: A stack of handmade ceramic coasters.
4. The Low-Profile Lounge Bar
In Japan, floor culture influences furniture height. While you likely won’t be sitting on the floor to make a drink, lowering the profile of your furniture creates a more grounded, relaxed vibe. A low-profile sideboard used as a bar creates a lounge aesthetic that feels less transactional and more conversational.
This design usually features a long, low credenza (around 28 to 30 inches high, rather than the standard 36). This keeps sightlines open across the room, which is vital for maintaining a “Zen” flow.
Designing for Low Living
Look for furniture with sliding doors rather than swinging doors. Sliding doors are very mid-century modern (a close relative of Scandi design) and save space.
Since the surface is lower, you will be looking down at it. Keep the top surface minimal. I suggest using a large wooden or woven tray to corral all the bar tools. This allows you to pick up the entire “bar” and move it if you need the surface for something else.
Texture and Contrast
To prevent a low cabinet from looking boring, focus on tactile details. Look for cabinet fronts with woven cane, rattan, or paper cord. These natural fibers soften the hard lines of the wood and introduce the “imperfect” beauty of wabi-sabi.
What I’d Do in a Real Project
- Cabinet Width: At least 60 inches long to anchor the room.
- Rug Pairing: Place the unit partially on a large, textural wool or jute rug.
- Wall Decor: Hang art low. The center of your artwork should be at eye level, roughly 57 to 60 inches from the floor. Do not hang art too high above a low console, or they will feel disconnected.
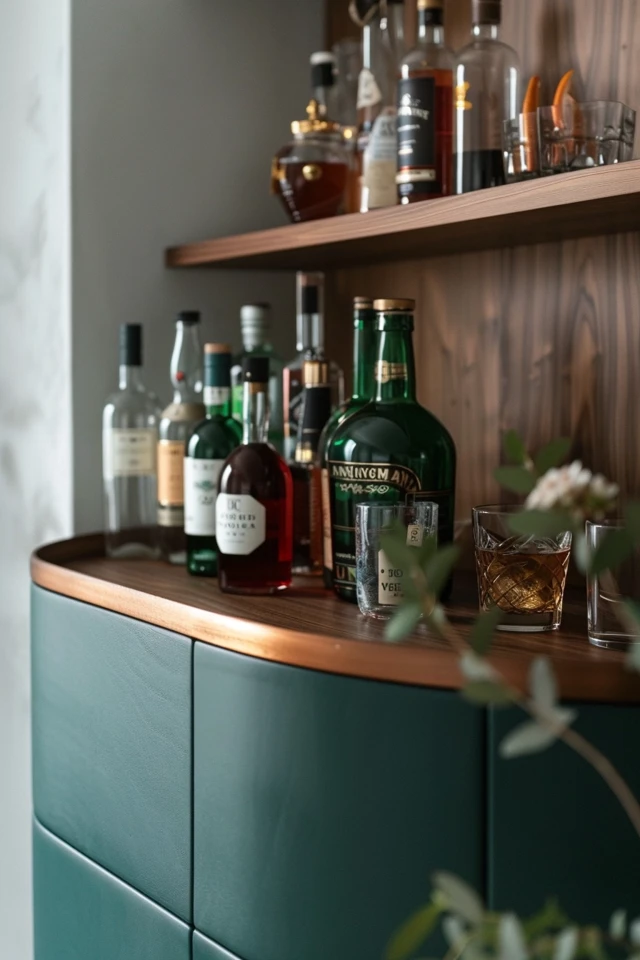
5. The Dark Japandi Corner
While Japandi is famous for light oaks and creams, there is a “dark” variation that is incredibly sophisticated. This involves using blackened wood (shou sugi ban style) or dark walnut combined with slate grays.
A dark bar corner creates a visual destination. It separates the “entertainment” zone from the “living” zone without building walls. It feels intimate, cozy, and very high-end.
The Palette
The key to doing dark Japandi without it becoming “industrial” is to keep the materials natural. Avoid cold metals like chrome. Instead, mix black stained wood with warm bronze or antique brass hardware.
Use a dark lime wash paint on the walls behind the bar. Lime wash adds texture and movement, preventing the black wall from looking like a flat chalkboard.
Lighting is Critical
Dark corners swallow light. You need to layer your lighting carefully.
1. Task Lighting: A small, rechargeable table lamp with a paper shade (Isamu Noguchi style) provides a soft glow for mixing drinks.
2. Accent Lighting: If you have open shelves, use warm LED tape (2700K) on the underside of shelves to illuminate the bottles below.
Common Mistakes + Fixes
Mistake: Using high-gloss finishes in a dark color scheme.
Fix: Fingerprints show up instantly on dark, glossy surfaces. Always specify matte or satin finishes for cabinetry and hardware in a dark bar.
Final Checklist: Designing Your Japandi Bar
Before you start buying lumber or ordering stone, run your plan through this checklist to ensure it hits the mark.
1. Functionality Check
- Is the counter height correct for how I will use it? (36″ for standing work, 30″ for sitting/low console).
- Do I have clearance for cabinet doors to open?
- Is there access to power for a fridge or lighting?
2. The Japandi Filter
- Palette: Is the wood tone consistent with the rest of the room?
- Texture: Do I have a mix of hard (stone/wood) and soft (cane/woven)?
- Lines: Are the lines clean? Have I removed unnecessary ornamentation?
3. Storage Reality
- Have I measured my tallest bottle? (Grey Goose and St. Germain are notoriously tall).
- Do I have a place to hide the ugly stuff (blenders, branded napkins)?
FAQs
Can I mix metal finishes in a Japandi bar?
Yes, but keep it subtle. Japandi favors matte black, brushed brass, or oil-rubbed bronze. Avoid mixing more than two metals. If your faucet is black, your cabinet pulls can be brass, but keep the shelving brackets black to match the faucet. Simplicity is key.
What creates the “Zen” feeling?
The Zen feeling comes from the absence of visual noise. This means hiding labels, grouping items, and leaving empty space on shelves. In a bar context, decanting liquor into matching glass bottles is a great way to reduce visual clutter, though it requires maintenance.
Is Japandi durable for a wet bar?
It can be, but material choice matters. Light woods like untreated pine will stain instantly with red wine or bitters. Always use hardwoods like White Oak and ensure they are sealed with a high-quality matte polyurethane. For countertops, quartz that mimics limestone is often more durable than real limestone.
How do I style a bar if I don’t drink alcohol?
A Japandi “bar” is really just a beverage station. You can style it as a tea ceremony station (very Japanese) or a coffee bar (very Scandi). Display cast iron teapots, ceramic matcha bowls, or a chemex coffee maker. The design principles of texture, light, and line remain exactly the same.
Conclusion
Designing a Japandi home bar is an exercise in restraint. It challenges you to strip away the excess and focus on the beauty of materials and the quality of construction. Whether you choose a hidden pocket bar or a slat-wood feature wall, the goal is to create a space that feels grounded and intentional.
Start with one element—perhaps the wood tone or a specific stone slab—and build outward from there. Remember that in this design language, empty space is just as important as the furniture itself. Allow your bar to breathe, and it will become a source of calm in your home, glass in hand or not.
Picture Gallery


