
5 Luxury Home Bar Designs for an Elegant Space
There is a distinct shift in energy when you move guests from the main living room to a dedicated home bar. It signals that the formalities of dinner are over, and it is time to relax, converse, and truly unwind.
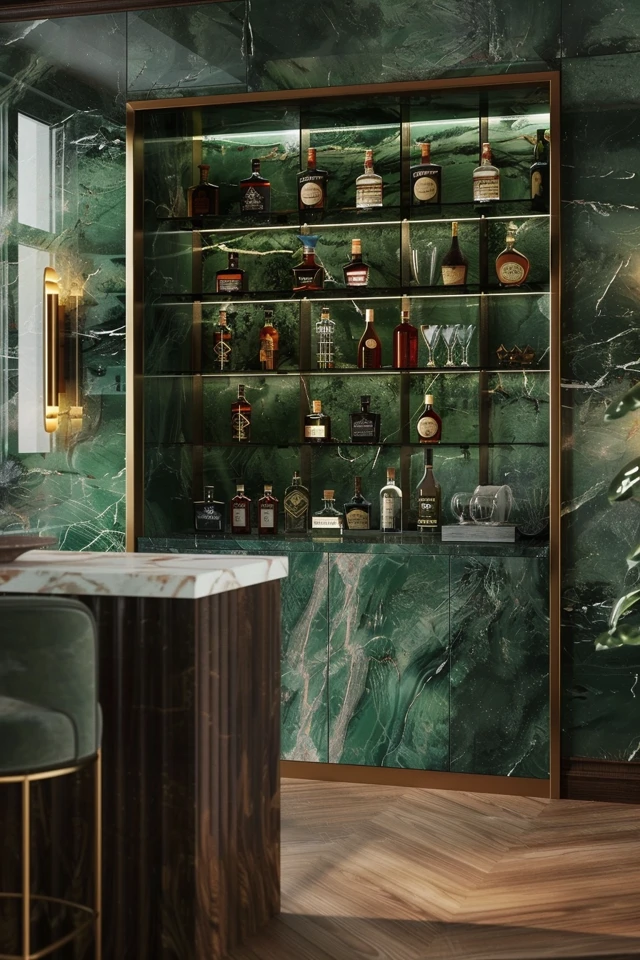
In my years designing luxury residences, I have found that the home bar is often the client’s favorite room, yet it is frequently the one where people make the most functional errors. For plenty of visual inspiration on these layouts, make sure to check out the Picture Gallery at the end of the blog post.
Whether you are renovating a basement into a lounge or carving out a niche in your dining room, the difference between a “nice counter” and a “luxury bar” lies in the details. It is about the weight of the hardware, the ambient lighting temperature, and the specialized flow of the workspace. Below are five distinct luxury bar concepts, complete with the measurements and materials you need to execute them correctly.
1. The Moody Speakeasy
This design is perfect for basements or enclosed rooms without natural light. We embrace the darkness here to create an intimate, cocoon-like atmosphere that feels miles away from the rest of the house.
The Palette and Materials
To achieve this look, you must commit to dark saturation. I typically specify walls painted in charcoal, navy, or forest green, often carried up onto the ceiling to blur the room’s boundaries. For cabinetry, we look at walnut or ebonized oak with a matte finish.
The countertops should be durable but tactile. Leathered granite or soapstone works beautifully here because they don’t reflect light the way polished stone does. This absorbs the glare and keeps the mood soft.
Lighting Strategy
Lighting is the make-or-break element in a speakeasy. You never want high-hat recessed lighting flooding this room. Instead, rely on:
- Under-shelf LED tape: Use warm dim-to-warm LEDs (2700K to 2200K) to backlight liquor bottles.
- Wall sconces: Place these at eye level to create a flattering glow.
- Picture lights: Use these to highlight art, providing indirect ambient light.
Designer’s Note: The Acoustics
A common failure in basement bars is the “echo chamber” effect. Because you are using hard surfaces like glass, stone, and wood, sound bounces aggressively.
In a luxury build, I always insist on an upholstered ceiling or acoustic wall panels wrapped in velvet or wool. If construction is already done, you must use a heavy, high-pile rug. It instantly dampens the noise and makes the space feel expensive.
Common Mistakes + Fixes
- Mistake: Using standard kitchen counter depth (24 inches) for the back bar without checking bottle sizes.
- Fix: Many premium liquor bottles are wider than average. Ensure your shelving depth is at least 12–14 inches if you are storing bottles, and ensure the shelf height clearance varies between 14 and 18 inches for taller spirits.
2. The High-Gloss Modern Jewel Box
This design works best for small alcoves, under-stair areas, or “pocket bars” off a dining room. The goal here is high impact in a small footprint, acting as a visual anchor for the entertaining space.
The “Jewel Box” Effect
Since the square footage is small, we splurge on materials. This is where I specify high-gloss lacquered cabinetry. The reflective surface bounces light around, making a tight nook feel deeper and more vibrant.
For the backsplash, bypass standard tile. Use an antique mirror or a slab of highly veined stone like Viola marble or Onyx. When lit correctly, the stone acts as art.
Vertical Storage Logic
In a small footprint, you cannot waste horizontal space. We build vertically to the ceiling.
- Top Tier: Display rarely used decanters or collectible bottles. Access via a library ladder is optional but adds a great aesthetic.
- Middle Tier: Glass shelving for glassware. Use 3/8-inch tempered glass; anything thinner looks cheap and bows under weight.
- Counter Level: Keep this clear for drink prep. Do not clutter it with permanent decor.
What I’d Do in a Real Project
If I am designing a wet bar in a small niche, I strictly use an 11-inch to 15-inch bar sink. A standard kitchen sink (24+ inches) is too large and ruins the counter space. I also pair this with a single-handle bar faucet, not a kitchen pull-down sprayer, which looks too utilitarian for a formal space.
3. The Classic Gentleman’s Lounge
This style is timeless, borrowing heavily from traditional English joinery and club aesthetics. It suits dedicated rooms like a library or a large study.
Millwork is King
The luxury factor here comes from the carpentry. We utilize fluted columns, raised panel doors, and heavy crown molding. The wood tone is usually mid-tone to dark—think mahogany, cherry, or a stained rift-sawn white oak.
The Bar Rail Detail
A true seated home bar needs a proper bar rail (the armrest). This isn’t just a flat counter overhang.
- The Chicago Rail: This is a specific wood molding profile that provides a comfortable place to rest your arms. It prevents spills from running off the edge onto the floor.
- Overhang Depth: For comfortable seating, the countertop overhang must be at least 10 to 12 inches. If you have the space, 15 inches is luxurious and prevents knees from knocking against the cabinetry.
The Foot Rail
Never forget the foot rail. If you have bar-height stools (30-inch seat height), guests need a place to rest their feet. A brass or oil-rubbed bronze rail should be installed roughly 6 to 8 inches off the floor.
Designer’s Note: Appliance Integration
In a traditional lounge, stainless steel appliances ruin the illusion. I always require panel-ready appliances. The ice maker, wine fridge, and dishwasher drawers should disappear behind wood fronts that match the cabinetry perfectly.
4. The Architectural Showpiece (Open Concept)
If your bar is part of a large open-concept living area, it needs to look like a piece of furniture or sculpture, not a kitchenette. This design relies on clean lines and concealed function.
The Waterfall Island
A double waterfall edge—where the stone continues down both sides of the island to the floor—is a staple of this look. It grounds the bar visually.
To elevate this, I often recommend a “mitered edge” to make the countertop look 2 to 3 inches thick, even if the slab is standard thickness. This adds substantial weight and grandeur to the piece.
The “Back Bar” Wall
In modern designs, we often skip upper cabinets entirely. instead, we use floating shelves fabricated from metal or stone.
- Spacing Rule: Mount the first shelf at least 18 to 20 inches above the countertop. This allows tall bottles to stand on the counter without looking cramped.
- Material mix: If the island is stone, make the back wall wood slats or textured plaster to warm up the space.
Common Mistakes + Fixes
- Mistake: Poor electrical placement on the island.
- Fix: Do not cut outlets into the side of your beautiful waterfall stone. Use pop-up outlets that sit flush in the countertop, or mount strips hidden directly underneath the overhang edge.
5. The Indoor-Outdoor Transition Bar
This is the ultimate luxury for homes with a patio or pool deck. It involves a pass-through window that connects an interior bar to an exterior counter, effectively doubling your entertaining space.
The Pass-Through Mechanism
There are two high-end ways to do this:
- Accordion Windows: These fold completely flat against the wall, blurring the line between inside and out.
- Gas Strut Windows: These flip up like a concession stand window (but chic). This creates a temporary awning outside.
Material Continuity
To make this look seamless, run the same countertop material from inside to outside. However, you must choose the material carefully.
Designer’s Insight on Materials:
Quartz is generally not UV stable and will yellow or warp in direct sunlight. For an indoor-outdoor bar, I specify natural Quartzite (which is harder than granite) or Porcelain slabs. These can withstand temperature shock and UV rays.
The Level Change
Be aware of your floor heights. Often, the outdoor patio is a step lower than the indoor floor. If you want the counter to be flat across, the outdoor bar stools will need to be taller, or the outdoor counter will feel too high. We usually design a “split level” or adjust the exterior grade to match.
Final Checklist: Before You Sign Off
Before you finalize your design or order materials, run through this checklist. These are the logistical details that usually cause headaches during installation.
1. Confirm Rough-In Plumbing
Does your wet bar need a pump? If you are in a basement or away from the main stack, you might need a sanitary ejector pump. Ideally, locate the bar near existing plumbing to save thousands in trenching.
2. Check Your Clearances
The “aisle” behind the bar (where the bartender stands) needs to be 36 inches wide minimum for one person. If you want two people to be able to pass each other, aim for 42 to 48 inches.
3. Ice Maker Requirements
Dedicated clear-ice makers require a gravity drain or a pump. They also generate heat. Ensure your cabinetry plan includes a ventilation grille at the toe kick, or the machine will burn out in a year.
4. Lighting Temperature Consistency
Ensure your under-cabinet lights match the overhead lights. A clash between cool white (4000K) and warm white (2700K) looks messy. Stick to 2700K for intimate bar spaces.
5. Seating Height Math
Counter height is 36 inches (requires 24-26 inch stool). Bar height is 42 inches (requires 30-inch stool). Do not mix these up, or your guests will be sitting at their chin level.
FAQs
Do I really need a wet bar, or is a dry bar enough?
If you plan on making cocktails that require shaking, stirring, or fresh ingredients (citrus, mint), a wet bar is essential. You need a sink to rinse shakers and wash hands. If you primarily pour wine or neat spirits, a dry bar is perfectly acceptable and much cheaper to install.
What is the best countertop material for a bar?
For durability, quartzite or sintered stone (like Dekton) is best because they resist etching from citrus juice and wine stains. Marble is beautiful but will etch instantly if lemon juice touches it. If you choose marble, accept the patina as part of the charm.
How much space do I need for a home bar?
A functional straight run of cabinetry needs to be at least 6 feet long to accommodate a sink, an under-counter fridge, and a small bank of drawers. For a walk-behind bar, you generally need a footprint of at least 8 feet by 8 feet.
Should I put a wine fridge or a beverage center?
A wine fridge has racks designed specifically for bottles and usually keeps temperatures around 45–55°F. A beverage center gets colder (34–40°F) and has flat shelves for soda and beer cans. If you drink both, get a dual-zone unit or two separate 15-inch units side-by-side.
Conclusion
Designing a luxury home bar is about more than just buying expensive cabinetry. It is about understanding the flow of service, the psychology of lighting, and the durability of materials against alcohol and acids.
Whether you choose the dark allure of a speakeasy or the bright, social atmosphere of an indoor-outdoor connection, the success of the project lies in the measurements and the mechanics. Take the time to plan your electrical layout and plumbing rough-ins before you ever pick out a paint color. When executed well, these spaces become the magnetic center of the home, offering a level of hospitality that a standard living room simply cannot match.
Picture Gallery


