
5 Tips for a Stylish Hall Ceiling Design
The hallway is the central artery of your home, yet it is frequently the most neglected space when it comes to design. We often treat it purely as a transitional tunnel to get from point A to point B, ignoring the potential for major architectural impact. However, because hallways are usually smaller and narrower than living rooms, they are actually the safest place to take a massive design risk.
In my years of practicing interior design, I have found that the ceiling is the secret weapon for transforming a cramped corridor into a grand passage. If you are looking for visual inspiration, you can visit the Picture Gallery at the end of the blog post.
Treating the “fifth wall” with the same respect as your floors or vertical walls changes the entire psychology of the home. It can make narrow spaces feel wider, low ceilings feel vaulted, or cavernous spaces feel intimate. Below, I’m sharing my top five strategies for elevating your hall ceiling, along with the specific measurements and rules I use on actual job sites.
1. Strategic Color Blocking and Sheen Selection
Paint is obviously the most accessible tool in your kit, but most homeowners simply slap “Ceiling White” up there and call it a day. In a hallway, standard white can actually create a “tunnel effect” where the eye shoots straight to the end of the hall without pausing.
The Monochromatic Wrap
If your hallway feels choppy or small, try painting the walls, trim, and ceiling the exact same color. This blurs the boundary lines where the wall meets the ceiling.
When the eye cannot distinguish where the wall ends and the ceiling begins, the ceiling feels infinitely higher. I recently did this in a narrow 3-foot wide Victorian hallway using a moody slate blue. By wrapping the color, the space felt intentional and cozy rather than cramped.
Designer’s Note on Sheen:
If you do the monochromatic wrap, you still need to vary the sheen for durability and light reflection.
- Walls: Use an Eggshell or Matte finish.
- Trim: Use Satin or Semi-Gloss (for scuff resistance).
- Ceiling: Use Flat or Matte.
The “Lid” Effect for High Ceilings
If you have a narrow hallway with very high ceilings (10 feet or more), it can feel like you are walking at the bottom of a well. To combat this, paint the ceiling a dark, rich color like charcoal, navy, or even black.
Bringing a dark color down onto the ceiling visually lowers the height. This rebalances the proportions of the hallway, making it feel wider rather than taller.
Common Mistakes + Fixes
- Mistake: Using a bright white ceiling with dark walls in a narrow hall.
- Why it fails: It creates a high-contrast “landing strip” overhead that emphasizes how narrow the room is.
- The Fix: Tint your ceiling paint with 20% of your wall color to soften the transition.
2. Install Architectural Beams or Coffers
Nothing suggests custom luxury quite like millwork. In a hallway, you have to be careful with scale, as you don’t have the vast width of a living room to support massive beams. However, linear architectural details act as guide rails for the eye.
Faux Beams for Directionality
Running beams perpendicular to the length of the hall (ladder style) can make a long hallway feel shorter and wider. It breaks up the infinite runway look.
For standard 8-foot ceilings, keep beams very shallow. I prefer beams that are no deeper than 2 to 3 inches. Anything deeper will make the ceiling feel like it is crushing you.
Box Beams vs. Solid Wood
In renovation projects, I almost always specify hollow box beams made from lightweight MDF or pine.
- They are lighter, meaning you don’t need heavy structural blocking in the ceiling to hold them up.
- You can run wiring through them to hide cables for new pendant lights.
- They are much more affordable than solid reclaimed timber.
Real World Project Rules:
When I layout beams in a hallway, spacing is critical.
- Spacing: Beams should generally be spaced 4 to 6 feet apart in a standard hallway.
- Symmetry: Always start from the center of the hall and work your way out. You do not want a full beam on one end and a half-beam cut off at the other.
- Lighting Integration: Plan your light fixtures to land exactly centered between two beams. Never mount a light on the side of a beam unless it is a specific sconce application.
3. Wallpaper and Pattern Scale
Wallpapering a hall ceiling is one of my favorite tricks for hiding uneven drywall or settling cracks, which are common in older homes. It adds instant personality without taking up valuable floor space.
Choosing the Right Scale
In a hallway, you are viewing the ceiling from directly underneath or at a steep angle. Large-scale murals can get lost or distorted.
I recommend geometric patterns, stripes, or dense botanicals for hallways.
- Stripes: If you run stripes parallel to the hall, it elongates the space. If you run them perpendicular, it widens the space.
- Small Geometrics: These provide texture that reads almost like a stamped tin ceiling from a distance.
The Renter-Friendly Option
If you are renting, peel-and-stick wallpaper is a legitimate option for ceilings. However, gravity is your enemy here.
Designer’s Note on Installation:
Most peel-and-stick failures happen because the ceiling paint was textured or dusty.
- Wipe the ceiling with a damp cloth and let it dry completely (24 hours) before applying.
- If the ceiling has “orange peel” texture, wallpaper will not stick well. You may need to sand it down or use a heavy-duty liner paper first.
Budget Constraint tip:
Wallpaper can be expensive. Since hallways are small, you can often get away with just 2 or 3 rolls. This allows you to buy premium designer paper that would be too costly for a master bedroom.
4. Lighting: The Jewelry of the Hallway
Lighting is not just about lumens; it is about manipulating the architecture. In a hallway, the ceiling fixture is often the only decorative element the space can physically fit.
The “7-Foot Rule”
This is a non-negotiable safety rule in interior design. The bottom of your light fixture must sit at least 7 feet (84 inches) off the finished floor.
If you have standard 8-foot ceilings, you only have 12 inches of play. You must look for “flush mount” or “semi-flush mount” fixtures. Do not attempt a pendant light unless you have ceilings 9 feet or higher.
Rhythm and Repetition
A single “boob light” in the middle of a 20-foot hallway creates gloomy shadows at the ends.
- Rule of Thumb: Install a fixture every 8 to 10 feet.
- Wattage: Use warm white bulbs (2700K to 3000K). Hallways should feel inviting, not like a hospital.
Up-Lighting for Illusion
If you cannot change the hardwired fixtures, add wall sconces that point upward. By bouncing light off a white ceiling, you “lift” the ceiling visually. This is a classic trick for basements or apartments with concrete ceilings that cannot be drilled into.
Common Mistakes + Fixes
- Mistake: Over-scaling the fixture width.
- Why it fails: A huge fixture in a narrow hall feels claustrophobic.
- The Fix: Leave at least 6–8 inches of clearance between the edge of the fixture and the wall. If your hall is 36 inches wide, your fixture should not be wider than 20–24 inches.
5. High Gloss and Lacquer Finishes
If you want to maximize light in a dark, windowless hallway, a high-gloss ceiling is the ultimate solution. It acts like a mirror, reflecting floor lamps and sconces to brighten the entire corridor.
The Preparation Reality Check
I love the look of a lacquered ceiling, but I always warn clients about the labor costs. High-gloss paint highlights every single imperfection.
If your drywall has bumps, visible tape seams, or a “popcorn” texture, gloss will make it look terrible.
- Level 5 Finish: To do this right, your painter needs to skim coat the ceiling to a “Level 5” smooth finish. This is expensive and messy.
- The Alternative: If skim coating isn’t in the budget, use a high-gloss stretch ceiling system or install smooth beadboard panels painted in gloss. The beadboard hides the drywall texture beneath.
Color Depth
Gloss works best with saturated colors. A high-gloss white can sometimes look clinical or plastic. A high-gloss navy, emerald, or oxblood red looks like liquid glass.
What I’d do in a real project:
If I am designing a powder room hallway or a foyer transition:
- I would skim coat the ceiling perfectly smooth.
- I would use a specialized product like Fine Paints of Europe (Hollandlac) for that wet-look finish.
- I would keep the walls matte to create maximum contrast between the surfaces.
Final Checklist: Assessing Your Hallway
Before you buy a single gallon of paint or order a light fixture, run through this checklist. This is the mental process I use during a consultation.
1. Measure the Clearance
- Measure floor to ceiling height exactly.
- Subtract 84 inches (7 feet).
- The remaining number is the maximum height of your light fixture.
2. Check the Drywall Quality
- Shine a flashlight across the ceiling (raking light).
- If you see waves and bumps, stick to flat paint or wallpaper.
- If it is smooth, you can consider satin, semi-gloss, or high gloss.
3. define the “Runway”
- Is the hall long and narrow? Use horizontal beams or perpendicular wallpaper to widen it.
- Is the hall short and boxy? Use a monochromatic color wrap to unify it.
4. Account for Doors
- Check how close the tops of the door casings are to the ceiling.
- If you have less than 3 inches between the door trim and ceiling, do not install crown molding. It will look crowded and forced.
FAQs
Should the hallway ceiling be the same color as the living room ceiling?
Not necessarily. The hallway is a transitional space. You can treat it as a distinct “jewel box” with its own identity. In fact, having a darker or more patterned ceiling in the hall makes the living room feel brighter and more open when you eventually walk into it.
How do I deal with a popcorn ceiling in a hallway?
If you cannot scrape it (due to asbestos concerns or budget), the best aesthetic fix is to cover it. Installing tongue-and-groove wood planks or beadboard directly over the popcorn is a clean, permanent solution that adds value.
Can I use a ceiling medallion in a narrow hall?
Yes, but scale is key. In a 3-foot wide hall, a medallion should be no wider than 16–18 inches. It draws the eye to the light fixture and adds a touch of historical charm, which works particularly well in Victorian or Craftsman homes.
What if my hallway has an L-shape?
Treat the L-shape as one continuous zone. Keep the ceiling treatment consistent throughout the turn. However, ensure your lighting is placed to illuminate both “legs” of the hallway equally. You may need a fixture at the center of each leg, plus one near the corner if it is dark.
Conclusion
The hallway ceiling is valuable real estate that most homeowners give away for free. By applying one of these five strategies—whether it is a simple coat of dark paint, a roll of geometric wallpaper, or properly scaled lighting—you change the experience of moving through your home.
Design is about how a space feels, not just how it looks. A well-designed hall ceiling creates a sense of arrival and journey. Don’t let your “fifth wall” stay blank. Measure your clearance, pick a bold finish, and turn that tunnel into a destination.
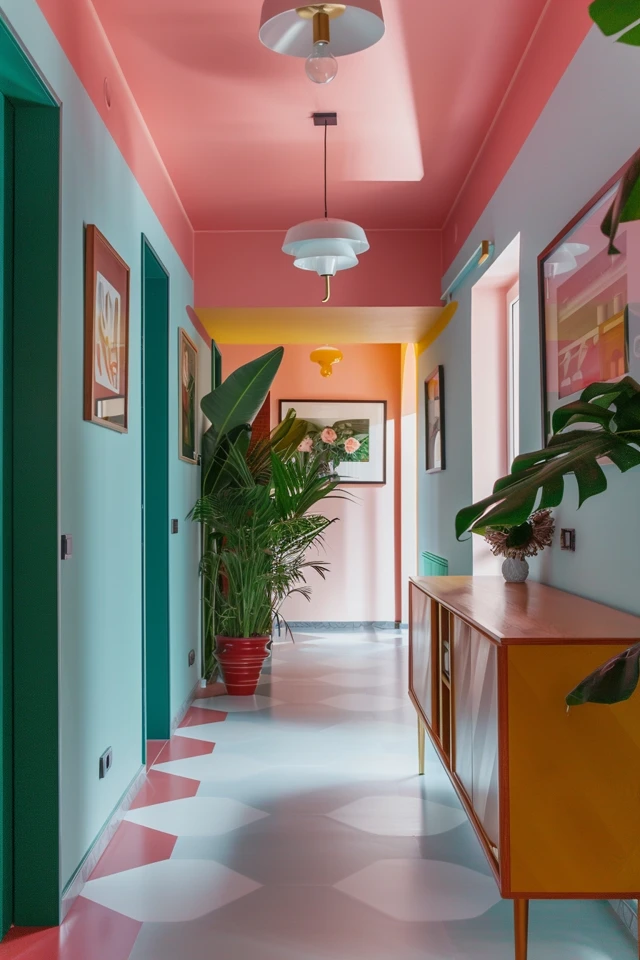
Picture Gallery


