
5 Tips for Choosing the Right Dining Room Curtains
The dining room is often the trickiest space in the house to dress. It needs to walk a fine line between formal elegance for hosting holidays and practical durability for Tuesday night spaghetti dinners. I often see clients paralyzed by the choices, resulting in bare windows that make the room feel cold and unfinished.
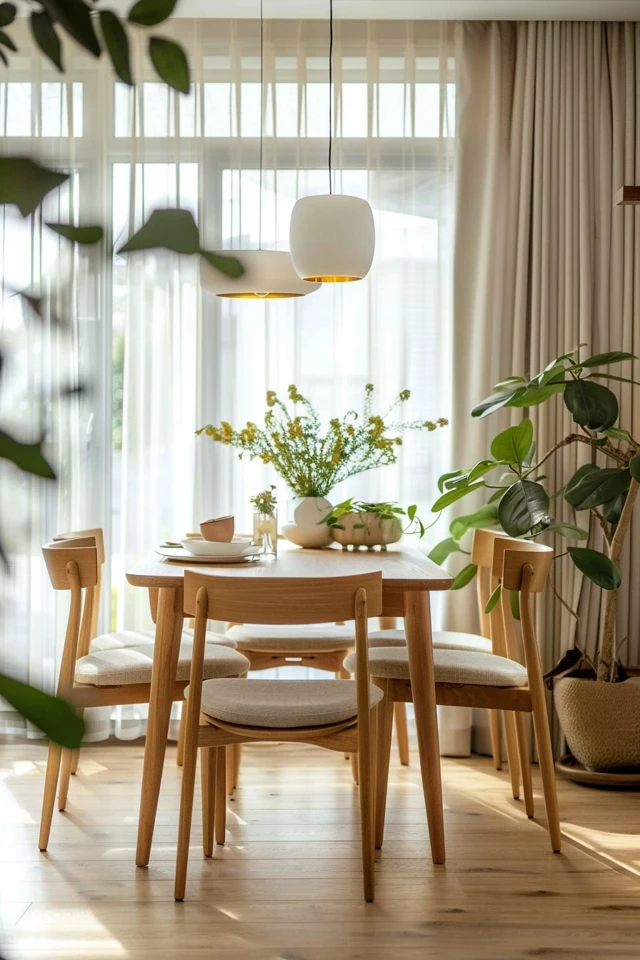
My goal is to help you navigate these choices without the stress. Check out the curated Picture Gallery at the end of this post for visual inspiration. This guide breaks down exactly how I approach window treatments for my own clients to ensure the result is polished and functional.
In my years of designing homes, I have learned that dining room curtains are less about decoration and more about architecture. They soften the hard lines of tables and chairs while controlling the light and acoustics of the space. Let’s dive into the practical rules you need to know to get this right the first time.
1. Prioritize Fabric Durability and Maintenance
The biggest mistake homeowners make is choosing a fabric based solely on how it looks in a swatch book. In a dining room, your curtains are living dangerously close to food, wine, and sticky fingers. You need to consider the practical life of the textile.
Silk looks incredible, but it is a nightmare for dining spaces. If a guest spills a drop of water on real silk, it stains, and sunlight will rot the fibers within a few years. Instead, look for high-quality faux silks, linen blends, or heavy cottons.
Linen blends are my go-to recommendation for most dining spaces. Pure linen wrinkles aggressively and stretches with humidity, but a linen-polyester blend gives you that organic drape with stabilized fibers. These blends are often machine washable, which is a lifesaver if you have pets or children.
Velvet is a beautiful option for adding drama and sound dampening, but be careful with color. Dark velvet shows every speck of dust and lint. If you choose velvet, ensure it is a performance velvet that can be wiped down with a damp cloth.
Designer’s Note:
When testing a fabric, crush it in your hand for ten seconds. If it stays wrinkled when you let go, it will look messy hanging on your wall. In a formal dining room, you want the pleats to hang straight and true, not look rumpled.
Common Mistakes + Fixes:
- Mistake: Buying “Dry Clean Only” drapes for a high-traffic family dining room.
- Fix: Check the care label immediately. Look for “washable” or “spot clean friendly” codes, especially if the curtains will pool on the floor where dust collects.
2. Master the Mounting Height and Rod Width
If there is one secret that separates a DIY project from a professional installation, it is hardware placement. Most people mount the curtain rod directly on the window frame. This makes the window look smaller and the ceiling look lower.
You need to mount your hardware “high and wide.” This trick creates an optical illusion that expands the size of the room. I typically mount the rod at least 4 to 6 inches above the window frame. If you have standard 8-foot ceilings, I often mount the rod all the way up, just below the crown molding.
For width, the rod should extend past the window frame by 8 to 12 inches on each side. This is called the “stackback.” When the curtains are open, the fabric should rest against the wall, not over the glass. This maximizes natural light and ensures the curtains don’t block the view.
Be mindful of furniture placement when measuring your width. If you have a buffet or china cabinet near the window, ensure you have enough wall space for the curtain stack. You do not want your fabric crushed behind a piece of furniture.
What I’d do in a real project:
- Step 1: Measure the window width (frame to frame).
- Step 2: Add 20 inches to that number (10 inches per side). This is your rod length (excluding finials).
- Step 3: Measure from the floor to the proposed rod height.
- Step 4: Buy panels that are longer than you need and have them hemmed. Standard 84-inch panels are almost always too short for modern mounting heights.
3. Select the Right Header Style for the Mood
The “header” is the top part of the curtain that attaches to the rod. The style of the header dictates how the fabric falls and sets the formality level of the room. This detail is often overlooked, but it changes the entire vibe of the dining area.
For a clean, modern, or transitional look, I prefer a Euro pleat or a French pleat. These are pinched at the top, allowing the fabric to fold neatly all the way to the floor. They require curtain rings and drapery pins, which elevates the look significantly compared to sliding fabric directly on a rod.
Grommet tops (metal rings punched into the fabric) are very casual. I generally avoid them in dining rooms unless the space is distinctly industrial or very relaxed. They tend to look a bit “off-the-shelf” and don’t stack as tightly as pleated drapes.
Rod pockets are the most difficult to function. Because the fabric slides directly on the rod, there is a lot of friction. If you plan on opening and closing your dining room curtains daily, avoid rod pockets. They are best for stationary panels that frame the window but never move.
Designer’s Note:
If you are renting and cannot install heavy traverse rods, look for “back tab” curtains. They have loops of fabric hidden on the back of the header. This creates a pleated look similar to custom drapes but slides easily on a standard tension or expansion rod.
Common Mistakes + Fixes:
- Mistake: Using clip rings on heavy fabric.
- Fix: Heavy dining room curtains will drag the clips down, creating an ugly sagging scalloped look. Use drapery pins (hooks) that insert into the header for a structured, upright hold.
4. Calculate the Correct Fullness
Nothing ruins a room faster than “skimpy” curtains. When you close the drapes, they should still have ripples and folds. If they look like a flat sheet pulled taut across the window, you do not have enough panels.
The industry rule of thumb is 2x to 2.5x fullness. This means the total width of your curtain panels should be two to two and a half times the width of the window. If your window is 40 inches wide, you need 80 to 100 inches of fabric width to cover it properly.
Most store-bought panels are roughly 50 inches wide. For a standard window, two panels (one on each side) might barely cover the glass when closed. In my projects, I often sew two panels together for each side or order “double-width” custom panels.
If you are buying ready-made curtains, buy four panels for a standard window—two for the left and two for the right. This creates that luxurious, volumetric look you see in magazines. It also helps with sound absorption, making the dining room quieter and more intimate.
The Math Breakdown:
- Standard Window (36-48 inches wide): requires roughly 100 inches of combined panel width.
- Double Window (60-72 inches wide): requires roughly 150-180 inches of combined panel width.
- Patio Door (72 inches+): requires at least 200 inches of combined panel width.
5. Determine the Hem Length and Floor Interaction
How your curtains hit the floor is a stylistic choice, but it also has functional consequences. There are three main ways to handle the hem: the float, the kiss, and the puddle.
The “float” or “hover” is when the curtain hangs about a half-inch off the floor. This is the most practical choice for a dining room. It allows you to sweep or vacuum easily without sucking up the fabric. It keeps the hem clean from dust bunnies and pet hair.
The “kiss” is the most difficult to execute but looks the most tailored. This is where the fabric barely touches the floor. It requires precise measuring and a perfectly level floor. In older houses with uneven floors, a “kiss” hem might touch on one side and float on the other.
The “puddle” involves 2 to 6 inches of extra fabric pooling on the floor. While romantic and dramatic, I rarely recommend this for dining rooms. Puddles are trip hazards for guests carrying hot dishes. They also collect crumbs and are difficult to clean around.
Designer’s Note:
If you buy ready-made curtains (usually 84, 96, or 108 inches long), they will likely not fit your specific mount height perfectly. It is worth taking them to a local dry cleaner for hemming. A custom hem makes a $50 curtain look like a $500 curtain.
What I’d do in a real project:
- Scenario: A family with a dog and young kids.
- Solution: I would choose a “hover” hem (1 inch off the floor) to keep the fabric away from the vacuum cleaner and mop. I would use a weighted hem tape to ensure the curtains hang straight despite being off the floor.
Final Checklist
Before you head to the store or click “buy,” run through this quick checklist to ensure you have covered all your bases.
- Measure Width: Have I accounted for stackback (10+ inches past the frame on each side)?
- Measure Height: Did I measure from my desired rod height, not just the top of the window frame?
- Fullness Check: Am I buying enough panels to achieve 2x fullness?
- Functionality: Do I need blackout lining for privacy, or light-filtering for ambiance?
- Hardware: Is my rod diameter at least 1 inch thick to prevent bowing?
- Hem Style: Have I decided on hovering vs. touching based on my cleaning habits?
- Fabric Care: Is the fabric washable if it is near the dining table?
FAQs
Should dining room curtains match the wall color?
They don’t have to match exactly. If you want the room to feel larger and airier, choose a curtain color close to your wall paint. This reduces visual contrast and makes the boundaries of the room disappear. If you want to frame the view or add drama, choose a contrasting color or a bold pattern.
Do I need sheers and drapes together?
Layering is a great “pro” move. I often install a double rod with sheers on the back and heavier panels on the front. This gives you privacy during the day without blocking light, and full closure at night. It also adds insulation to drafty windows.
How far should the dining table be from the curtains?
Ideally, you want at least 36 inches of clearance between the edge of your table and the wall or window. This allows guests to pull out chairs comfortably. If your space is tighter, choose flat panel curtains rather than bulky, voluminous ones so they don’t encroach on the seating area.
Can I use blinds and curtains together?
Absolutely. In fact, woven wood shades (bamboo or grass cloth) look fantastic paired with linen drapes. The shades provide texture and light control, while the curtains add softness and insulation. Just mount the curtain rod high enough so the curtain header clears the top of the blinds.
What rod diameter should I use?
For dining rooms, avoid skinny rods. A rod that is 0.5 inches or 0.75 inches thick often looks cheap and can bow under the weight of 96-inch curtains. Look for a rod that is at least 1 inch to 1.5 inches in diameter. This scale holds its own against dining furniture.
Conclusion
Choosing the right dining room curtains is about balancing the romance of the space with the reality of how you live. It is the backdrop for Thanksgiving dinners, homework sessions, and morning coffees. By paying attention to the mounting height, fabric durability, and proper fullness, you can create a room that feels architecturally sound and welcoming.
Don’t be afraid to invest in getting the length right. Whether that means moving the rod up or hemming the fabric, the vertical line of the curtain is what elevates the room’s ceiling height. Take your time measuring, buy more panels than you think you need, and enjoy the softness that textiles bring to your home.
Picture Gallery


