
5 Tips for Dining Room Hutch Decor
Dining room hutches often become the catch-all for mismatched serve ware, unread mail, and birthday candles from three years ago. It is one of the most substantial pieces of furniture in a home, yet it is frequently the most neglected in terms of styling.
When styled correctly, a hutch serves as the vertical focal point of the dining room, adding depth and personality that a simple buffet or sideboard cannot achieve. It bridges the gap between functional storage and artistic display.
I want to help you turn those shelves into a curated moment that reflects your home’s aesthetic. If you are looking for visual inspiration immediately, please scroll to the Picture Gallery at the end of this post.
1. Start with the Backdrop and Lighting
Before you place a single plate or vase, you must address the shell of the cabinet. A dark, shadowy hutch swallows decor, making your beautiful ironstone or crystal invisible.
If your hutch is wood-toned inside and out, consider creating contrast. I often paint the back panel of a client’s hutch a soft contrasting color, such as a muted sage or a warm charcoal, to make the objects pop. Alternatively, applying a peel-and-stick grasscloth wallpaper adds instant texture without a permanent commitment.
Lighting is the second critical component of the backdrop. If your unit does not have hardwired lighting, you are not out of luck.
I recommend using battery-operated LED puck lights that adhere to the underside of the shelves. Look for lights with a color temperature of 2700K (warm white) rather than 5000K (daylight), which can look sterile and blue.
Designer’s Note: The Depth Perception Trick
If your hutch is shallow (less than 12 inches deep), avoid dark paint on the back panel. Dark colors recede visually, which usually helps, but in a shallow cabinet, it can create a “black hole” effect.
Instead, use a mirror on the back panel or a very light cream paint. This reflects light and tricks the eye into thinking the piece is twice as deep as it actually is.
2. Balance Visual Weight with the “Z” Formation
One of the most common mistakes I see is “shelf lining.” This happens when items are lined up in straight rows like soldiers, or when all the heavy items are on one side.
To fix this, we use the “Z” or Zig-Zag formation. Imagine a “Z” drawn across the front of your hutch.
Place your largest, visually heaviest item (like a soup tureen or a large wooden bowl) on the bottom left. Place the next large item on the middle right shelf. Place the final anchor piece on the top left.
This forces the viewer’s eye to travel back and forth across the piece, taking in the entire display.
Once your anchors are set, fill in the gaps with medium and small items. Keep the visual weight heavier at the bottom of the hutch.
If you put heavy ceramic pitchers on the top shelf and delicate glassware on the bottom, the furniture will feel top-heavy and unstable.
Common Mistakes + Fixes
Mistake: Using items that are all the same height.
Fix: Use risers. I frequently use old hardcover books (with jackets removed) to lift bowls or small sculptures. You can also buy acrylic or wooden risers. Varying the height creates a dynamic landscape rather than a flat horizon.
3. Grouping and Layering for Depth
A hutch is a three-dimensional space, yet people often style it like a two-dimensional flat lay. You have depth to work with, so use it.
Start by leaning flat items against the back of the shelf. This could be large platters, artwork, or cutting boards. This creates your background layer.
Next, place your “anchor” items in front of those leaning pieces. This might be a stack of dinner plates or a large pitcher.
Finally, add a “garnishing” layer in the very front. This includes small pinch bowls, napkin rings, or a small succulent.
When grouping items, stick to the rule of odds. Groups of three or five items generally look more natural and pleasing to the human eye than groups of two or four.
What I’d Do in a Real Project: The Cluster Strategy
If I am styling a client’s farmhouse hutch, here is my go-to cluster formula for a single shelf:
- Layer 1 (Back): Lean a large white oval serving platter against the back wall.
- Layer 2 (Middle): Place a stack of 4-5 salad plates slightly off-center to the left.
- Layer 3 (Front/Right): Place a small wooden mortar and pestle to the right of the plates, slightly overlapping the view of the platter behind it.
This creates a triangular composition that feels collected, not cluttered.
4. Mixing Materials and Textures
A hutch filled entirely with white porcelain can look clean, but it can also look sterile and flat. A hutch filled only with books looks like a library, not a dining room.
The secret to a warm, inviting display is mixing materials. You want a balance of hard and soft, shiny and matte.
Try to include at least three of the following texture categories in your display:
- Ceramics/Glass: Plates, bowls, pitchers, vases.
- Metals: Silver candlesticks, pewter mugs, brass bowls, copper cookware.
- Organics: Wood cutting boards, woven baskets, rattan chargers.
- Paper/Textiles: Books, linen napkins, table runners folded neatly.
- Life: Preserved boxwood balls, dried wheat, or a trailing pothos plant (if there is sunlight).
If you have a lot of glass shelving, incorporate wood or woven textures to ground the look. If you have wooden shelves, use plenty of glass, crystal, or white ceramic to bounce light around.
Practical Constraints: The Earthquake/Toddler Factor
If you live in an earthquake zone or have active children, stability is not optional. I use a product called museum wax (or museum putty) on almost every job.
Place a small ball of wax on the bottom of breakable items. It secures them firmly to the shelf but removes cleanly when you need to rearrange.
For leaning plates, never rely on gravity alone. Use proper plate stands or ensure the plate is tucked behind a heavy stack of bowls that acts as a stopper.
5. Embrace Negative Space (The 60/40 Rule)
The fear of empty space leads to overcrowding. When a hutch is stuffed 100% full, the eye has nowhere to rest, and the result is visual chaos.
I follow a loose 60/40 rule. Fill about 60% of the available shelf space and leave 40% empty.
Negative space highlights the objects you do choose to display. It makes a generic white pitcher look like a sculptural art piece.
Leave space between your groupings. If you have a cluster of items on the left and a cluster on the right, leave a clear 4-6 inch gap in the center.
This rule also applies to the vertical space between shelves. If you can adjust your shelves, ensure there is at least 2 to 3 inches of clearance above your tallest items.
If an item is scraping the shelf above it, the arrangement will feel cramped and claustrophobic.
Designer’s Note: Top of the Hutch
Clients always ask me: “What do I put on top of the hutch?”
My honest answer is usually: Nothing.
In modern and transitional design, leaving the top clear emphasizes the architecture of the piece and the height of the ceilings. Placing fake ivy or dusty baskets on top usually dates the room.
However, if you have very high ceilings (over 9 feet) and the hutch feels short, you can add large-scale woven baskets. They must be substantial in size. Small items on top of a hutch look like clutter you forgot to put away.
Final Checklist: The “Edit” Phase
Once you have styled the hutch, step back ten feet. Use this checklist to refine the look:
- The squint test: Squint your eyes. Does one side feel heavier or darker than the other? If so, move a large item to balance it out.
- Color distribution: Is all your blue decor on one shelf? Spread the color diagonally across the unit.
- Functionality check: Can you easily reach the dinner plates you use every day? Keep daily items at waist/chest height.
- Texture check: Do you have too much glass? Add a wooden bowl or a stack of books to warm it up.
- Breathing room: Did you leave enough empty space? If in doubt, remove one item from every shelf.
FAQs
How do I style a hutch with glass doors vs. an open hutch?
With glass doors, you have to be more conscious of glare. Avoid placing mirrors inside a glass-doored hutch, as the double reflection can be distracting. You also need to keep the edges of the display tidy, as you will view them from angles. With open hutches, you have to dust more frequently, so I recommend keeping the very top shelves for items you use rarely, so you aren’t constantly reaching up into the dust zone.
Can I mix different china patterns?
Absolutely. In fact, mismatched china often looks more high-end and curated than a boxed set. The key is a unifying thread. This could be a color (e.g., all blue and white patterns) or a material (e.g., all ironstone). Use your neutral plates (white or cream) as the separators between busy patterns to give the eye a break.
What if my hutch is very small?
For narrow or small hutches, focus on verticality. Stacks are your friend. Stack cups and saucers, stack bowls, and stack cake plates. Avoid wide, sprawling arrangements. Stick to a tighter color palette (2-3 colors max) to prevent the small space from feeling chaotic.
How do I handle unsightly cords from lamps or electronics?
If you place a small lamp on the hutch buffet, cord management is vital. I use small adhesive cord clips to run the wire down the back leg of the hutch so it is invisible from the front. If there is no outlet nearby, simply stick to battery-operated lighting options to avoid the cord issue entirely.
Conclusion
Styling a dining room hutch is about finding the sweet spot between a functional storage unit and a beautiful display case. It requires patience and a bit of trial and error.
Don’t be afraid to clear the shelves completely and start fresh. Treat your hutch as a rotating gallery. Change the heavy serving bowls for lighter glass in the summer, or bring in pinecones and brass in the winter.
By following the principles of layering, balance, and negative space, you can transform that looming piece of furniture into the highlight of your dining room.
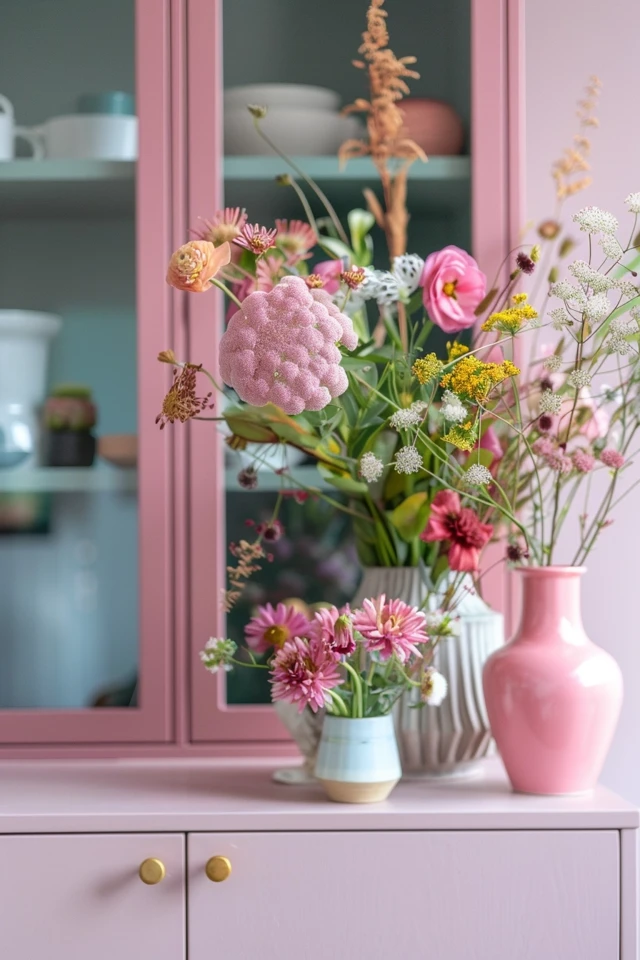
Picture Gallery


