
Title: 5 Tips for Outdoor Yoga Deck Design
Introduction
Creating a dedicated space for yoga in your backyard transforms a standard exercise routine into a grounding, sensory experience. There is something profoundly different about feeling the breeze on your skin during a warrior pose or watching the leaves move while in savasana. However, simply placing a mat on the grass often results in uneven footing, damp knees, and distractions.
A purpose-built yoga deck provides the stability of a studio with the healing atmosphere of nature. In my years designing outdoor living spaces, I have found that the difference between a deck you rarely use and one that becomes your daily sanctuary lies in the subtle details of orientation, material texture, and privacy. It is not just about building a platform; it is about curating a specific environment.
If you are looking for visual inspiration, scroll down to the end of this post for a curated Picture Gallery featuring some of my favorite outdoor sanctuary designs.
Tip 1: Site Selection and Solar Orientation
The most common mistake homeowners make is placing their yoga deck in a “leftover” corner of the yard without analyzing the elements. In interior design, we talk about flow; in landscape design, we talk about microclimates. You need to understand how sun, wind, and noise interact with your specific plot of land.
For yoga specifically, solar orientation is critical. Ideally, you want to face East or Southeast. This orientation captures the soft, early morning light, which is perfect for traditional Sun Salutations, without subjecting you to the harsh, glaring heat of the afternoon sun. If you are an evening practitioner, a North-facing orientation offers consistent, even light throughout the day, keeping the deck cooler.
Wind is another invisible factor that ruins balance. Avoid placing your deck in a wind tunnel, which often occurs between two structures like your house and a detached garage. If your only available spot is windy, plan for a windbreak using landscaping or a slat wall.
Designer’s Note:
I once had a client insist on placing their deck under a large oak tree for shade. While it looked romantic, they spent 10 minutes sweeping acorns and bird droppings off the deck before every practice. If you build under a tree, accept the maintenance or install a shade sail instead.
Tip 2: Choosing Materials That Are Skin-Friendly
Unlike a dining deck where you wear shoes, a yoga deck interacts directly with your bare hands, feet, and often your face. The material you choose effectively becomes your second skin. Standard pressure-treated pine often splinters over time and can feel rough to the touch, making it a poor choice for this specific application.
I generally recommend two paths for yoga decks: high-end tropical hardwoods or specific PVC composites. Tropical woods like Ipe or Cumaru are incredibly dense, resistant to rot, and can be sanded to a furniture-grade smoothness. They feel organic and warm, but they require annual oiling to maintain that rich color.
If you prefer low maintenance, look for capped polymer or PVC decking. However, you must be careful with heat retention. Dark composite boards can reach temperatures over 150 degrees Fahrenheit in direct summer sun, which will burn your skin. Always choose a light color like “biscuit” or “sand,” and ask the manufacturer specifically about their “heat build” rating.
Common Mistakes + Fixes:
Mistake: Using exposed screws or nails.
Fix: Always use a hidden fastener system. This clips the boards together from the side or bottom. It ensures a perfectly smooth surface with no metal heads to snag your yoga mat or burn your skin.
Tip 3: Dialing in the Dimensions and Clearances
Scale is the hardest thing to visualize on an empty lawn. A standard yoga mat is roughly 24 inches wide by 68 inches long. If you build a deck that is just slightly larger than a mat, you will feel constricted and likely fall off the edge during wide-legged poses or inversions.
For a comfortable solo practice, I recommend a minimum deck size of 8 feet by 8 feet. This allows you to rotate your mat in any direction and still have ample flooring around you. It also provides space for props like blocks, straps, and water bottles without them becoming trip hazards.
If you plan to practice with a partner or an instructor, you need to account for “wingspan clearance.” You generally want at least 4 to 5 feet between mats to ensure you don’t smack hands during lateral movements. A 12-foot by 12-foot space is usually the “sweet spot” for a two-person sanctuary.
What I’d Do in a Real Project:
I always mark the proposed deck outline with landscaping spray paint and have the client do a full practice on the grass within those lines.
1. Do a wide-legged forward fold.
2. Lie down with arms spread wide.
3. Check if the visual boundaries feel claustrophobic.
If the budget allows, adding just 18 inches to the perimeter often makes the difference between “cramped” and “luxurious.”
Tip 4: Sensory Design and Grounding Elements
Interior design principles regarding mood apply outdoors as well. A yoga deck should engage the senses without overwhelming them. This starts with the foundation. I prefer keeping yoga decks low to the ground—under 30 inches high—so we can avoid mandatory railing codes in most municipalities.
Railings create a visual cage. By keeping the deck floating just 6 to 12 inches off the grade, you maintain an uninterrupted visual connection with the garden. This “floating” look also helps with the psychological feeling of grounding.
Sound is the next layer. Traffic noise can kill the meditative vibe instantly. If you live in a noisy area, incorporate a water feature nearby. The frequency of splashing water (white noise) is excellent at masking the frequency of distant cars. You don’t need a massive pond; a simple recirculating urn fountain placed within 10 feet of the deck works wonders.
Finally, consider the perimeter planting. Use plants that have “soft movement” in the breeze, such as ornamental grasses (Karl Foerster or Maiden Grass) or Bamboo (contained in planters to prevent spreading). The sound of rustling grass is naturally soothing and provides a soft visual screen for privacy.
Pro-Level Rule of Thumb:
Keep pollinator plants like lavender or bee balm at least 4 feet away from the edge of the deck. While we love nature, you do not want to worry about stepping on a bee while moving into a lunging pose.
Tip 5: Lighting and Ambience for Evening Practice
Many of my clients are busy professionals who can only practice after work, making lighting a functional necessity, not just an aesthetic choice. However, standard floodlights are the enemy here. You never want a light source shining directly into your eyes while you are lying on your back.
The goal is indirect, low-level illumination. Focus on “moonlighting” or step lighting. Small, shielded LED fixture lights installed on the perimeter fascia of the deck cast a glow across the floor surface without blinding you.
Another successful technique is uplighting the trees or shrubs surrounding the deck. By bouncing light off the foliage, you create a soft, ambient glow that reflects back onto the practice space. This provides enough light to see your footing but keeps the atmosphere calm and celestial.
Technical Spec:
Stick to a color temperature of 2700K (Kelvin). This is a warm, golden light. Anything higher (3000K or 4000K) will look too blue and clinical, which signals your brain to wake up rather than wind down.
Final Checklist: Designing Your Outdoor Shala
Before you break ground or buy lumber, run your plan through this quick checklist to ensure you haven’t missed a critical functional detail.
Site Analysis:
Have I tracked the sun path? (Ensure shade during your preferred practice time).
Is the ground level and stable?
Is there a view I want to face? (Orient the “front” of the mat that way).
Material Check:
Is the decking splinter-free?
Is the color light enough to resist scorching heat?
Have I specified hidden fasteners?
Layout & Flow:
Is the deck at least 8×8 feet for a single user?
Is it low enough to skip railings (check local codes)?
Is there a designated spot for a water bottle or speaker?
Atmosphere:
Is there a windbreak or privacy screen?
Is the lighting indirect and dimmable?
Are noisy elements (AC units, pool pumps) baffled or masked?
FAQs
What is the best way to clean a yoga deck to keep it safe for mats?
Avoid harsh pressure washing, which can raise the grain of wood and cause splinters. Instead, use a soft-bristle brush and a mild soap-and-water solution. If you have mildew (which makes decks slippery), use a specialized wood cleaner that contains a mildewcide, but rinse it thoroughly so no chemical residue touches your yoga mat.
Can I leave my yoga props outside?
Generally, no. Even “weather-resistant” mats will degrade quickly with UV exposure and moisture. I often design a waterproof deck box nearby or a built-in bench with a hinged lid to store mats, blocks, and straps. This keeps them dry and spider-free while making them easily accessible.
How do I handle bugs during evening practice?
This is a reality of outdoor design. I recommend planting natural repellents like lemongrass, marigolds, and mint in pots around the perimeter. For a more robust solution, install a few low-profile tiki torches with citronella fuel around the perimeter, or use a Thermacell radius repeller, which is odorless and silent.
Should I put a rug on my outdoor yoga deck?
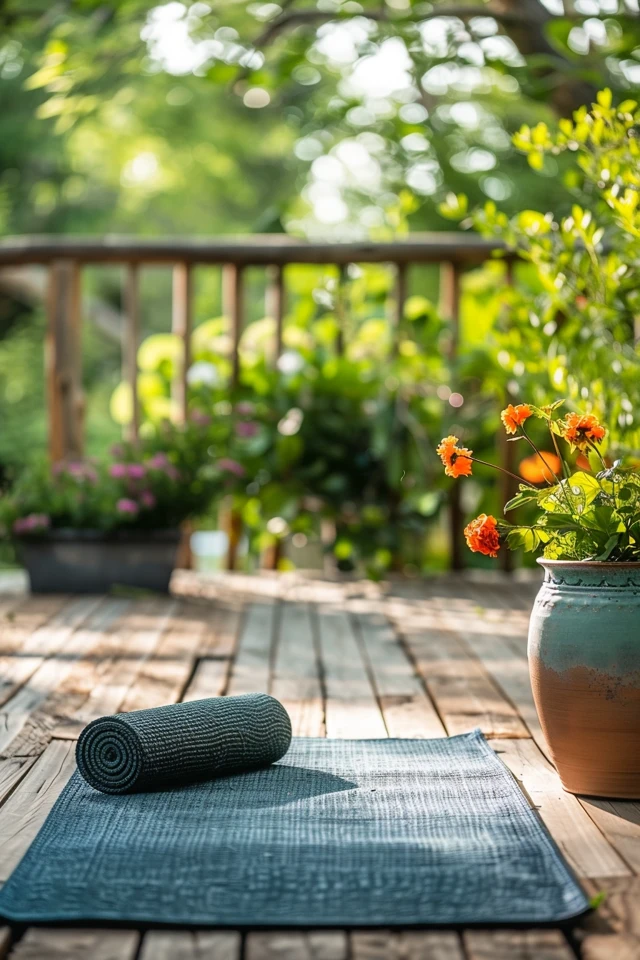
While an outdoor rug adds style, I usually advise against placing your yoga mat on top of a rug. It creates an unstable surface that can slip underfoot. It is safer to place your sticky yoga mat directly on the stable decking. You can use rugs in the corners for aesthetics or a seated meditation area, but keep the active practice zone clear.
Conclusion
Building an outdoor yoga deck is an investment in your physical and mental well-being. It encourages you to step away from the screens and stagnant air of the indoors and reconnect with the rhythm of the natural world.
By paying attention to the sun’s path, choosing materials that honor the tactile nature of yoga, and sizing the space for freedom of movement, you create more than just a deck. You create a destination. When the design is right, the space pulls you out there, making the discipline of a daily practice feel less like a chore and more like a retreat.
Picture Gallery


