
Affordable Sloped Garden Ideas on a Budget
Designing a garden on a slope is one of the most intimidating challenges a homeowner faces. Gravity works against you, soil erodes during heavy rains, and the cost of professional hardscaping can drain a renovation budget faster than almost any other project. However, a sloped yard also offers opportunities for depth, drama, and distinct zoning that flat yards simply cannot provide.
I have worked with many clients who initially viewed their uneven backyard as a curse. One particular project involved a steep 30-degree incline that the owners wanted to flatten completely. After pricing out the concrete retaining walls and excavation, the quote came in at over $40,000. We pivoted to a terraced approach using timber and strategic planting, bringing the cost down by nearly 70% while creating a much more organic look. For visual inspiration on terracing and planting layouts, make sure to check out the curated Picture Gallery at the end of this blog post.
The secret to managing a slope on a budget is working with the land rather than forcing it into submission. By using cost-effective materials, understanding proper drainage, and prioritizing specific zones, you can turn a treacherous hill into a tiered sanctuary. This guide covers the practical steps, measurements, and design rules I use to tackle gradients without breaking the bank.
1. Understanding the Grade and Drainage First
Before buying a single paver or plant, you must understand the severity of your slope. In professional landscape design, we look at the “rise over run.” This helps determine if you need structural engineering or if you can handle the project as a DIY or handyman job.
If your slope rises less than one foot for every three feet of horizontal distance, you are in the safe zone for soft solutions like ground cover and minor terracing. If it is steeper than 30 degrees, you have to be much more careful about soil stability. Ignoring the physics of the slope is the number one reason budget garden projects fail within two years.
Water management is the unsexy hero of sloped gardens. When it rains, water accelerates down the hill, taking your expensive topsoil and mulch with it. Before building, observe where the water flows during a storm. You likely need to install a French drain or a dry creek bed at the base of the slope to direct water away from your home’s foundation.
Designer’s Note: The Rule of Thirds
When dealing with a massive slope, don’t try to terrace the whole thing at once. I apply the rule of thirds. Design the top third (usually nearest the house) for high use. Design the bottom third for visuals or storage. Leave the middle third as low-maintenance stabilization planting. This drastically cuts down on the expensive materials needed for pathways and retaining walls.
2. The Tiered Approach: Timber Retaining Walls
Poured concrete and natural stone masonry are the gold standards for retaining walls, but they are incredibly expensive. For a budget-friendly alternative, pressure-treated timber or railroad ties are your best friends. They provide a warm, natural aesthetic that softens the landscape rather than making it look like a fortress.
You can create a series of “mini-terraces” rather than one giant wall. A wall that is three feet high or lower usually does not require a structural engineer or a permit in many municipalities (always check local codes). By building two 2-foot walls separated by a garden bed, you achieve a 4-foot rise without the heavy reinforcement costs.
When installing timber walls, use “deadmen” anchors. These are pieces of timber running perpendicular to the wall, buried into the slope behind it. They use the weight of the soil to hold the wall in place. Even for a short wall, this ensures it won’t bow outward after a few freeze-thaw cycles.
Materials to Consider
- Pressure-Treated 4x4s or 6x6s: The most economical structural wood. Staining them black or dark charcoal can make them look modern and high-end.
- Gabion Baskets: These are wire cages filled with rocks. You can often fill the back (unseen) part with cheap rubble and use nice river rock only for the visible face.
- Corten Steel Edging: For smaller slopes (under 12 inches of rise), steel strips can hold back soil and create clean, modern lines.
3. Budget-Friendly Pathways and Switchbacks
Stairs are expensive to build because they require precise footings and level treads. On a steep slope, a straight run of stairs can also feel exhausting to climb. The budget solution is the switchback path. This mimics a hiking trail, traversing the slope in a zig-zag pattern to reduce the steepness of the climb.
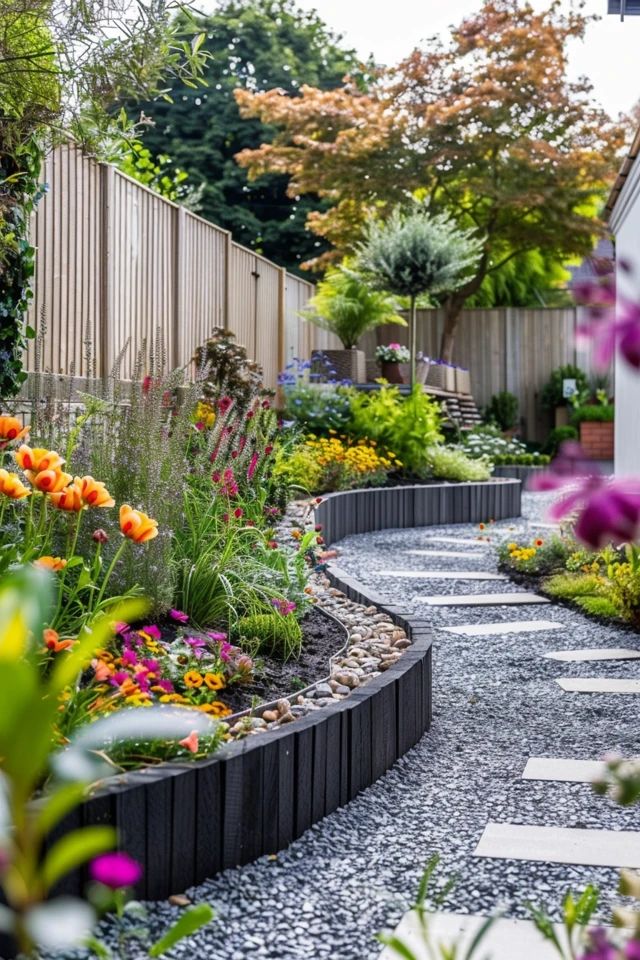
For the path surface, avoid pavers which require a perfectly level sand base. Instead, use crushed gravel or decomposed granite. These materials are permeable, meaning water drains through them rather than washing over them. They also shift slightly with the ground, so you won’t get cracks like you would with concrete.
To keep the gravel in place on a slope, you must install rigid edging on both sides. I prefer treated lumber or flexible metal edging. If the path is steeper than 10 degrees, insert a “step” every few feet using a 4×4 timber buried flush with the path surface. This acts as a brake for the gravel, stopping it from migrating to the bottom of the hill.
Key Measurements for Pathways
- Minimum Width: Keep main paths at least 36 inches wide. This allows two people to pass or one person to carry gardening tools comfortably.
- Step Height: If you build stairs, the riser height should never exceed 7.5 inches. 6 inches is the sweet spot for a comfortable garden stroll.
- Landing Depth: If you have a long run of stairs, place a landing every 7 to 9 steps. The landing should be at least 36 inches deep.
4. Softscaping: Erosion Control with Plants
Plants are significantly cheaper than hardscaping materials. The strategy here is to use plants that have aggressive root systems to act as a living net, holding the soil together. This is often called a “living wall.”
Ground covers are essential. Creeping varieties like Juniper, Creeping Phlox, or Vinca Minor (check for invasiveness in your area) form a dense mat that prevents rain from hitting the soil directly. This reduces splash erosion and suppresses weeds, which are notoriously difficult to pull on a steep hill.
For visual interest, avoid planting in rows. Plant in drifts or clusters of 3, 5, or 7. This looks more natural and ensures that if one plant dies, it doesn’t leave a gaping hole in a geometric pattern. Incorporate native ornamental grasses; they usually have deep taproots that are excellent for stabilization and require very little water once established.
Common Mistakes + Fixes
- Mistake: Planting grass on a steep slope.
Fix: Mowing a slope is dangerous and difficult. Replace turf with low-maintenance ground cover or wildflower meadows that only need to be cut back once a year.
- Mistake: Ignoring mulch migration.
Fix: Standard wood chips will float away in rain. Use “gorilla hair” mulch (shredded redwood or cedar) which knits together and sticks to the slope, or use heavier pine straw.
5. Creating Usable Destinations: The Floating Deck
One of the best ways to reclaim a sloped yard is to stop trying to level the ground and instead build over it. Excavating a flat spot for a patio requires heavy machinery and retaining walls. A “floating” deck, supported by posts, is often much cheaper and less disruptive to the land.
You can create a destination at the bottom of the garden or a viewing platform at the top. Because the deck sits on piers, water flows naturally underneath it, solving drainage issues instantly. For a budget approach, look for pressure-treated pine decking rather than expensive composites or exotic hardwoods like Ipe.
When furnishing a deck on a slope, think about orientation. If you are overlooked by neighbors, use a pergola or a shade sail to create a ceiling. This provides privacy and makes the space feel like an outdoor room. Define the perimeter with railing planters to bring greenery up onto the structure, softening the hard edges of the wood.
6. Lighting and Atmosphere on a Budget
A sloped garden can look like a black void at night if not properly lit. Lighting is also a critical safety feature for uneven terrain. You do not need an expensive hard-wired low-voltage system to get a professional look. Modern solar technology has improved immensely.
Use solar spike lights along the pathways, but don’t create a “runway” effect by placing them evenly on both sides. Stagger them for a more organic feel. Use solar spotlights to uplight the canopies of trees or the texture of your retaining walls. This adds depth and makes the garden feel larger.
String lights are another budget-friendly tool. By hanging them in a zig-zag pattern over a lower terrace, you create a false ceiling that makes the space feel intimate. Ensure the poles for string lights are cemented into the ground or securely attached to a fence, as wind loads can be high on open slopes.
What I’d Do in a Real Project: The Mini Checklist
If I were handed a $5,000 budget for a sloped backyard renovation, this is exactly how I would allocate it:
- Stabilize (20%): Fix drainage issues first. Install a simple French drain and secure the steepest areas with jute netting to stop erosion.
- Access (30%): Build a gravel switchback path with timber edging. It’s the cheapest way to get from point A to point B safely.
- Zoning (30%): Construct one small 10×10 floating timber deck in the sunniest spot for a table and chairs.
- Planting (20%): Spend the rest on flats of plugs (small starter plants) for ground cover. They are cheaper than gallon pots and establish faster.
Final Checklist for Your Sloped Garden
Before you break ground, ensure you have ticked these boxes to avoid costly surprises later.
- Check the grade: Have you measured the rise and run? Slopes over 30 degrees may need professional help.
- Drainage plan: Do you know where the water goes? Ensure it doesn’t pool against your house or your neighbor’s fence.
- Material selection: Have you chosen materials that are easy to carry? Hauling heavy stone up a hill is exhausting and labor-intensive.
- Safety first: Are your paths wide enough? Do you have railings on drops higher than 30 inches?
- Plant choice: Have you selected drought-tolerant plants with deep roots?
- Utilities check: Call 811 (in the US) to check for buried utility lines before digging into the slope.
FAQs
What is the cheapest way to level a sloped garden?
The “cut and fill” method is usually the cheapest. You dig out soil from the high side and move it to the low side to create a flat surface. However, you will need to build a retaining wall to hold the soil on the low side. Using timber sleepers is the most cost-effective material for this wall.
Can I build a retaining wall myself?
Yes, provided the wall is under 3 feet (check local codes). Walls higher than that withstand immense pressure and usually require engineering. Sticking to low, terraced walls is safer and more manageable for DIYers.
How do I stop mulch from sliding down the hill?
Avoid “nugget” style bark, which rolls like marbles. Use shredded mulch (often called gorilla hair) or pine straw. These interlock and create a mat. You can also lightly spray the mulch with water immediately after laying it to help it settle and bond.
Is gravel a bad idea for a sloped driveway or path?
Round pea gravel is a bad idea because it acts like ball bearings underfoot. You must use “crushed” gravel with “fines” (stone dust). When compacted, this locks together to form a firm surface that won’t slide easily.
Conclusion
Transforming a sloped garden on a budget is about strategy, not brute force. It requires seeing the incline not as a problem to be flattened, but as a feature to be highlighted. By utilizing tiers, smart planting, and permeable materials like gravel and timber, you can create a dynamic, multi-level outdoor space that feels far more custom and expensive than a flat square of grass.
Start small. Tackle one terrace or one pathway at a time. Establish your drainage and ground cover first to protect the land, then add the fun elements like decks and lighting. With patience and the right measurements, your sloped yard can become the most interesting room in your home.
Picture Gallery


