Armoire Styling Tips: How to Decorate Top of Armoire
One of the most frequent design dilemmas I encounter in client homes involves that awkward, empty gap between the top of a tall piece of furniture and the ceiling. Armoires are fantastic for storage and anchoring a room, but they often leave a void that feels unresolved. If you leave it empty, the room can feel cold or unfinished; if you clutter it, the space feels chaotic and top-heavy.
Finding the balance requires an understanding of scale, negative space, and practical functionality. You want to draw the eye upward without creating a distraction that competes with the rest of the room’s focal points. It is a subtle art that blends architecture with décor to make your ceilings feel higher and your furniture feel more intentional.
If you are looking for visual inspiration to guide your styling, make sure to check out the Picture Gallery at the end of this blog post.
1. Assess Your Vertical Real Estate: Scale and Proportion
Before buying a single vase or basket, you need to measure the gap between the top of the armoire and the ceiling. This measurement dictates everything you can and cannot do.
If you have less than 6 to 8 inches of space, my professional advice is usually to leave it empty. Trying to squeeze small objects into a tight gap creates visual tension and looks cluttered rather than styled. In these tight scenarios, let the architecture breathe.
For gaps between 10 inches and 2 feet, you have the ideal “styling zone.” This offers enough height to create a proper vignette without the items looking lost.
If you have soaring vaulted ceilings with 3 or more feet of empty space, you need substantial, large-scale objects. Small knick-knacks will disappear visually. In this case, think about architectural salvage pieces, oversized baskets, or large artwork that leans against the wall.
The Pyramid Rule
When styling a flat surface high above eye level, you generally want to create a pyramid shape or a triangle composition. This means the highest point should be roughly in the center or slightly off-center, with lower items tapering off to the sides.
This shape guides the eye comfortably rather than forcing it to scan a flat, straight line.
Visual Weight
Consider the color and “heaviness” of the armoire. If you have a dark, heavy mahogany piece, placing delicate, clear glass objects on top will look unbalanced.
Conversely, a white, airy linen cabinet can be overwhelmed by dark, heavy iron sculpture. Try to match the visual weight of your décor to the furniture piece itself.
2. The Holy Trinity of Armoire Decor: Baskets, Art, and Ceramics
When I am shopping for a client project, I almost always stick to three main categories for top-of-cabinet styling: woven textures, ceramics, and artwork.
Woven Storage (Baskets and Trunks)
Baskets are the workhorse of armoire styling. They add necessary texture to break up the solid wood or paint of the cabinet, and they offer secret storage.
I often use a series of identical square or rectangular baskets to create a uniform, rhythmic look. This is perfect for “quieting” a busy room.
If you choose baskets, ensure they fill about 60-70% of the vertical space. If the basket is too small, it looks like an afterthought.
Vintage suitcases or trunks are another favorite for farmhouse or eclectic interiors. Stack two vintage leather suitcases to add height and history to the piece.
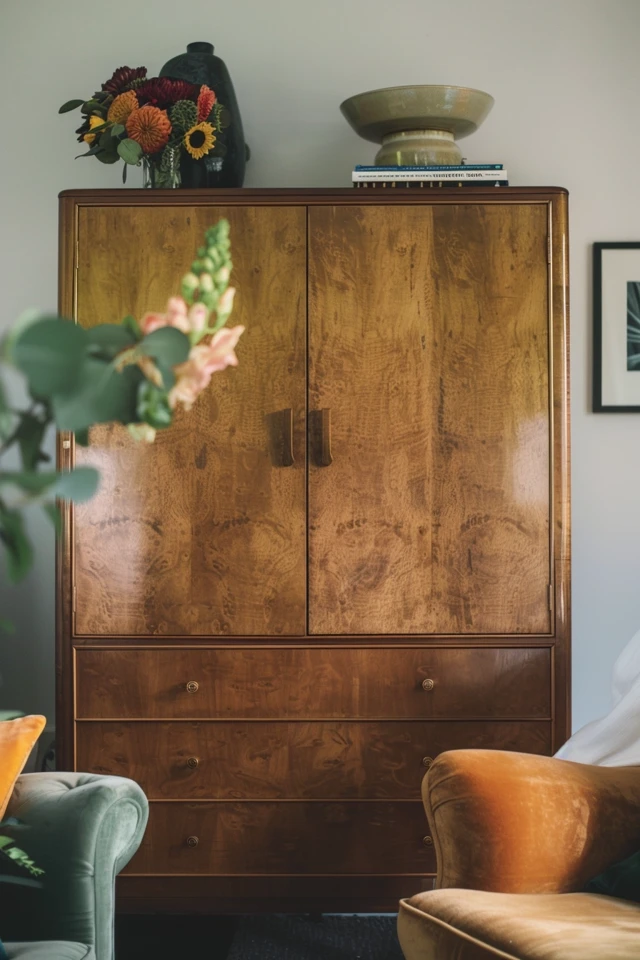
Ceramics and Pottery
Sculptural pottery is excellent for modern or transitional spaces. I prefer grouping a collection of three vessels in varying shapes but the same color palette (e.g., all matte white or all terra cotta).
Vary the heights significantly. You want one tall vessel, one medium, and one low, wide bowl. This variation keeps the eye moving.
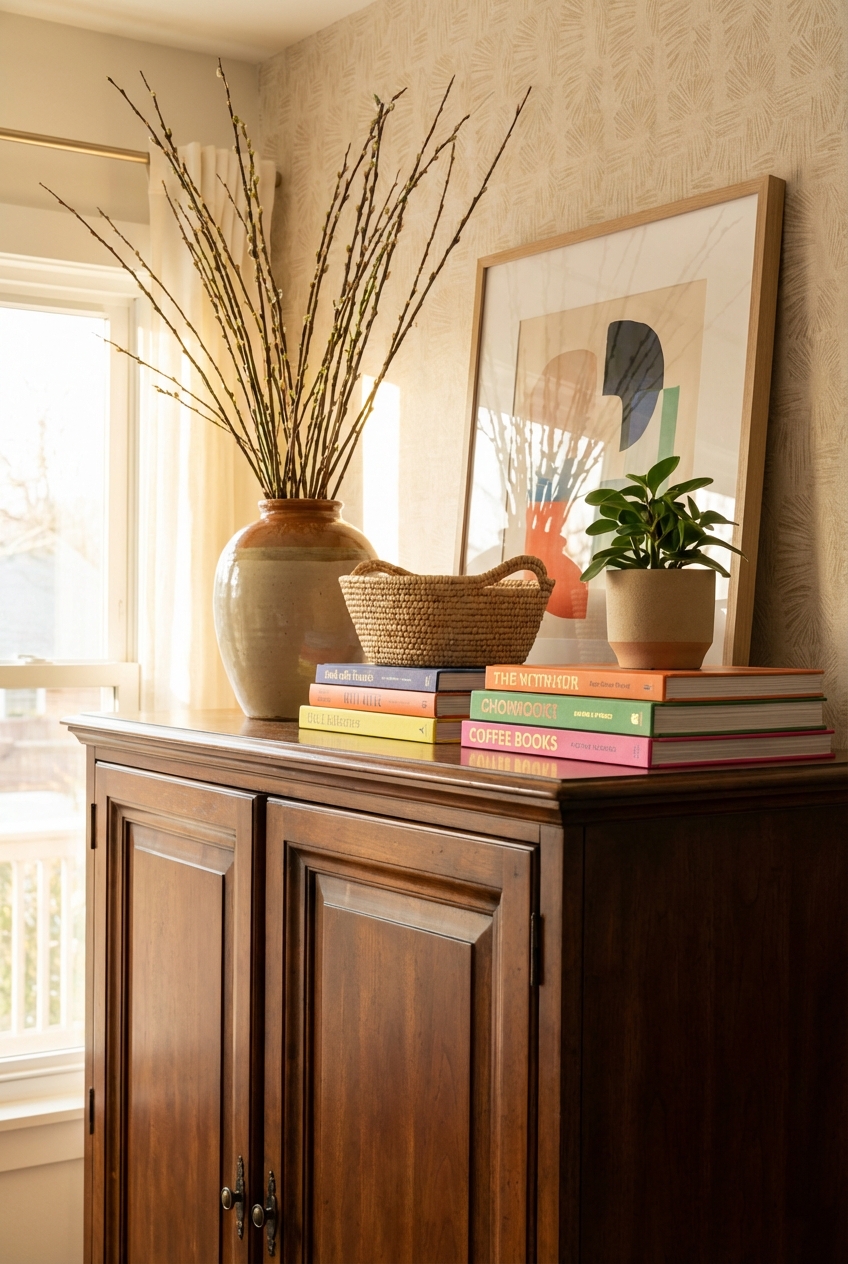
Leaning Art
You do not need to hammer nails into the wall above an armoire. Simply leaning framed art is a sophisticated, relaxed look.
Layering is key here. Place a larger, simpler piece in the back, and overlap it slightly with a smaller frame in the front.
Ensure the art is large enough to be read from the floor. Tiny 5×7 frames will be unidentifiable from that distance; stick to 11×14 or larger.
3. Introducing Life: Plants and Greenery
Greenery softens the hard edges of large furniture. It bridges the gap between the manufactured wood of the armoire and the architecture of the room.
The Right Plants for High Places
Real plants are difficult to water when they are seven feet off the ground. Unless you are extremely disciplined with a stepladder, I often recommend high-quality faux plants for this specific location.
If you do use real plants, choose drought-tolerant varieties like Pothos or Snake Plants (Sansevieria). Pothos is particularly lovely because its trailing vines draw the eye down, connecting the top of the armoire to the main body of the furniture.
Placement and Pots
Don’t center a single plant. Place a trailing plant on one of the outer corners of the armoire.
This softens the rigid 90-degree angle of the furniture corner.
Use lightweight pots. Resin or fiberglass pots that look like stone are safer than heavy ceramic, especially if you live in an earthquake-prone area or have adventurous cats.
4. Lighting the Void
One aspect that is often overlooked in armoire styling is lighting. The space above tall furniture can become a dark cavern at night, absorbing the room’s light.
Uplighting
Placing a small can light or a hidden LED strip on top of the armoire can wash the ceiling with light. This makes the room feel taller and more expansive.
This is a trick we use in hospitality design constantly. It creates ambient glow without the harshness of overhead recessed lighting.
Battery-Operated Solutions
If you don’t have an outlet nearby, use rechargeable battery-operated puck lights. You can hide them behind a large vase or basket.
Point the light toward the wall or ceiling, not out toward the room. You want a glow, not a spotlight in your eyes.
5. Creating Vignettes: Step-by-Step Styling Logic
When it comes time to actually arrange the items, do not just line them up in a row. This creates the “toy soldier” effect, which looks stiff and unnatural.
The Triangle Method
Group items in odd numbers, usually threes or fives. Establish your highest point first.
For example, place a large woven basket on the left side. This is your anchor.
Next, lean a piece of art slightly behind the center point, but overlapping the visual space of the basket.
Finish with a lower object, like a wooden bowl or a low planter, on the right side to taper the view down.
Depth and Layering
Utilize the depth of the armoire top. Pull some items forward to the very edge and push others back against the wall.
This creates shadows and dimension. If everything is pushed against the wall, the display will look flat and two-dimensional.
Designer’s Note: Safety and Practicality
A Note on Safety:
In my years of practice, the biggest oversight I see is safety. If you live in California or any seismic zone, or if you have children who might climb, you must secure heavy items.
I use museum wax or earthquake putty on the bottom of every vase or ceramic piece placed high up. It is an invisible, inexpensive fix that prevents tragic accidents.
Also, consider the weight capacity of the armoire top. The roof of a wardrobe is often made of thinner plywood than the shelves. Do not load it with boxes of heavy books.