
Title: Balcony Privacy Screen Ideas for Cozy Outdoor Spaces
Introduction
There is nothing quite like stepping out onto your balcony with a morning coffee, only to lock eyes with a neighbor three floors down or feel like you are on display for the street below. Privacy is the single most important factor in transforming an outdoor area from a fishbowl into a functional living room. Without a sense of seclusion, even the most beautifully furnished balcony often goes unused because it simply does not feel relaxed or secure.
In my design practice, I treat balcony privacy not just as a way to block a view, but as an opportunity to add architectural interest and texture. Whether you are dealing with a strict HOA, a rental lease that forbids drilling, or a small budget, there is always a way to create a visual barrier that looks intentional rather than defensive. For visual inspiration, don’t miss the curated Picture Gallery included at the end of this post.
The key is layering materials and heights to create a “cocoon” effect without shutting out the sunlight or the breeze. We will explore structural screens, strategic greenery, and layout tricks that trick the eye. By the end of this guide, you will have actionable strategies to reclaim your outdoor square footage.
1. Structural Screens and Slat Walls
When you have the ability to install semi-permanent fixtures, structural screens are the cleanest and most architectural solution. Horizontal wood slat walls are currently the gold standard in modern exterior design because they provide privacy while allowing air to pass through.
The spacing of the slats is the critical detail here. In my projects, I typically specify a gap of 0.5 inches to 1 inch between boards. This spacing is tight enough to obscure the view from a distance but open enough to reduce wind load. If you build a solid wall on a balcony, you risk creating a “sail” effect that can be dangerous during storms.
For materials, cedar and redwood are naturally rot-resistant, but they require sealing every year or two to maintain their color. For a lower maintenance option, look for composite decking boards or powder-coated aluminum screens.
If you are renting or cannot drill into the exterior facade, look for freestanding privacy screens with weighted bases. These should be heavy—aim for a base weight of at least 25 to 30 pounds per linear foot if you are in a high-wind area.
Designer’s Note: The Wind Tunnel Effect
Early in my career, I designed a balcony with lightweight bamboo shades for a client on the 15th floor. The first summer storm shredded them because I hadn’t accounted for the wind tunnel effect created by high-rise buildings.
The Lesson: Always prioritize wind permeability. Hard screens must have gaps, and soft screens must be weighted or retractable. If you live above the 4th floor, assume the wind load is double what it is at street level.
2. The Living Wall: Using Plants for Screening
Plants are the most versatile tool in a designer’s kit because they soften hard edges while blocking sightlines. However, placing a few small pots on the floor will not provide coverage where you actually need it, which is usually at eye level when seated.
To get immediate privacy, you need to elevate your greenery. Use rectangular planter boxes that are at least 24 to 30 inches tall. When you add a plant that grows another 2 to 3 feet, you effectively create a 5-foot hedge that blocks neighbors without building a fence.
Bamboo is a popular choice for this, but you must choose the right variety. Always select “clumping” bamboo (like Fargesia) rather than “running” bamboo, which can crack pots and become invasive. Clumping bamboo grows vertically and stays dense, providing a lush, rustling sound that also helps mask street noise.
If you lack a green thumb, high-quality faux boxwood panels are a legitimate design solution today. I often use these on “ugly” walls or railings where real plants would struggle due to lack of sun. Zip-tie these panels directly to your metal railing for an instant, evergreen barrier that requires zero water.
Common Mistakes + Fixes
Mistake: Buying pots that are too small for the wind and sun exposure.
Fix: On a balcony, soil dries out twice as fast as it does in the ground. Use pots that are at least 18 inches in diameter. The larger volume of soil holds moisture longer and provides the weight necessary to keep the plant upright in gusts of wind.
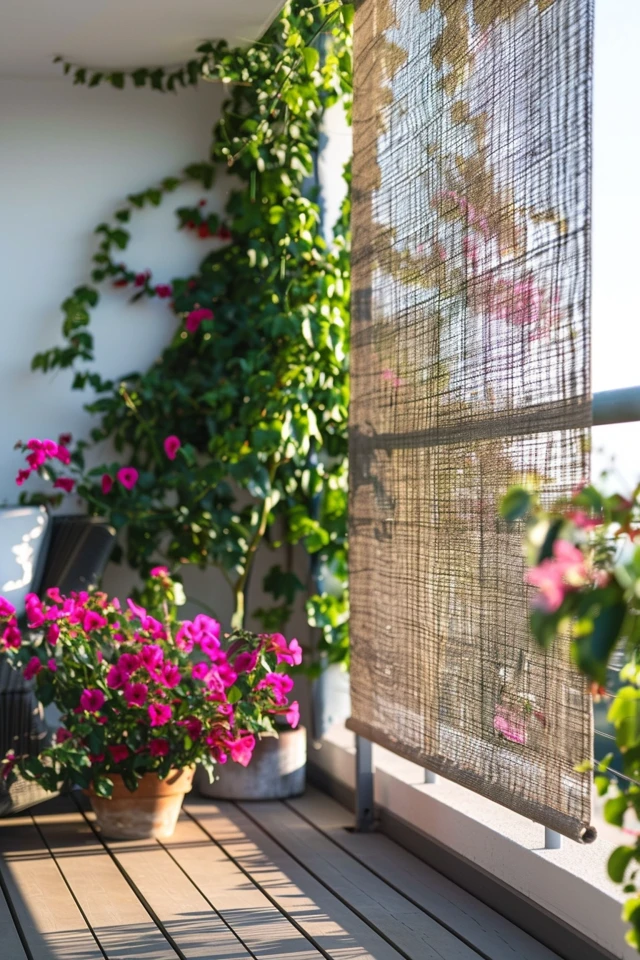
3. Textile Solutions: Curtains and Shades
Outdoor drapery brings the softness of an indoor living room to the outside, making it one of my favorite styling moves. It creates a cabana-like atmosphere that feels luxurious and intimate. This is also the best solution for renters because tension rods usually leave no marks.
When selecting fabric, material composition is non-negotiable. You must use solution-dyed acrylic fabrics (like Sunbrella) rather than standard polyester. Solution-dyed fabrics have the color locked into the fiber core, meaning they won’t fade after one season in the sun.
For installation, hang the curtains as high as possible. If you have a balcony above you, use a heavy-duty tension rod spanning the width of the opening. If you are open to the sky, you may need to install a wire system or use a cantilevered umbrella (more on that later).
One crucial functional detail is weighting the hems. Outdoor curtains will flap aggressively in even a mild breeze. I always sew a chain or small lead weights into the bottom hem of the drapery. Alternatively, you can use magnetic weights that clip onto the bottom corners to keep the fabric hanging straight.
4. Strategic Furniture Layout and “Zoning”
Sometimes the best privacy screen isn’t a screen at all, but rather how you position your furniture. The goal is to orient your seating away from the exposure point. If your neighbor is to the left, do not place your main lounge chair facing left.
Use high-backed furniture to create a physical shell around you. A “hooded” wicker chair or a high-back loveseat creates a sense of enclosure for the person sitting in it. This limits your peripheral vision of the neighbors, which psychologically makes you feel more private.
Shelving units are another excellent zoning tool. An open-back shelving unit made of teak or acacia wood can be placed perpendicular to the wall. Fill the shelves with heavy pots, lanterns, and outdoor-safe books.
This creates a “room divider” effect that filters the view rather than blocking it entirely. Just ensure the unit is secured. I recommend using L-brackets to attach it to a wall if possible, or using furniture straps if you are in a rental, to prevent tipping.
5. Lighting as a Visual Boundary
Lighting is often overlooked as a privacy tool, but it is highly effective at night. When you sit in a brightly lit space, you are on display. When you utilize low, moody lighting, you reduce the contrast between your balcony and the dark night, making you less visible to onlookers.
Avoid high-voltage overhead lights or security floodlights. Instead, aim for “pools of light” located at the floor level. Use solar lanterns placed in the corners or LED strip lighting hidden under the railing.
String lights are a classic choice, but the installation matters. Do not just drape them loosely. run them back and forth across the ceiling or railing to create a “ceiling” of light. This draws the eye upward and inward, creating a visual distraction that keeps the focus on your space rather than what is happening outside of it.
Aim for a color temperature of 2700K (warm white). This mimics the glow of candlelight and feels cozy. Anything above 3000K will look like a hospital waiting room and will make your balcony feel stark and exposed.
What I’d Do in a Real Project: A Mini-Checklist
If I were hired to design your balcony for privacy tomorrow, this is the exact order of operations I would follow. This workflow ensures that function leads form.
- Step 1: Audit the Sightlines. I sit in the chair you plan to use. I look left, right, and forward. I identify exactly where the “intrusion” is coming from. You usually don’t need 360-degree privacy; you just need to block one specific angle.
- Step 2: Check HOA/Building Codes. I read the bylaws to see if there are restrictions on “hanging items” or plant heights. Many buildings prohibit anything attached to the railing that faces the street.
- Step 3: Establish the “Hard” Layer. I place the largest elements first. This is usually the tall planters or the shelving unit. I anchor these in the corners to preserve the central floor space.
- Step 4: Layer the “Soft” Elements. Once the structure is there, I add the textiles. This might be a rug to define the zone or the curtains to soften the vertical lines.
- Step 5: Test the Wind. Before finalizing, I leave the setup for a few days. If the plants tip over or the curtains blow onto the coffee table, I add more weight or tie-backs immediately.
Final Checklist for Success
Before you buy materials, run through this quick checklist to ensure your design is practical and durable.
- Weight check: Is your freestanding screen heavy enough to withstand a 30mph gust?
- Water check: Do your planters have drainage holes? If they drip onto the neighbor below, you will have a problem. Use saucers.
- Material check: Is the wood rated for exterior use (Teak, Cedar, Acacia)? Is the metal powder-coated to prevent rust?
- Height check: Sit down in your lounge chair. Is the screen high enough to block the view at eye level? (Usually requires 48 to 60 inches).
- Egress check: Have you left at least 30 inches of clearance for walking in and out of the door?
Frequently Asked Questions
How can I get privacy on a balcony without drilling?
The best non-drill options are heavy planter boxes with tall plants (bamboo or tall grasses) and tension rod curtains. You can also use zip-ties to attach reed fencing or faux ivy rolls directly to existing metal railings. This is sturdy, cheap, and completely removable when you move out.
What is the best plant for balcony privacy in winter?
You need evergreen plants that keep their leaves year-round. Boxwood, Arborvitae, and certain varieties of Holly are excellent choices. If you live in a warmer climate, Snake Plants and Palms work well. Avoid deciduous plants like Hydrangeas, which will leave you with bare sticks from November to March.
How high can a privacy screen be?
Most municipalities and HOAs have height restrictions for aesthetic and safety reasons. A safe rule of thumb is that your screen should not exceed the height of the sliding glass door or window it sits against. Always check your specific building rules, but keeping screens under 6 feet is usually safe.
Can I use an indoor room divider outside?
Generally, no. Indoor dividers are often made of paper, untreated pine, or indoor fabrics that will rot, warp, or mold within weeks outdoors. However, you can seal a wooden indoor divider with marine-grade varnish to extend its life, but it will still require significant maintenance compared to a product designed for exterior use.
Conclusion
Creating privacy on a balcony is about more than just putting up a wall; it is about reclaiming your personal sanctuary. By combining structural elements like slat walls with the organic texture of plants and the softness of textiles, you can build a space that feels secluded and high-end.
Remember to respect the scale of your space. In a small area, a few well-placed tall elements are far more effective than cluttering the perimeter with small items. Start with the sightlines that bother you the most, anchor your design against the wind, and layer your lighting for the evening.
With these strategies, your balcony will transition from an exposed platform to a cozy extension of your home—a place where you can finally exhale.
Picture Gallery


