
Title: Beach Themed Backyard Ideas for a Sandy Oasis
Introduction
There is something inherently calming about the coast. The sound of wind moving through tall grasses, the warmth of the sun, and the soft palette of sand and water naturally lower our heart rates. As an interior and landscape designer, I often have clients ask how to replicate that vacation feeling at home without making their backyard look like a theme park. The secret lies in texture, natural materials, and a relaxed layout rather than kitschy decor.
Creating a beach-themed backyard is about capturing the essence of the seaside environment. It requires a balance of hardscaping, thoughtful planting, and durable furnishings that can withstand the elements while inviting you to lounge for hours. Whether you are landlocked in the suburbs or sitting right on the coast, the design principles remain the same. If you are looking for visual inspiration, jump to the Picture Gallery at the end of this article for a curated lookbook.
In this guide, I will walk you through the structural and stylistic steps to build your own sandy oasis. We will cover everything from managing actual sand to selecting the right textiles. My goal is to help you create a space that feels effortless, functional, and distinctly yours.
1. Laying the Groundwork: Sand, Stone, and Zoning
The biggest decision you will make in a beach-themed garden is the ground cover. While actual sand seems like the obvious choice, it comes with significant maintenance realities. If you have cats in the neighborhood or heavy leaf fall, a large open sand pit can become a headache quickly.
If you are committed to real sand, you must do it correctly to avoid drainage issues. Excavate the area to a depth of at least 8 to 12 inches. Lay down a commercial-grade landscape fabric to prevent weeds and soil mixing. I recommend using washed masonry sand or “play sand” rather than river sand, as it is cleaner and feels better underfoot.
For a more practical approach that still captures the aesthetic, I often specify Decomposed Granite (DG) in a tan or gold hue. DG packs down firm enough to walk on and place furniture on, but the loose top layer mimics the look and crunch of sand. It offers that warm, beige foundation without tracking into the house as easily as fine silica sand.
Designer’s Note:
One lesson I learned early in my career involved a client who wanted a “dune” look right up to their back door. We installed fine sand without a transition zone. Within a week, their hardwood floors were scratched. Always create a “buffer zone” of pavers, decking, or gravel between the sandy area and your home’s entrance. A rinse station or a slat-wood walkway helps knock debris off feet before entering.
2. Curating the Coastal Plant Palette
The vegetation you choose is what transforms a sandbox into an oasis. A coastal look relies heavily on movement. You want plants that sway in the breeze, creating that soothing rustling sound associated with the dunes.
Ornamental grasses are your best friends here. Varieties like Miscanthus, Fountain Grass (Pennisetum), and Blue Fescue offer incredible texture and are generally drought-tolerant. Plant them in drifts or clusters rather than straight rows to mimic how vegetation grows naturally on a shoreline.
If you live in a zone that supports them, palms add instant vertical height and tropical vibes. However, avoid over-planting them. A cluster of three palms at varying heights looks more natural than a singular soldier standing alone. If you are in a cooler climate, look for cold-hardy varieties like the Windmill Palm or use structural shrubs like Juniper to mimic the windswept look of coastal cypress.
Common Mistakes + Fixes:
- Mistake: Planting too many flowering annuals. High-maintenance flowers often clash with the rugged, relaxed vibe of a beach garden.
- Fix: Stick to a 70/30 rule. 70% of your planting should be structural grasses and evergreens. Limit flowering plants to 30%, focusing on species like Hydrangeas, Lavender, or Russian Sage that offer soft, muted colors.
3. Selecting Durable Furniture and Layouts
Furniture selection for a beach theme is about marrying comfort with extreme durability. The aesthetic should be low-slung and lounge-heavy. Think about how you behave at the beach; you are rarely sitting upright. You are reclining.
I recommend materials that weather gracefully. Teak is the gold standard because it naturally repels water and turns a beautiful silver-grey patina over time. If you prefer a more modern look, powder-coated aluminum in white or beige resists rust and stays cool to the touch. Avoid dark metals, which can become scorching hot in the sun.
Layout Rules of Thumb:
- Spacing: In a lounge area, keep your coffee table 15 to 18 inches from the edge of the sofa. This is close enough to set down a drink but far enough to walk through.
- Walkways: Ensure main traffic paths are at least 36 to 48 inches wide. Beach style implies openness; you never want to feel squeezed.
- Conversation Circles: Adirondack chairs are a classic choice. Arrange them in a circle around a fire pit. Leave 24 to 30 inches of space between the front of the chair and the fire feature for safety and legroom.
What I’d do in a real project:
If I were designing a deck for a rental property, I would skip the wicker (which can unravel) and use High-Density Polyethylene (HDPE) lumber. Brands like Polywood make heavy, durable Adirondack chairs that look like painted wood but can be pressure washed and left out all winter.
4. Lighting the Oasis for Evening Ambiance
Lighting transforms a beach backyard from a day-use space to an evening retreat. The goal is soft, warm illumination that mimics the glow of a sunset or a campfire. You want to avoid high-intensity security floodlights that wash out the texture of your landscaping.
Start with string lights. They are a staple for a reason. Zig-zag them overhead to lower the visual ceiling of the space, making it feel intimate. Ensure you buy commercial-grade strands with heavy-duty weatherproofing. The bulbs should be shatterproof LEDs with a color temperature of 2700K (Warm White). Anything higher than 3000K will look blue and clinical.
Layering Light:
- Path Lights: Place solar or low-voltage path lights every 6 to 8 feet along walkways. You don’t need a runway effect; you just need to see where the path curves.
- Up-lighting: Use well lights to shine up into the canopy of your palms or ornamental grasses. This highlights the texture and movement of the plants at night.
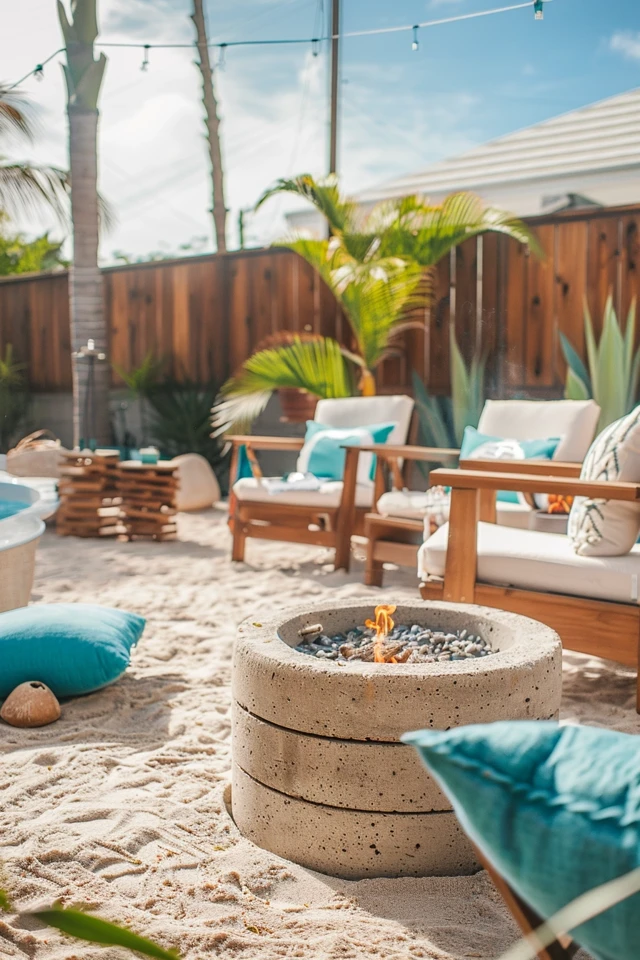
- Fire Features: A fire pit is the ultimate focal point. If you want a clean, modern beach look, opt for a gas fire table with lava rocks or glass beads. If you prefer a rustic “bonfire” feel, a steel wood-burning bowl is ideal.
5. Textiles, Shade, and Finishing Touches
This is where the design comes together. Textiles bring softness to the hardscaping and define the color palette. For a beach theme, stick to neutrals: creams, sands, soft greys, and bleached whites. You can introduce color through accents, but keep them inspired by nature—sea glass blues, sage greens, or navy.
The Importance of Shade:
You cannot enjoy a beach backyard without escaping the sun. A large cantilever umbrella is often better than a table umbrella because it allows you to shade a lounge area without a pole obstructing the view. Look for umbrellas with a heavy base (at least 100 lbs) or bolt them to the deck, as coastal vibes often come with coastal winds.
Rug Sizing Logic:
Outdoor rugs define zones. A common error is buying a rug that is too small.
- Dining: The rug must extend at least 24 inches past the table on all sides so chairs stay on the rug when pulled out.
- Lounge: At a minimum, the front legs of all seating furniture should rest on the rug. This anchors the furniture and prevents the “floating island” look.
Designer’s Note:
When buying outdoor pillows and cushions, check the fabric grade. Solution-dyed acrylic is the industry standard for resisting fading and mildew. Polyester prints will fade within one season of direct sunlight. It is worth the upfront investment to buy high-quality fabric that lasts for five years rather than replacing cheap cushions every spring.
Final Checklist
Before you start ordering sand and furniture, run through this checklist to ensure you have covered the logistics.
- Drainage Check: Have you tested how water flows in your yard? Do not install a sand pit in a low spot where water pools.
- Zoning: Have you clearly defined where the lounging happens versus where the dining happens? Separation prevents clutter.
- Material Audit: Are your metals powder-coated? Is your wood naturally rot-resistant (Teak, Cedar, Redwood)?
- Lighting Plan: Do you have access to exterior outlets for string lights, or do you need to hire an electrician?
- Storage: Where will cushion covers go when it rains? Plan for a deck box or shed space.
FAQs
How do I keep cats out of my sand feature?
This is the most common concern. The most effective method is a custom cover. If the sand area is a specific shape (like a sandbox), build a slat-wood cover that doubles as a deck. If it is a large open landscape feature, installing motion-activated sprinklers can deter animals without harming them. Alternatively, using crushed gravel or DG instead of soft sand usually deters digging.
Can I have a beach backyard in a cold climate?
Absolutely. The “beach” vibe is about the visual cues, not the temperature. Use cold-hardy grasses like Blue Oat Grass and furniture that can withstand freezing and thawing. A fire pit becomes even more essential in cold climates, extending the usability of the space into the autumn.
How much does it cost to install a sand backyard?
Costs vary wildly by region and DIY capability. A simple DIY project with a truckload of sand, landscape fabric, and edging might cost $500 to $1,000. A professionally designed space with grading, drainage, large palms, and high-end hardscaping can easily range from $10,000 to $30,000. Start with the hardscaping (the floor) as your primary investment.
Conclusion
Designing a beach-themed backyard is about more than just dumping a bag of sand next to a deck chair. It requires thoughtful consideration of how the space flows, how materials age, and how plants interact with the wind and light. By focusing on natural textures, durable materials, and a relaxed layout, you can create a sanctuary that transports you to the coast every time you step outside.
Remember that the best landscapes evolve over time. Start with a solid foundation of hardscaping and key trees, then layer in your furniture and decor as you live in the space. Whether you are hosting a summer barbecue or reading a book by the fire, your sandy oasis should be a place where stress dissolves.
Picture Gallery


