
Bedroom Door Painting Ideas for a Chic Aesthetic
Bedroom doors are often the most overlooked canvas in a home. We spend hours agonizing over wall colors, rug textures, and window treatments, yet the door usually remains a standard, builder-grade white. This is a missed design opportunity that can completely alter the architecture and mood of your space.
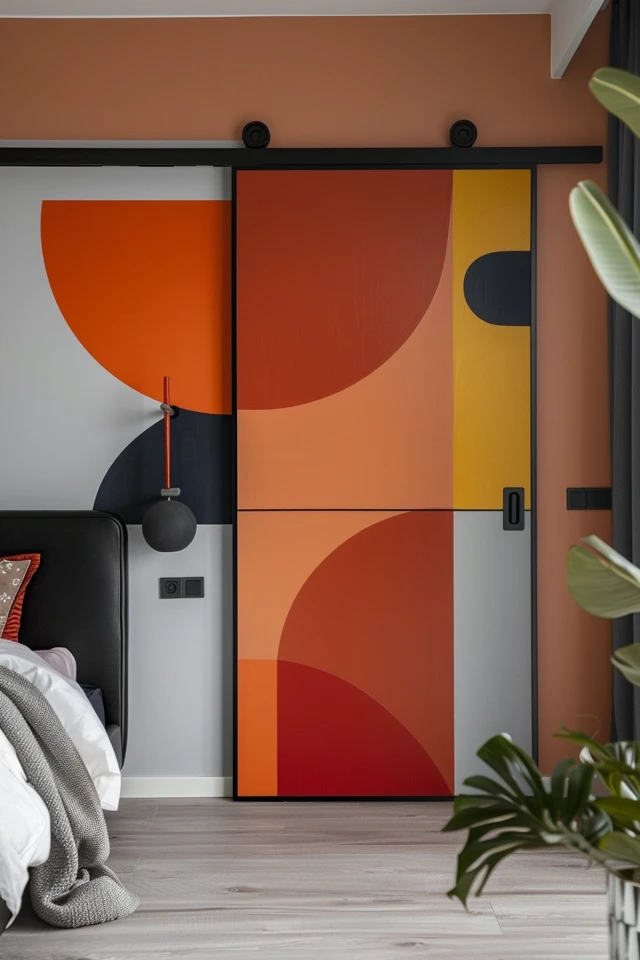
Treating your bedroom door as a distinct design element creates an entry experience rather than just a functional threshold. A painted door can act as a focal point, tie together a color palette, or add a sophisticated architectural detail where none existed before. It is one of the highest-impact, low-cost upgrades you can make in a weekend.
For those looking for visual inspiration, a curated Picture Gallery is available at the end of this blog post. Before we get to the visuals, however, we need to cover the technical execution and color theory that ensures your project looks like it was handled by a professional design team, not a quick DIY fix.
1. Selecting the Right Finish and Paint Type
The success of a painted door relies heavily on the finish you choose. In interior design, we don’t just pick a color; we pick a light reflectivity value. The sheen of the paint dictates how durable the door will be and how much it will highlight surface imperfections.
The Case for Satin vs. Semi-Gloss
For years, the standard rule was to paint trim and doors in semi-gloss. While semi-gloss is durable and easy to wipe down, it can look a bit dated and plastic-like in modern aesthetics. It also reflects a lot of light, which highlights every dent, scratch, or uneven brush stroke on the door.
For a chic, high-end aesthetic, I almost exclusively specify a satin finish for bedroom doors. Satin offers a velvety luster that looks more custom and expensive. It is still scrubbable enough for high-traffic areas but hides imperfections much better than semi-gloss.
High-Gloss for Drama
If you have a perfectly smooth, flat-panel door and want a glam look, a high-gloss or lacquer finish is stunning. However, this is a high-risk choice. High-gloss paint acts like a mirror; if your door has wood grain texture or old layers of paint, the gloss will magnify those flaws.
Latex vs. Oil-Based
Designer’s Note: Stick to high-quality water-based alkyd enamels (often called “cabinet and trim paint”). Old-school oil paints yellow over time and are messy to clean up. Modern water-borne alkyds cure harder than standard wall latex, preventing the door from feeling sticky or “blocking” (sticking to the frame) when you close it.
2. Color Theory: Lighting and Undertones
Choosing a color for a door is trickier than choosing a color for a wall because a door exists in two spaces simultaneously: the hallway and the bedroom. You have to consider how the color interacts with the lighting and decor in both areas.
The Hallway Perspective
Hallways are often darker than bedrooms. A color that looks vibrant in your bright bedroom might look muddy or black in the hallway. If you are painting the outward-facing side of the door, always test your swatch in the hallway lighting, not just near the bedroom window.
Coordinating with Flooring
Your door physically connects to the floor. If you have warm oak hardwood floors, a cool grey door might clash, making the wood look orange.
- For warm wood floors: Opt for warm neutrals like mushroom, taupe, or creamy off-whites.
- For cool grey or carpeted floors: You have more flexibility with cool blues, true greys, and crisp whites.
Handling Small Spaces
In smaller bedrooms, a dark door against a light wall can visually break up the space, making the ceiling feel lower. If the room is small, painting the door the same color as the walls (or one shade darker) creates a seamless look that expands the visual field.
3. Design Approaches and Styling Techniques
Once you understand the finish and lighting, you can decide on the stylistic approach. There are several ways to paint a door that go beyond simply rolling on a new color.
The “Color Drenching” Method
This is currently one of my favorite techniques for creating a cozy, envelope-like feel in a bedroom. You paint the door, the door casing (trim), and the baseboards the exact same color.
- Why it works: It simplifies the visual noise. Instead of a white outline around a colored door, the entire architectural element reads as one unit.
- The effect: It makes standard doors look wider and more substantial.
The Contrast Edge
This is a subtle detail that signals a designer touched the space. You paint the face of the door one color (perhaps white to match the hallway) and the edge of the door a fun, unexpected accent color like teal, coral, or black. You only see the pop of color when the door is open.
The Monochrome Mood
For a moody aesthetic, paint the door a deep charcoal, navy, or forest green. To keep it chic, ensure your wall color has a similar undertone. For example, a navy door pairs beautifully with walls painted in a very pale, icy blue-grey. This creates a layered, monochromatic look that is very restful for a sleeping space.
Designer’s Note: The “Two-Tone” Question
A common question I get is, “Can I paint the inside of the door one color and the outside another?”
The Verdict: Yes, absolutely. In fact, this is often necessary. The hallway side should generally match the other doors in the corridor for unity. The bedroom side is for you.
The Rule of Thumb: The edge of the door (the part with the latch) should be painted the color of the room the door opens into. If the door opens into the bedroom, the latch edge gets painted the bedroom color. The hinge edge gets painted the hallway color.
4. The Hardware Equation
You cannot achieve a chic aesthetic with old, splatter-painted hardware. The doorknob and hinges are the “jewelry” of the door. Painting around old hardware rarely works; you inevitably get paint on the metal, which looks amateurish.
Updating Hinges
If your hinges are painted over from previous owners, replace them. You do not need to take the door down to do this.
- Replace one hinge at a time while the door is closed.
- Unscrew the top hinge, swap it for the new one, and screw it in.
- Repeat for the middle and bottom hinges.
This keeps the door aligned without the struggle of rehanging a heavy slab.
Knob Placement and Finish
Matte black hardware is very trendy and looks sharp against white or light grey doors. Satin brass is timeless and warms up cool colors like blue or green. Ensure the metal finish of your doorknob coordinates with the light fixtures or curtain rods in the bedroom for a cohesive look.
5. Step-by-Step Execution for a Pro Finish
The difference between a “landlord special” and a high-end finish is 90% preparation and 10% painting. Do not skip the prep.
Step 1: Cleaning and Deglossing
Doors are touched constantly. They have oils from hands, lotion, and dust. Scrub the door with a degreaser or a TSP substitute. If you paint over hand oils, the paint will eventually peel or bubble.
Step 2: Sanding (Non-Negotiable)
You don’t need to strip the paint, but you must scuff it. Use a medium-grit sanding sponge (120-grit). The sponge gets into the molded corners of the panels better than sandpaper sheets. The goal is to take the shine off the previous finish so the new paint bonds mechanically. Wipe away all dust with a tack cloth or damp rag.
Step 3: Masking
If you aren’t removing the hardware (though you should), use painter’s tape to cover the knob completely. Tape off the hinges precisely. Run a line of tape along the floor to protect the carpet or hardwood.
Step 4: The Order of Painting
If you are painting a flat door, you can simply roll it. If you have a paneled door (like a standard 6-panel), there is a specific order to follow to avoid chaotic brush marks.
- Moldings: Use a brush to paint the recessed grooves around the panels first.
- Panels: Paint the flat inner rectangles.
- Center Vertical Stile: Paint the vertical strip down the center.
- Horizontal Rails: Paint the horizontal strips across the door.
- Outer Vertical Stiles: Paint the long vertical strips on the far left and right.
This order allows you to smooth out overlap marks in the direction of the wood grain.
Tools of the Trade
Use a 2-inch angled sash brush for the corners and a small 4-inch foam or microfiber roller for the flat areas. The roller mimics a sprayed finish and eliminates brush strokes.
Common Mistakes and Fixes
Mistake: Closing the door too soon.
Even if paint feels dry to the touch, it hasn’t cured. If you close the door tightly against the stop, it will glue itself shut.
Fix: Leave the door open for at least 24 hours. If you must close it for privacy, put a small piece of wax paper or a felt bumper pad on the door jamb to prevent the fresh paint surfaces from touching.
Mistake: Painting over the strike plate.
The strike plate is the metal piece on the door frame where the latch enters. Painting this looks sloppy and causes the paint to chip immediately upon use.
Fix: Remove the strike plate before painting the trim, or tape it off meticulously.
Mistake: Using a wall brush.
Using a large 3-inch wall brush on a door makes it difficult to control paint in the corners, leading to drips and runs.
Fix: Invest in a high-quality 1.5 to 2-inch angled sash brush. It gives you control over the details.
Real-World Project Checklist
When I am managing a bedroom redesign, this is the mental checklist I run through before the painters arrive:
- Light Check: Have I viewed the paint swatch in the hallway and the bedroom at night?
- Sheen Check: Is the paint specified as Satin or Semi-Gloss? (Avoid Eggshell or Flat for doors; it’s too hard to clean).
- Prep Check: Do we have sanding sponges and tack cloths?
- Hardware Plan: Are we keeping the old hinges? If yes, are they being taped or removed?
- Edge Logic: Does the painter know which color goes on the latch edge?
- Climate Control: Is it too humid today? High humidity slows drying and can cause sagging paint.
FAQs
Should bedroom doors be lighter or darker than the walls?
There is no hard rule, but generally, contrast is key. If you have light walls, a darker door adds weight and interest. If you have dark, moody walls, a lighter door can provide relief. However, painting the door the exact same color as the wall is a very contemporary, chic move that blurs the boundaries of the room.
Can I paint a hollow core door?
Yes, absolutely. Hollow core doors accept paint very well. Because they are lightweight and often have a faux-wood grain texture, using a high-quality roller is the best way to get a smooth look. Be careful not to sand too aggressively, as the outer skin is thin.
Do I have to paint the door frame (trim) the same color?
Traditionally, the trim is white, and the door is the accent color. However, for a more modern “built-in” look, I love painting the trim to match the door. It makes the opening feel grander. If you keep the trim white, ensure the white is crisp and clean to provide a sharp contrast to your new door color.
Conclusion
Painting your bedroom door is more than a maintenance task; it is a design declaration. Whether you opt for a soothing sage green in a satin finish or a dramatic charcoal that matches your baseboards, the key to a chic aesthetic lies in the preparation and the details.
By choosing the right sheen, respecting the lighting conditions of your hallway, and taking the time to prep the surface correctly, you elevate the entire feeling of your home. It turns a simple point of entry into an architectural feature. Grab your sanding sponge and your angled brush—it is time to make an entrance.
Picture Gallery


