
Brighten Your Coop: Chicken Coop Painting Ideas
Backyard chickens have evolved from a purely agricultural pursuit into a genuine lifestyle trend that impacts your landscape design. As an interior designer who often consults on exterior living spaces, I treat a chicken coop like a “folly” or a garden shed; it is an architectural feature that should complement your main home. A well-painted coop elevates the entire yard, turning a functional structure into a focal point.
However, designing for livestock requires a shift in priorities compared to painting a living room. We have to balance aesthetics with safety, ensuring that materials are non-toxic to birds who are notorious for pecking at everything. For a visual feast of inspiration, skip to our Picture Gallery at the end of this post.
This guide walks you through the practical steps of choosing safe paints, selecting colors that harmonize with your landscape, and executing a finish that withstands the elements. Let’s make your coop the envy of the flock and the neighborhood.
1. Safety First: Choosing the Right Paint
Before we discuss color palettes, we must address toxicity. Chickens are curious creatures that investigate their world with their beaks. If paint chips or peels, your birds will eat it, so the chemical composition of your coating is the most critical design decision you will make.
Zero-VOC is Non-Negotiable
When selecting paint for any surface a chicken might touch, look for “Zero VOC” (Volatile Organic Compounds) labeling. Standard exterior paints release off-gassing fumes that can be fatal to chickens, whose respiratory systems are incredibly sensitive.
Even with low-VOC options, I recommend keeping the birds out of the coop for a full 24 to 48 hours after painting. The paint needs to cure, not just dry.
The Whitewash Alternative
For the most natural approach, consider traditional whitewash. This is a mixture of hydrated lime and water. It is historically accurate, completely non-toxic, and has natural antibacterial properties.
It does not offer the same color range as latex paint, but it dries to a brilliant, chalky white that looks beautiful in cottage-style gardens. It requires re-application annually, but the process is fast and cheap.
Stain vs. Paint
If you have a cedar or high-quality pine coop, you might prefer a stain. Water-based exterior stains are generally safer than oil-based ones once cured.
Stain penetrates the wood rather than sitting on top, which eliminates the risk of chipping. If you want a rustic, natural look that blends into a wooded lot, a semi-transparent stain is the superior choice.
2. Interior Strategy: Function Over Form
While the exterior is for you, the interior is for the chickens. The primary goal inside the coop is hygiene and pest control.
Why White is the Pro Choice
I almost exclusively recommend painting the interior of a coop high-gloss or semi-gloss white. This isn’t just an aesthetic preference; it is a sanitation tool.
Red mites and lice are dark brown or red. Against a stark white background, you can spot an infestation immediately. If you paint the interior dark gray or leave it raw wood, parasites can hide in plain sight until the problem is severe.
Sheen Matters
Do not use flat or eggshell paint inside a coop. Chicken coops require heavy-duty scrubbing, often with stiff brushes and vinegar solutions.
Use a high-gloss exterior enamel for the interior walls. It seals the wood pores, preventing poop and moisture from soaking into the lumber. When it is time for a deep clean, high-gloss surfaces can be hosed down and wiped clean with minimal effort.
The Deep Litter Line
If you use the deep litter method (letting bedding build up to compost), consider painting the bottom 12 inches of the interior with a heavy-duty, rubberized sealant or a marine-grade paint.
This creates a “bathtub” effect that protects the structural wood from the constant moisture of the composting bedding. It prevents rot from the inside out.
3. Exterior Aesthetics: Coordinating with Your Home
Your chicken coop should not look like it landed from outer space. It should have a visual relationship with your main house or the surrounding landscape design.
The “Main House” Mirror
The safest and most cohesive design strategy is to mirror the color palette of your main residence. If your house is navy blue with white trim, paint the coop navy blue with white trim.
This connects the structures visually, making the coop feel like an intentional extension of the architecture. It signals to neighbors and visitors that this is a designed property, not just a farmyard.
The “Garden Folly” Approach
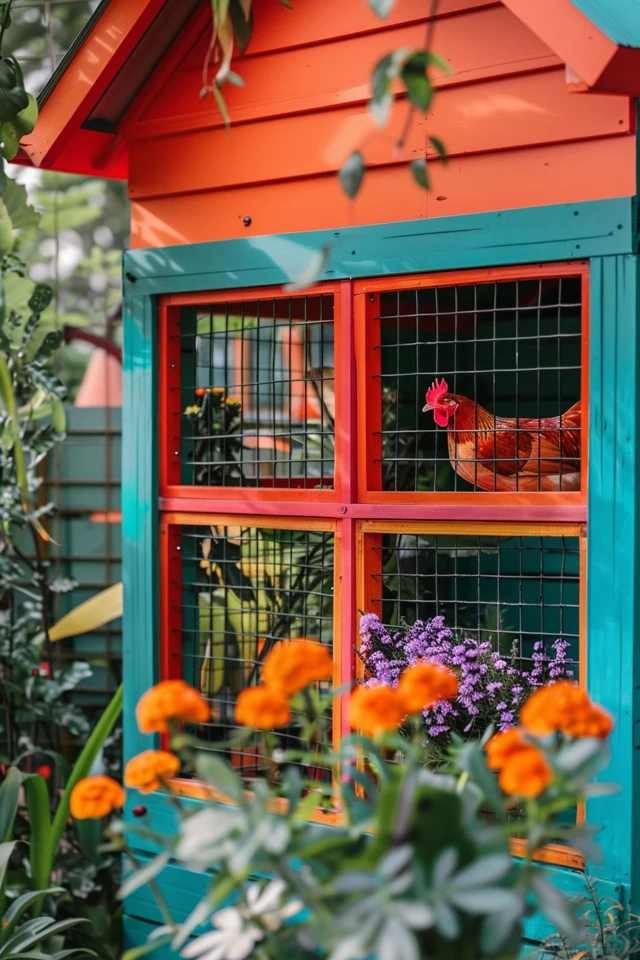
Alternatively, you can treat the coop as an accent piece, much like a colorful front door or a garden bench. This is where you can take risks you might not take on your house.
- The Red Barn: A classic “Barn Red” with bright white trim is timeless. It pops beautifully against green grass and foliage.
- Sage and Earth Tones: If you want the coop to disappear into the garden, use sage greens, grayish-browns, or deep charcoals. These colors recede visually.
- Cottage Pastels: For a whimsical look, soft butter yellows, robins-egg blues, or pale lavenders work well, especially if you have a flower garden nearby.
Roofing Coordination
Don’t forget the roof. If your home has gray asphalt shingles, try to use similar materials on the coop. If you have a metal roof, a corrugated metal roof on the coop looks fantastic and lasts forever.
4. Creative Themes and Stylistic Directions
Once you have the basics down, you can lean into a specific design style. Here are three popular directions I use when consulting on exterior spaces.
Modern Farmhouse
This is the most requested style currently. It relies on high contrast and clean lines.
- Body: Stark White or very light gray.
- Trim/Accents: Matte Black or dark charcoal.
- Hardware: Black galvanized steel hinges and latches.
- Lighting: A gooseneck barn light above the door (even if solar-powered) finishes the look.
The Nordic Scandi Coop
This style focuses on minimalism and natural materials. It works exceptionally well in modern backyards.
- Body: Deep, matte black or charcoal.
- Trim: Natural, sealed cedar or pine (no paint).
- Vibe: Moody but warm. The wood tones warm up the black paint.
- Landscaping: Surround with ornamental grasses or river rocks.
The English Garden
This style is romantic, soft, and detailed. It suits older homes or lush, overgrown gardens.
- Body: Soft cream, sage green, or pale pink.
- Trim: A slightly darker shade of the body color (monochromatic) or soft white.
- Details: Add window boxes planted with marigolds (which chickens avoid) or herbs like mint (which repels rodents).
- Hardware: Brass or rusted iron handles.
5. The Application Process: Getting a Pro Finish
Painting a coop is smaller in scale than a house, but the steps for longevity are identical. Skipping prep work guarantees peeling paint within six months.
Prep is 70% of the Work
If you are repainting an old coop, you must remove the old, flaking paint. Chickens will eat paint chips. Scrape everything down and sand the edges smooth.
If the wood is new, it often has a “mill glaze” that prevents paint adhesion. Lightly sand new wood to open the grain.
Priming is Mandatory
Do not rely on “paint and primer in one” products for outdoor wood structures exposed to ammonia (chicken poop) and rain. Use a dedicated, high-quality exterior wood primer.
Apply two coats of primer to any end-grain cuts (where the wood was sawed). These areas suck up moisture like a straw and are the first places to rot.
Weather Windows
Plan your painting for a dry week with temperatures consistently above 50°F (10°C). If it is too cold, the paint won’t bond. If it is too hot (above 85°F), the paint dries too fast and leaves brush marks.
Designer’s Note: A Lesson from the Field
The “Curing” Mistake
I once worked with a client who painted her coop on a Saturday morning and put the chickens back in that evening because the paint felt dry to the touch. By Monday, three of her hens were showing signs of respiratory distress.
Latex paint feels dry quickly, but it releases fumes (off-gassing) for days. In a well-ventilated house, this is minor. In a small, enclosed coop, those fumes concentrate.
The fix: I now advise clients to have a temporary housing plan (a dog crate in the garage or a fenced run area) for at least 48 hours after the final coat. If you can smell the paint, the chickens shouldn’t be in there.
Common Mistakes + Fixes
Mistake: Painting the Roosting Bars
People often paint the roost bars to match the interior.
Fix: Leave roost bars as raw wood (2x4s). Paint is slippery. Chickens need friction to grip the bar while sleeping. If the bar is slick, they can develop Bumblefoot or keel bone injuries from slipping.
Mistake: Painting Over Hardware
Painting over hinges and latches looks sloppy and eventually causes the paint to crack when the hardware moves.
Fix: Use blue painter’s tape to cover hinges, or better yet, unscrew them before painting. It takes 10 extra minutes but adds five years to the look of the coop.
Mistake: Neglecting the Underside
Many coops are raised on legs. Owners often forget to paint the underside of the floor.
Fix: Paint the bottom of the coop floor with exterior grade paint. Moisture rising from the ground can rot the floor from below if it isn’t sealed.
What I’d Do: The Project Checklist
If I were painting a coop this weekend, this is exactly how I would manage the project:
- 08:00 AM: Move chickens to a temporary run. Remove all bedding and scrub the interior with water and vinegar. Let dry completely.
- 10:00 AM: Remove hardware (latches/locks) and tape off window glass.
- 11:00 AM: Sand rough spots and scrape loose paint on the exterior.
- 12:00 PM: Apply a high-quality exterior primer to bare wood spots.
- 01:00 PM: Paint the interior walls High-Gloss White (Zero VOC). Avoid the roost bars.
- 03:00 PM: Paint the exterior body color (Satin or Semi-Gloss finish).
- 05:00 PM: Paint the exterior trim color (Semi-Gloss).
- Next Day: Apply a second coat to the exterior.
- Day After Next: Reinstall hardware and add fresh bedding only when the paint smell is gone.
FAQs
Q: Can I use chalk paint on a chicken coop?
A: Only if you seal it very well. Chalk paint is porous and not durable for exterior use on its own. It requires a top coat of exterior-grade marine varnish or sealer, otherwise, the weather will wash it away.
Q: Is pressure-treated wood safe to paint?
A: New pressure-treated wood needs to dry out for several months before it can hold paint. If you paint it too soon, the moisture in the wood will push the paint off, causing bubbling.
Q: How do I choose a color that hides dirt?
A: For the exterior, mid-tone grays, tans, and greens hide dust and mud splashes best. White shows mud; black shows pollen and dust.
Q: What about the run? Should I paint the wire mesh?
A: Generally, no. Paint eventually chips off wire mesh, and chickens will eat those chips. Use galvanized hardware cloth which resists rust naturally and doesn’t need painting.
Conclusion
Painting your chicken coop is one of the most satisfying weekend projects you can undertake. It immediately improves the visual appeal of your backyard and extends the life of the structure.
By prioritizing non-toxic materials and durable finishes, you create a healthy environment for your flock. By coordinating the colors with your home and garden, you create a cohesive, designer look for yourself. Remember to prep well, ventilate thoroughly, and have fun with the color choices.
Picture Gallery


