
Budget-Friendly Above Ground Pool Deck Ideas
Introduction
An above-ground pool is the ultimate summer luxury for cooling off, but let’s be honest: visually, they can be a bit of an eyesore. They often look like a large blue bathtub dropped into the middle of a perfectly manicured lawn, creating a disconnect between your landscaping and your leisure space. As a designer, my goal is always to integrate these structures so they feel intentional and permanent, rather than temporary.
Building a deck is the single most effective way to bridge that gap, providing a transition zone that elevates the entire backyard aesthetic. However, many homeowners shy away from this project because they assume it requires a contractor’s budget and weeks of construction. The truth is that with smart material choices and a strategic layout, you can create a stunning resort-style look without draining your savings.
I have compiled a list of actionable strategies to get that high-end look for less. For a massive dose of inspiration, make sure to check out the Picture Gallery at the end of the blog post. Let’s dive into the practical ways you can transform your backyard pool area.
1. The “Splash Deck” Concept: Size and Placement
The biggest mistake I see homeowners make is assuming they need to wrap the entire pool with decking. A full surround deck is incredibly expensive due to the lumber required, the complexity of the cuts, and the structural supports needed for a curved perimeter.
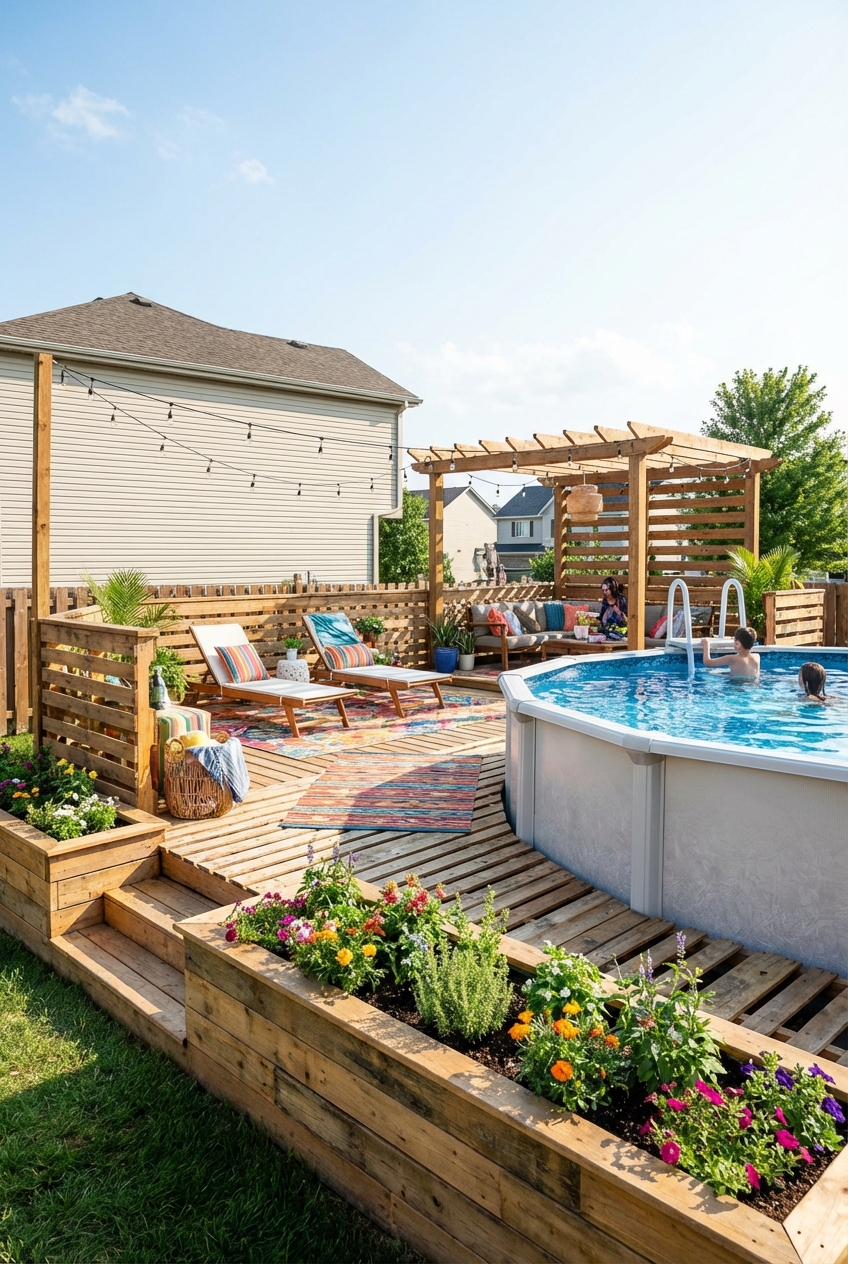
Instead, I recommend building a “splash deck.” This is a standalone platform, usually rectangular or square, that sits adjacent to the pool. It provides a dedicated entry point and a space for lounging without the massive material cost of a full wrap. By building a simple 10×10 or 12×12 square platform on one side, you drastically reduce waste and labor.
Why this saves money
- Standard Lumber Lengths: By sticking to dimensions like 8, 10, or 12 feet, you minimize cut-offs and wasted wood.
- Simplified Structure: A square deck requires standard footings and framing. A curved deck requires complex blocking and specialized carpentry skills.
- Less Railing: You only need to rail the perimeter of the platform, rather than the entire circumference of the pool.
Designer’s Note: Scale and Proportions
In my projects, I never design a pool deck smaller than 6 feet deep. If you go shallower than that, you won’t have room for a chair once you account for traffic flow. A good rule of thumb is to allow a minimum of 36 inches for a walkway and an additional 48 inches for a lounge chair. If you are tight on space, prioritize width over depth to allow for side-by-side seating.
2. Material Selection: Pressure-Treated vs. Composite
When we talk about budget, material selection is the primary lever we can pull. While composite decking is low-maintenance and beautiful, it generally costs 2 to 3 times more than pressure-treated lumber. For a budget-friendly build, pressure-treated pine is the undisputed champion.
However, standard pressure-treated wood can look yellow or green initially. The secret to making it look high-end is in the finishing. Once the wood has dried (usually 6 to 12 months after installation), apply a semi-solid stain in a warm, modern tone like cedar, charcoal, or walnut. This hides the grain imperfections and gives you the look of expensive hardwood at a fraction of the cost.
Smart Compromises
If you absolutely hate the maintenance of wood but can’t afford full composite, consider a mixed approach. Use pressure-treated lumber for the structural framing (posts and joists) and standard wood for the railing system, but splurge on composite boards just for the “decking” (the floor you walk on).
Common Mistakes + Fixes
- Mistake: Buying the cheapest lumber grade available at the big box store.
- Fix: Look for “
1 Grade” or “Premium” pressure-treated decking. It costs marginally more but has fewer knots and is less likely to warp or cup over time.
- Mistake: Painting the deck immediately.
- Fix: Perform the “water test.” Sprinkle water on the wood; if it beads up, it’s too wet to stain. If it absorbs, it’s ready. Painting too soon causes peeling.
3. Skirting and Screening: Hiding the Structure
Nothing ruins the illusion of a built-in pool faster than seeing the white metal struts and pumps underneath. “Skirting” is the term for the material that covers the gap between the deck and the ground, as well as the exposed sides of the pool.
The cheapest option is usually vinyl lattice, but I advise against it. It tends to crack and looks dated. Instead, use horizontal wood slats or vertical fencing pickets. You can space them about 0.5 to 1 inch apart. This allows for airflow (crucial for preventing mold under the deck) while effectively screening the pool equipment.
Creative Budget Skirting Ideas
- Reed or Bamboo Rolls: You can buy rolls of bamboo fencing for very cheap. Staple this to the wooden posts of your deck for an instant tropical vibe.
- Evergreen Shrubs: Instead of building a wooden wall around the pool, plant dense shrubs like Boxwood or Arborvitae. This is often cheaper than lumber and softens the hard edges.
- Canvas Drop Cloths: For a bohemian look, install outdoor curtain rods under the deck lip and hang heavy canvas drop cloths (treated with waterproofing spray). It hides the pump and creates hidden storage.
What I’d do in a real project
If I am working with a tight budget, I focus the skirting budget on the “view corridors.” I will use nice horizontal wood slats on the side facing the house and patio. On the back side facing the neighbor’s fence or the woods, I will use black landscape fabric or simple wire mesh to keep animals out, as no one sees that side anyway.
4. Safety Code and Railing Solutions
Safety is not an area where you can cut corners, but there are ways to be compliant without overspending. Most building codes require a guardrail that is at least 36 to 42 inches high if the deck is more than 30 inches off the ground. The vertical balusters must be spaced so that a 4-inch sphere cannot pass through them.
Glass railings are trendy but cost a fortune. Cable railings are sleeker but also pricey. The most budget-friendly, high-design look right now is “hog wire” or “cattle panel” railing. This involves using heavy-gauge welded wire mesh framed in pressure-treated 2x4s.
Why Hog Wire works
It is incredibly durable, allows for near-perfect visibility (unlike wood balusters which block the view), and is very affordable. A single panel costs a fraction of a pre-fabricated railing kit. When framed in dark-stained wood, it looks industrial and modern.
A Note on Gates
If your deck connects directly to the pool, you almost certainly need a self-closing, self-latching gate to meet code. This is a non-negotiable for child safety.
- Hardware: Buy a high-quality spring-loaded hinge.
- Latch Height: The latch usually needs to be at least 54 inches high so small children cannot reach it.
5. Zoning and Styling the Deck
Once the structure is built, the styling is what makes it feel expensive. You don’t need a lot of furniture; you just need the right scale of furniture. On a smaller pool deck, clutter is the enemy.
Define your zones. If you have a 10×12 deck, dedicate it to one primary function. Is it for sunbathing? Then line up two chaises. Is it for dining? Use a bistro table. Trying to cram a sofa, a dining table, and loungers onto a small deck makes it feel cheap and chaotic.
Designer Rules for Furniture
- Rug Sizing: Use an outdoor rug to define the seating area. The rug should be large enough that the front legs of all furniture sit on it. For a two-chair setup, a 5×8 rug is usually perfect.
- Material durability: Avoid steel furniture, which will rust near chlorinated or saltwater pools. Opt for resin wicker, aluminum, or poly-lumber.
- Vertical Interest: Use a cantilever umbrella. Since space is tight on a deck, an umbrella that stands off to the side (rather than in the middle of a table) keeps the circulation path clear.
Lighting on a Dime
Skip the hardwired lighting if you are on a budget. It requires an electrician and permits. Instead, use solar post caps for the railing posts. They are easy to install and provide ambient glow. String lights are another budget hero. String them from the house to the far corners of the deck to create a “ceiling” that makes the space feel intimate.
Final Checklist: The Budget Build
Before you buy your first piece of lumber, run through this checklist to ensure you are staying on track and avoiding hidden costs.
Planning Phase
- Check Utility Lines: Call 811 to have underground lines marked before digging footings.
- Permit Check: Almost all decks require a permit. The fine for building without one is much higher than the permit fee.
- Lumber List: Calculate your square footage and add 10% for waste.
Construction Phase
- Fasteners: Use screws specifically rated for treated lumber. Standard screws will corrode and fail within a year.
- Joist Tape: Apply butyl tape to the tops of your joists before laying decking. This costs about $20 but adds years to the life of the deck by preventing rot.
- Cut Sealing: Brush a wood preservative on any cut ends of your lumber to prevent moisture intrusion.
Frequently Asked Questions
Does an attached deck damage the pool walls?
A properly designed deck should be “freestanding.” This means it stands on its own legs and does not rely on the pool wall for support. You should never bolt the deck directly to the pool wall. The pool walls are designed to hold water pressure, not the lateral load of a deck structure. Leave a gap of about 1/2 to 1 inch between the deck and the pool top rail to allow for movement.
Can I use pallets to build a pool deck?
I strongly advise against this. While “pallet decks” are popular on social media, pallets are generally made of untreated, low-grade wood that rots quickly when exposed to moisture. They are also not structurally rated for the weight of people. For safety, stick to pressure-treated lumber.
How do I prevent slipping on a wood deck?
Wet wood is incredibly slippery. When you stain your deck, you can mix in a clear anti-slip additive. These are essentially fine sand or grit particles that provide traction without changing the look of the stain. This is essential for any surface near a pool.
Is a permit really necessary for a freestanding deck?
In most municipalities, yes. Even if it isn’t attached to the house, if it is over a certain square footage or height (often 30 inches), it requires inspection. This ensures your footings are deep enough to prevent collapse and that your railings are safe for children.
Conclusion
Transforming an above-ground pool from a backyard obstacle into a cohesive outdoor oasis is entirely possible on a budget. The key lies in restraint—building a strategic “splash deck” rather than a massive wrap-around, choosing cost-effective materials like pressure-treated pine, and using smart styling to elevate the look.
Remember that the goal is integration. By using vertical skirting to hide the pool walls, adding soft lighting, and scaling your furniture correctly, you create a space that feels intentional. It doesn’t take a five-figure budget to create a summer retreat; it just takes a bit of planning and a focus on the details that matter most.
Picture Gallery


