
Cape Cod Siding Ideas for Charming Home Exteriors
Few architectural styles evoke a sense of history and comfort quite like the Cape Cod home. Whether you are actually on the coast or nestled in a suburb miles inland, the symmetry and simplicity of this design are timeless. The siding you choose is the single most important factor in capturing that authentic New England aesthetic.
I remember working on a renovation in Connecticut where the homeowners wanted to modernize their 1950s Cape. They almost covered the beautiful original wood details with standard vinyl siding, which would have flattened the character completely. We pivoted to a cedar-texture composite that maintained the shadow lines, and the result was transformative.
If you are looking for visual inspiration, keep in mind that a curated Picture Gallery is available at the end of this blog post. Let’s dive into the materials, colors, and design rules that will make your Cape Cod exterior shine.
1. The Classic Shingle Style: Cedar and its Alternatives
When you picture a quintessential Cape Cod home, you likely imagine weathered gray shingles. In the design world, we refer to these as “shakes” or sidewall shingles. They provide a rich texture that changes as the sun moves across the sky.
Authentic white cedar shingles are the gold standard for this look. When left untreated, they weather naturally to a silvery gray over about six to twelve months. However, this requires a specific climate and tolerance for uneven aging.
For clients who want the gray look immediately without the wait, I specify “bleaching oil.” This accelerates the graying process and protects the wood from rot and mildew. It gives you that “beach cottage” look from day one.
If maintenance is your primary concern, modern polymer (vinyl) shakes have come a long way. Brands now offer “rough split” textures that mimic real wood grain surprisingly well from the street.
Designer’s Note: The Corner Detail
A massive detail often overlooked is how the shingles meet at the corner of the house.
Corner Boards: Using wide, white trim boards (usually 5 to 6 inches) frames the house and creates a crisp, formal look.
Woven Corners: This is where the shingles are laced together at the edge, eliminating the vertical trim board. This looks more rustic and authentic to older, historic cottages.
2. Clapboard Siding: Clean Lines and Historical Accuracy
While shingles are popular, horizontal clapboard is equally traditional for Cape Cod exteriors. This creates a more formal, tailored appearance compared to the rustic vibe of shakes. The key here is the “reveal” or “exposure.”
The exposure refers to the height of the siding plank that is visible. For a historic Cape Cod feel, a narrower exposure is generally better. I recommend staying between 4 inches and 6 inches. Anything wider than 7 inches starts to look like a modern farmhouse or a ranch style, which clashes with the Cape’s steep roofline.
Material choice is critical here. Wood clapboard (usually pine or cedar) requires scraping and painting every 5-7 years. For most of my clients, I suggest fiber cement siding. It holds paint three times longer than wood and is impervious to termites.
If you choose fiber cement, avoid the “wood grain” texture. Real painted wood looks smooth, not grainy. The fake grain on fiber cement often looks plastic and artificial. Always specify the smooth finish for a high-end look.
Common Mistakes + Fixes
Mistake: Installing siding that is too wide for the scale of the house.
Fix: Stick to a 4-inch or 5-inch reveal. Capes are usually smaller, cozy structures. Large planks can make the house look squat and short.
Mistake: Using J-channel trim around windows with vinyl siding.
Fix: Use wide, flat casing (3.5 inches minimum) around windows. This mimics real wood carpentry and hides the vinyl ends much better than thin J-channel strips.
3. Color Palettes: Beyond Weathered Gray
Color plays a massive role in how your siding is perceived. While the weathered gray and white trim combination is classic, you have other historical options. The Cape Cod palette is usually rooted in nature.
The Coastal Blues
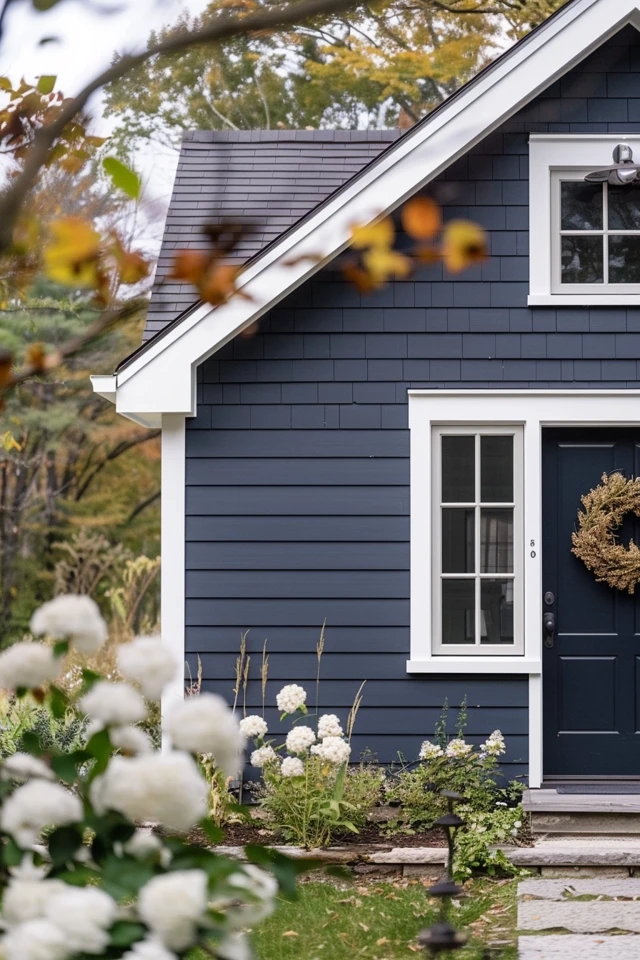
Navy, slate blue, and wedgewood blue are stunning on Cape Cod homes. Darker blues ground the house and make white trim pop. If you choose a dark blue, ensure you invest in high-quality siding materials. Dark colors absorb heat, which can cause cheap vinyl to warp or oil-canned finishes on metal siding.
Sage and Moss Greens
For inland Capes or homes surrounded by trees, soft greens blend beautifully with the landscape. I prefer colors that have gray undertones rather than bright, yellow-greens. Think “dried herb” rather than “lime.”
Creamy Whites
An all-white Cape is elegant, but it can look stark if you use a builder-grade bright white. Look for whites with warm undertones (like a very subtle vanilla). This softens the look and makes the house feel welcoming rather than sterile.
What I’d Do in a Real Project
If I were designing a renovation today, I would use a “Color Block” approach:
1. Main Body: Light silver-gray cedar shingles (or composite equivalent).
2. Trim: crisp, bright white (PVC material for durability).
3. Front Door: A high-gloss black or a deep red.
4. Shutters: Black or very dark Essex Green. This provides the high contrast that makes these small homes visually striking.
4. Mixing Materials for Modern Curb Appeal
You don’t have to stick to just one material. Mixing textures is a great way to add architectural interest, especially if your home has additions or a garage. The trick is knowing where to stop and start different materials.
A common approach is to use clapboard on the lower main body of the house and cedar shakes on the upper gables or dormers. This draws the eye upward and emphasizes the steep roof pitch typical of Cape Cod architecture.
Another option is a stone veneer “skirt” or water table. This is the bottom 18 to 24 inches of the exterior wall. Adding natural fieldstone here anchors the house to the ground visually. It works exceptionally well on sloped lots where more foundation is exposed.
Rules of Thumb for Mixing Materials
Transition Board: Never switch materials without a horizontal trim board separating them. It looks unfinished otherwise.
Keep it Simple: Limit yourself to two siding materials maximum (e.g., stone + siding, or clapboard + shakes). Adding a third (like board and batten) usually makes a small Cape look cluttered.
Consistency: If you use shakes on the front dormers, use them on the back dormers too. “Front-facing” design, where the back of the house is cheap vinyl and the front is expensive cedar, lowers the perceived value of the home.
5. Architectural Details: Shutters, Trim, and Roofing
Siding does not exist in a vacuum. The charm of a Cape Cod home relies heavily on the supporting cast of architectural details. If you get the siding right but fail on the shutters, the house will look “off.”
Shutter Sizing Logic
This is the number one error I see on exteriors. Shutters should be sized so that, if they were actually closed, they would cover the window.
If your window is 30 inches wide, each shutter must be 15 inches wide.
Many homeowners buy standard 12-inch vinyl shutters for wide windows, and they look like “stick-on” decals.
For hardware, use “shutter dogs” (the metal hold-backs) and hinges. Even if the shutters are decorative and never close, the hardware adds a layer of authenticity.
Roofing Relationships
Because Cape Cod roofs are steep and very visible, the roof color interacts with your siding color more than on other home styles.
Red Cedar Siding: Pairs best with charcoal or black architectural shingles.
Gray Siding: versatile, but avoid brown roofs. Stick to slate gray or black.
* White Siding: Can handle a light gray roof or a cedar shake roof.
Trim Widths
Standard 3-inch corner boards can look flimsy. I typically specify 5.5-inch or even 7.25-inch corner boards for Cape Cods. This robust framing gives the house a sturdy, historic presence.
Final Checklist: Before You Order Materials
Before you sign a contract with a siding installer, run through this checklist to ensure you haven’t missed any critical design details.
- Check Your Exposure: Have you confirmed the reveal height? (Aim for 4–6 inches).
- Sample the Color: Have you painted a large sample board (4ft x 4ft) and viewed it on the north and south sides of the house?
- Define the Corners: Are you doing corner boards or woven corners? Make sure this is specified in the quote.
- Plan the Flashing: Ask your contractor about “kick-out flashing” where rooflines meet walls. This is where most leaks happen.
- Ventilation: If you are re-siding, are you adding house wrap and insulation board? This is the best time to improve energy efficiency.
- Shutter Audit: Measure your windows. Do not buy standard shutters if your windows are wide. Order custom widths.
- Material texture: If buying fiber cement or vinyl, have you confirmed you are ordering the “smooth” or “driftwood” texture, not the fake “oak” grain?
Frequently Asked Questions
Can I put vinyl siding on a historic Cape Cod?
Yes, but you must be careful with the detailing. Use a high-quality, insulated vinyl that resists denting. Crucially, replace standard vinyl corner posts with wide, white PVC trim boards. This tricks the eye into thinking it is wood siding. Avoid J-channels around windows whenever possible.
What is the best siding for a coastal environment?
If you are within a mile of the ocean, salt air is brutal. Cedar is traditional but requires maintenance. PVC composite shingles (like NuCedar) or fiber cement are excellent choices. PVC is impervious to water and salt, making it arguably the most durable option for beachfront properties, though it is expensive.
Should I paint my brick chimney?
On a Cape Cod, a red brick chimney is a classic element that adds warmth. I generally advise against painting it. However, if the brick is damaged or an ugly color, painting it white to match the trim can make the house look larger and more cohesive. Just know that once you paint brick, you can never go back.
How do I handle the dormers?
Dormers are often sided in the same material as the main house, which is the safest bet. However, if you want to highlight them, you can use cedar shakes on the dormers while using clapboard on the main body. Keep the color consistent to avoid the house looking “top-heavy.”
Conclusion
Renovating the exterior of a Cape Cod home is a rewarding project because the architecture is so forgiving and naturally charming. The goal is to enhance the simple, cozy lines that make this style so beloved. Whether you choose authentic cedar shakes that weather with the seasons or a durable fiber cement in a deep navy blue, success lies in the details.
Pay attention to the scale of your siding exposure, the width of your trim, and the sizing of your shutters. These small measurements add up to a significant visual impact. By respecting the history of the home while using modern materials for longevity, you can create a curb appeal that feels both fresh and timeless.
Picture Gallery


