
Cedar Wall – Ideas for Rustic & Modern Homes | My Tips
Cedar is one of those rare materials that engages multiple senses at once. It adds immediate visual warmth, offers a tactile texture that drywall simply cannot mimic, and brings that subtle, earthy aroma into a living space. Whether I am designing a mountain retreat or a sleek city apartment, cedar walls have become my secret weapon for adding depth without relying on paint or wallpaper.
The beauty of this wood lies in its incredible versatility. A knotty grade installed horizontally screams cozy cabin, while clear vertical grain slats look distinctively architectural and modern. It bridges the gap between different design styles, acting as a neutral backdrop that still has plenty of character.
However, working with cedar requires more than just nailing boards to a stud; you have to understand grading, acclimation, and finishes to get it right. To help you visualize these concepts, I have curated a full Picture Gallery at the end of the blog post with real-world examples.
Understanding Cedar Grades and Cuts
Before you buy a single board, you need to understand that not all cedar looks the same. The “vibe” of your room—whether it is rustic or modern—depends entirely on the grade of wood you select.
The most common mistake homeowners make is buying “Select Tight Knot” (STK) cedar when they actually want a modern look. STK is full of character, visible knots, and grain swirling. It is perfect for a farmhouse or cottage aesthetic, but it can look too busy in a minimalist space.
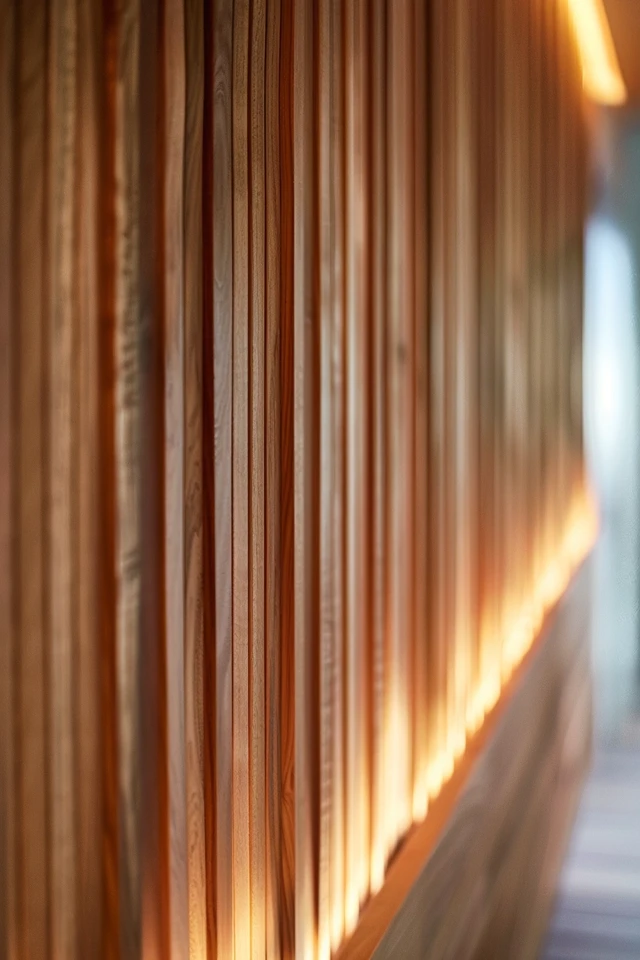
For a contemporary or mid-century modern home, you want “Clear Vertical Grain” (CVG). This grade is harvested from the center of the log. It has almost no knots and features straight, tight grain lines. It creates a seamless, ribbon-like effect on the wall.
Designer’s Note: The Cost Factor
Clear Vertical Grain cedar is significantly more expensive than knotty grades, often double the price per linear foot. If you are on a budget but want a modern look, consider using knotty cedar but staining it a dark charcoal or black. The dark stain hides the knots while keeping the texture, giving you a modern feel for less money.
Installation Styles: Horizontal, Vertical, or Slatted
The direction you install the boards changes the perceived shape of the room. This is a classic optical illusion interior designers use constantly.
Horizontal Installation (Shiplap or Tongue and Groove)
Running boards horizontally draws the eye from left to right. This makes a narrow room feel wider. It is the traditional choice for “feature walls” behind a bed or a sofa. For a cleaner look, use nickel-gap tongue and groove, which leaves a deliberate small space between boards.
Vertical Installation
If you have low ceilings (standard 8-foot height), vertical boards are your best friend. They draw the eye upward, making the room feel taller and airier. This creates a more contemporary, Japanese-inspired aesthetic compared to the horizontal farmhouse look.
The Slatted Wall (Slat Wood)
This is currently the most requested style in my high-end projects. This involves installing narrow strips of cedar (usually 1.5 inches wide) with a gap (usually 0.5 to 0.75 inches) between them. It adds depth and shadow lines that flat paneling lacks.
Common Mistakes + Fixes
Mistake: Installing slats directly over white drywall.
The Fix: Always paint the drywall black or dark charcoal before installing a slat wall. The gaps will show the wall behind the wood. If it is white, it looks unfinished and cheap. If it is black, it creates infinite depth and shadow.
Finishes, Sealants, and “The Greying Effect”
One of the biggest questions I get is, “Should I seal my cedar wall?” The answer depends on where the wall is located and how much you want the color to change over time.
Interior Applications
Indoors, cedar does not necessarily need to be sealed for protection, as it isn’t fighting rain or sun. However, raw cedar is porous. It will absorb oils from hands and can collect dust. I usually recommend a clear, water-based matte polyurethane. This keeps the wood looking natural but makes it wipeable. Avoid oil-based polyurethanes if you want to avoid a yellow/amber tint over time.
Exterior or Sun-Exposed Rooms
If your cedar wall is in a sunroom or extends to the outdoors, UV rays are your enemy. Unprotected cedar will turn a silvery-gray within 6 to 12 months of sun exposure. This is a chemical reaction in the wood’s surface cells.
If you love the warm orange/red tones, you must use a sealer with UV inhibitors. You will also need to re-apply this every 2 to 3 years. If you like the silver driftwood look (which is very popular in coastal design), you can leave it raw or use a bleaching oil to accelerate the process evenly.
Design Rules: Scale, Lighting, and Proportions
A cedar wall is a heavy visual element. It demands attention. If you don’t balance it correctly, the room can feel dark or claustrophobic.
The 60/30/10 Rule
In a room with a cedar feature wall, the wood should generally take up about 30% of your visual focus. If you have cedar floors, a cedar ceiling, and cedar walls, you are creating a wooden box. Contrast is key. If you have a cedar wall, pair it with light-colored furniture, stone floors, or white adjacent walls to let the wood breathe.
Lighting is Non-Negotiable
Texture needs light to be seen. The worst thing you can do is light a cedar wall from the center of the room. You want “grazing” light.
Install recessed cans or a track light about 12 to 18 inches away from the wall specifically to wash light down the surface. This highlights the grain, the knots, and the gaps between boards. Without grazing light, a wood wall just looks like a flat, dark color.
Rug and Floor Coordination
Do not try to match your cedar wall to your hardwood floors. It is almost impossible to get an exact match, and a “near match” looks like a mistake. Go for contrast. If you have warm cedar walls, try a cooler-toned floor or break up the space with a large, neutral wool rug.
Room-Specific Applications
Cedar works differently in every room. Here is how I approach the three most common areas for wood accents.
The Living Room
A cedar wall behind the TV is functional as well as beautiful. The dark, matte nature of the wood absorbs light, reducing glare on the screen. It also helps dampen sound, improving the acoustics of your movie nights.
The Bedroom
I love using cedar as an extended headboard. Run the paneling up the wall behind the bed, perhaps 4 feet high, and cap it with a narrow shelf for art. Or, do the full wall for a “cocooning” effect. The scent of cedar is also naturally relaxing, which supports good sleep hygiene.
The Bathroom
Yes, you can use cedar in a bathroom. It is naturally rot-resistant and antimicrobial. However, ventilation is critical. You must have a high-quality exhaust fan. I generally avoid putting it directly inside a shower stall unless it is heavily sealed with marine-grade varnish, which changes the look. Keep it to vanity walls or ceilings.
Real-World Project Lesson
I once designed a small powder room with floor-to-ceiling cedar slats. We didn’t account for the thickness of the slats (1 inch) plus the furring strips (0.75 inch) when measuring for the toilet rough-in. The wall came out almost 2 inches, and the toilet tank wouldn’t fit.
Lesson: Always account for the total thickness of your wall assembly (wood + backing) when checking clearances for toilets, sconces, and door swings.
Installation Guide for DIYers
If you are tackling this yourself, precision is everything. Here is a practical workflow to ensure professional results.
1. Acclimation is Mandatory
Wood moves. It expands with humidity and shrinks with dryness. You cannot buy cedar and install it the same day. Bring the wood into the room where it will be installed. Unwrap it and let it sit for at least 72 hours (ideally a week). If you skip this, your boards will shrink after installation, revealing unpainted wall stripes between the joints.
2. Wall Prep
Locate and mark every stud. If you are doing a vertical install or a slat wall, you might need to install horizontal “furring strips” (thin strips of wood screwed into studs) first to give you something to nail the vertical boards into.
3. Nailing Techniques
For a clean look, use “blind nailing.” This means driving the nail through the tongue of the board at a 45-degree angle so the next board covers the nail head. You will need a finish nailer for this. If you must face-nail (nail through the front), use stainless steel nails. Standard galvanized nails can react with the tannins in cedar, causing ugly black bleeding streaks over time.
4. Corner Details
Corners are where amateur jobs become obvious. Do not just butt two boards together. Use a corner trim piece or miter the edges at 45 degrees for a seamless wrap. If you aren’t confident in your miter cuts, a simple square piece of trim in the corner is a respectable, clean solution.
Maintenance and Longevity
Cedar is durable, but it isn’t maintenance-free.
Cleaning
Dust loves texture. Use a microfiber cloth or a vacuum with a soft brush attachment to clean the walls monthly. Avoid harsh chemical cleaners. A damp cloth with mild soap is all you need for spot cleaning.
Scratch Repair
Cedar is a softwood (Janka hardness rating is low). It dents and scratches easily. If you have a dog that jumps on walls or kids running toy cars along the baseboards, be aware of this. Minor scratches can be sanded out lightly with 220-grit sandpaper. If the wood is stained, you will need to re-touch that spot.
Scent Revival
The cedar smell will fade after a year or so. You can revive it by very lightly sanding the surface to expose fresh fibers. Alternatively, natural cedar oil can be dabbed onto inconspicuous areas to boost the aroma without altering the finish.
Final Checklist: What I’d Do in a Real Project
If I were managing your renovation, here is the checklist I would run through before the first board goes up:
- Verify the Grade: Did I order Clear Vertical Grain for modern or Knotty for rustic?
- Check the Background: Is the drywall painted black (for slat walls) or primed dark (for open joints)?
- Lighting Plan: Are the recessed lights positioned 12-18 inches from the wall for grazing?
- Outlet Extensions: Did I buy box extenders? The electrical outlets need to be pulled forward to sit flush with the new wood depth.
- Baseboard Strategy: Am I removing the existing baseboards (preferred) or stacking the wood on top?
- Acclimation: Has the wood been in the room for 3+ days?
- Fasteners: Do I have stainless steel nails to prevent tannin streaks?
FAQs
Is cedar wall paneling expensive compared to shiplap?
Generally, yes. Standard “shiplap” is often made of pine or MDF (medium-density fiberboard), which is cheap and meant to be painted. Real Western Red Cedar is a premium hardwood product. Expect to pay 3x to 4x more for cedar than for pine.
Can I install cedar over a brick fireplace?
Yes, but you need a substructure. You cannot nail into brick easily. You will need to attach vertical wood furring strips to the masonry using concrete screws, and then nail the cedar to those strips. Always check local fire codes regarding combustible materials near the firebox opening.
Does cedar paneling make a room look smaller?
Dark walls absorb light, which can visually shrink a space. However, they also blur boundaries. If you use vertical grain and good lighting, it often adds depth. If the room is very small, stick to one accent wall rather than wrapping the whole room.
How do I handle switches and outlets on a slat wall?
This is tricky. The cleanest way is to cut a block of solid cedar that matches the thickness of the slats. Install this block around the outlet box, and then run your slats up to the block. This gives the switch plate a flat surface to sit on.
Conclusion
Adding a cedar wall is one of the highest-impact upgrades you can make to a home. It brings nature indoors in a way that feels permanent and substantial. Whether you choose the clean lines of a modern slat wall or the cozy warmth of rustic knotty planks, the key is planning.
Respect the material—give it time to acclimate, give it the right lighting, and choose the grade that matches your vision. Do this, and you won’t just have a wood wall; you’ll have a centerpiece that sets the tone for your entire home.
Picture Gallery


