
Chalk Paint Armoire Ideas for a Chic Refresh
An armoire is often the elephant in the room, quite literally. These massive pieces of furniture offer incredible storage and architectural interest, but their heavy wood finishes can sometimes feel outdated or oppressive in a modern space. Whether you have an heirloom piece passed down through generations or a lucky thrift store find, painting it is the most effective way to modernize its look without sacrificing its soul.
Chalk paint is the go-to medium for these transformations because of its forgiving nature and beautiful matte finish. It allows you to achieve a high-end, custom look without needing an industrial spray booth. However, tackling a piece of this scale requires a specific strategy to ensure the finish is durable and looks professional rather than patchy.
In this guide, I will walk you through the design decisions and technical steps required to revive your armoire. If you are looking for visual inspiration before you start, make sure to check out the Picture Gallery at the end of this blog post.
Understanding the Armoire: Scale and Placement
Before you even open a can of paint, you need to consider the physical presence of the armoire in your room. An armoire is a vertical anchor; it draws the eye up and commands attention. Because of its size, the color you choose will have a significant impact on the perceived size of the room.
If you are painting an armoire for a small room or a space with standard 8-foot ceilings, I generally recommend sticking to lighter hues. A heavy, dark charcoal or navy armoire in a small bedroom can visually suck the light out of the space. Conversely, if you have vaulted ceilings or a large open-concept living area, a dark, moody color can act as a stunning focal point that grounds the furniture arrangement.
You also need to consider functional spacing. An armoire generally requires at least 36 to 48 inches of clearance in front of it. This allows the doors to swing fully open without hitting the bed or sofa, and gives you room to stand comfortably while accessing the contents. If your space is tighter than this, consider painting the exterior a color that matches your walls to help the piece “disappear” visually into the architecture.
Designer’s Note: The Reality of “No Prep”
There is a common misconception in the DIY world that chalk paint requires zero preparation. As a designer who has seen many projects peel after six months, I have to correct this. While you do not need to strip the furniture back to raw wood, you absolutely must clean and scuff the surface.
Armoires, particularly older ones, are often covered in decades of furniture polish, oils, and dust. Chalk paint will stick to almost anything, but it will not stick to lemon oil or wax. If you paint over a dirty surface, the paint will adhere to the dirt, not the wood, and eventually flake off.
Common Mistakes + Fixes
Mistake: Skipping the cleaning step or using a standard household spray cleaner.
Fix: Use a dedicated degreaser or TSP (Trisodium Phosphate) substitute. Scrub the piece down and wipe it clean with water to remove residue. This ensures a bond that lasts for years, not months.
Choosing Your Aesthetic: Techniques and Colors
The versatility of chalk paint lies in how you manipulate the finish. You aren’t just picking a color; you are picking a texture and a style. Here are three distinct approaches I often use in client homes depending on the desired vibe.
The Modern Matte (Solid Finish)
This look is ideal for contemporary, transitional, or modern farmhouse interiors. The goal is a smooth, solid color with no distressing.
- Colors: Matte black, slate blue, or warm “greige.”
- Technique: Use a fine-grit sanding sponge between coats to knock down brush strokes.
- Hardware: Swap old ornate handles for sleek brass bars or simple iron knobs.
The French Country (Distressed)
This is the classic chalk paint look. It highlights the architectural details of the armoire, such as carved headers or raised door panels.
- Colors: Creamy whites, soft sage greens, or pale blues.
- Technique: Paint two coats, then use 220-grit sandpaper to gently remove paint from edges and raised details where wear would naturally occur.
- Hardware: Keep the original hardware but maybe rub a little “Gold Leaf Rub ‘n Buff” on it to brighten the metal.
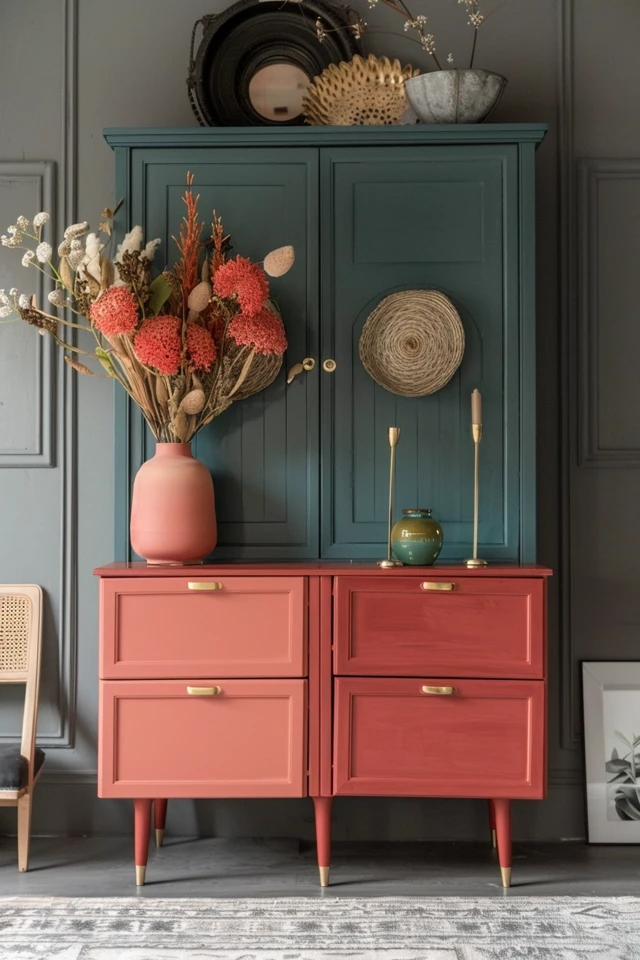
The Boho Statement (Textured)
This style embraces brush strokes and imperfections to create an organic, handmade feel.
- Colors: Terracotta, deep teal, or mustard yellow.
- Technique: Use a round natural bristle brush and paint in multiple directions (cross-hatching) to build texture. Dark wax is often applied over the paint to settle into the grooves and add depth.
Step-by-Step Application Guide
Painting a large armoire is a marathon, not a sprint. Proper sequencing saves you time and frustration. Here is the workflow I use to ensure efficiency.
1. Disassembly and Labeling
Remove all doors, drawers, and hardware. It is tempting to paint everything in place, but you will inevitably get paint on the hinges or miss the edges of the doors.
Use masking tape to label each door and drawer (e.g., “Top Left,” “Bottom Right”). Older furniture is rarely perfectly square; a door that fits on the left might rub if you try to install it on the right.
2. The “Scuff” Sand
Once the piece is cleaned (as mentioned in the Designer’s Note), take a 220-grit sanding block and give the entire surface a quick pass. You aren’t trying to remove the old finish; you are just creating “teeth” for the new paint to grab onto. Wipe away the dust with a tack cloth.
3. Dealing with Bleed-Through
This is a critical step for mahogany, cherry, or oak pieces from the 1920s to 1940s. These woods contain tannins that can bleed through light-colored paint, creating pink or yellow stains.
If you are painting a dark wood armoire white or cream, spot-prime the piece with a shellac-based primer first. If you see a stain emerging as you paint, stop immediately, let it dry, apply shellac over the spot, and then continue.
4. The Painting Process
Flip the armoire upside down or on its back if possible to paint the bottom edges first. Work in sections. Chalk paint dries quickly, so keep a “wet edge” to avoid lap marks.
I usually recommend two coats. The first coat might look streaky—that is normal. The second coat provides the true coverage. Allow 2 to 4 hours of dry time between coats depending on humidity.
What I’d Do in a Real Project: The Interior Matters
When I design an armoire for a client, I rarely leave the interior untouched. Opening the doors should be a moment of delight. A dark armoire can feel like a black hole if the inside is also dark.
Paint the Interior a Contrast Color
If the exterior is a soft gray, paint the interior a crisp white or a pale robins-egg blue. This makes whatever you store inside—whether it is linens, books, or dishes—pop visually.
Wallpaper the Back Panel
This is a fantastic way to add pattern without overwhelming the room. Peel-and-stick wallpaper is renter-friendly and easy to apply to the back panel of the armoire. Choose a pattern that coordinates with your rug or throw pillows to tie the room together.
Lighting is Key
If the armoire is being used as a bar or a display cabinet, I always install a wireless, motion-sensor puck light or an LED strip inside the header. It creates a boutique feel and makes the piece functional at night.
Sealing and Protection: Wax vs. Topcoat
Chalk paint is porous. If you do not seal it, it will absorb oils from your hands, dust, and spills. The finish you choose depends on how you plan to use the armoire.
When to Use Wax
Wax provides that signature velvety, soft sheen associated with chalk paint. It is beautiful but requires maintenance.
- Best for: Decorative armoires in bedrooms or guest rooms that don’t see heavy daily use.
- Application: Brush on clear wax, wipe off the excess with a lint-free cloth, and let it cure. You can buff it later for more shine.
When to Use Poly or Lacquer
If your armoire is in a high-traffic zone, such as a mudroom or a living room where it houses the TV, wax is not durable enough.
- Best for: High-touch surfaces, homes with kids or pets.
- Application: Use a water-based matte or satin polychrylic. Apply with a sponge roller for a streak-free finish. It resists scratches and can be scrubbed clean.
Common Mistakes + Fixes: Sealing
Mistake: Applying wax while the paint is still wet or tacky.
Fix: Wait at least 24 hours after the last coat of paint before sealing. Trapping moisture under the wax can cause the paint to lift or the wax to stay sticky forever.
Mistake: “Flashing” or uneven sheen with topcoats.
Fix: Do not overwork the clear coat. Lay it down and walk away. If you keep brushing over it as it starts to dry, it will cloud up. If this happens, lightly sand it with 400-grit paper and apply a final, quick fluid coat.
Hardware and Final Touches
The hardware is the jewelry of the piece. If the original hardware is solid brass, I almost always recommend cleaning it rather than replacing it. Boil the hardware in a mixture of water and vinegar to remove decades of grime; the original patina is often beautiful.
If you must replace the hardware, measure the “center-to-center” distance of the screw holes carefully. Standard sizes are 3 inches or 4 inches, but vintage furniture often has non-standard sizing like 2.5 inches. If your new handles don’t fit, you will need to fill the old holes with wood filler, sand them smooth, and drill new holes before you paint.
Designer’s Note:
Check the scale of your new knobs. A large armoire door looks silly with a tiny 1-inch knob. Aim for hardware that has some visual weight—elongated pulls or knobs with a backplate usually look best.
Final Checklist for Your Armoire Refresh
Before you call the project done, run through this list to ensure professional results.
Preparation Phase
- Remove all hardware, doors, and drawers.
- Label all doors and drawers with tape.
- Clean thoroughly with a TSP substitute/degreaser.
- Scuff sand all surfaces with 220-grit sandpaper.
- Wipe down with a tack cloth or damp rag.
- Tape off any glass panels or mirrors.
Painting Phase
- Spot prime any bleed-through with shellac-based primer.
- Paint the first coat (focus on coverage, not perfection).
- Allow to dry (2-4 hours).
- Lightly sand any drips or rough spots.
- Paint the second coat.
- Distress edges now if that is your chosen style.
Finishing Phase
- Allow paint to dry for at least 24 hours.
- Apply wax (sections at a time) OR water-based topcoat (entire surface at once).
- Reinstall hardware.
- Reattach doors and drawers (wax the wooden runners of drawers so they slide smoothly).
- Let the piece “cure” for 20-30 days before placing heavy objects on it.
FAQs
Do I really need to sand if the chalk paint can says “no prep”?
Yes. While the paint will stick initially, skipping the scuff sand significantly increases the risk of chips and scratches later. The “no prep” claim is marketing; “low prep” is the reality. A 10-minute sanding session saves you hours of repairs later.
How much paint will I need for a large armoire?
For a standard large armoire (approx. 6 feet tall, 4 feet wide), one quart (roughly 1 liter) of chalk paint is usually sufficient for two coats on the exterior. If you plan to paint the interior as well, you will likely need a second quart.
Can I paint the hardware with chalk paint?
Technically yes, but I advise against it for high-use handles. The oils from your hands will wear the paint off quickly on metal. It is better to spray paint hardware with a metal-specific spray paint or use “Rub ‘n Buff” wax for a metallic finish.
Why is my white paint turning pink or yellow?
This is “bleed-through,” caused by tannins in the wood (common in mahogany and cherry). You cannot paint over it to fix it—the stain will just seep through the new layer. You must seal the stain with a shellac-based primer or a clear shellac spray before painting again.
Conclusion
Reviving an armoire with chalk paint is one of the most rewarding DIY projects because the transformation is so dramatic. You are taking a piece that was likely visually heavy and dated and turning it into a custom focal point that fits your specific style.
Remember that patience is your best tool. Allow proper drying times, don’t skimp on the cleaning, and choose a finish that matches your lifestyle. Whether you go for a distressed French country look or a sleek modern matte black, your “new” armoire will extend the life of the furniture and add character to your home that big-box store furniture just can’t match.
Picture Gallery


