
Charming Bay Window Ideas Exterior Makeovers
Bay windows are the architectural jewelry of a home’s facade. They break up flat walls, capture sunlight from multiple angles, and add immediate dimension to your property. However, they are also one of the first features to look dated or neglected if not maintained properly.
I remember my first project involving a bay window exterior renovation on a Victorian remodel. The original structure was rotting at the base, and the roofing shingles were mismatched. To spark your imagination before we dive into the technical details, remember that a curated Picture Gallery is at the end of the blog post.
In this guide, we are going to look at how to transform that projecting window into a standout feature. We will cover everything from architectural trim and roofing materials to the landscaping that grounds the structure. Let’s elevate your curb appeal.
1. Architectural Trim and Millwork Details
The difference between a builder-grade bay window and a custom design usually comes down to the millwork. The trim frames the window and transitions it back to the main siding. Without substantial trim, a bay window can look like a plastic box stuck onto the side of a house.
You want to focus on the apron (the bottom trim) and the fascia (the top trim). These areas need visual weight to support the projection. A common rule of thumb I use is that the bottom apron should be at least 6 to 8 inches tall to balance the glass above.
Consider adding corbels or brackets underneath the bay window if it is a “floating” style (Oriel window) that doesn’t reach the ground. These structural-looking decorative elements add historical charm and visual support.
Designer’s Note: The Scale Rule
One of the biggest issues I see is “anemic” trim. If your house siding has a 5-inch exposure, your corner boards on the bay window should be at least 5.5 inches wide. Never use trim that is narrower than the siding exposure. It makes the window look flimsy and out of proportion.
Material Choices for Trim:
- Cellular PVC: This is my go-to for exterior trim. It doesn’t rot, it holds paint famously well, and it can be milled just like wood.
- Cedar: A classic choice that offers natural rot resistance, but it requires more maintenance and staining over time.
- Fiber Cement: Durable and fire-resistant, but harder to create intricate details with compared to wood or PVC.
2. Roofing Materials and Accent Metals
The roof of your bay window is a prime opportunity to introduce a high-end material accent. Because the square footage is small, you can splurge on materials here that might be too expensive to use on the entire house.
Copper is the gold standard for bay window roofing. It offers a timeless aesthetic that ages beautifully, transitioning from a bright penny color to a distinguished green patina over 10 to 20 years.
If copper isn’t in the budget or doesn’t fit your home’s style, a standing seam metal roof in matte black or dark bronze creates a stunning modern farmhouse or industrial look. This creates a sharp texture contrast against standard asphalt shingles on the main roof.
Common Mistakes + Fixes
Mistake: Using asphalt shingles on a low-slope bay roof.
The Fix: Bay window roofs often have a shallow pitch (low slope). Standard shingles require a certain steepness to shed water effectively. If the pitch is below 3:12 (3 inches of rise for every 12 inches of run), you must use a metal roof or a membrane system to prevent leaks.
Roofing Profiles to Consider:
- Concave (Bell) Roof: Curves inward, offering a very elegant, traditional Victorian look. Almost always requires metal roofing.
- Hip Roof: Slopes down on all three sides. This is the most common and works with almost any architectural style.
- Shed Roof: Slopes in one direction away from the house. This is simpler and works well for Craftsman or modern homes.
3. Siding Contrast and Cladding Strategies
You do not have to match the siding on your bay window to the rest of the house. In fact, changing the material is a fantastic way to highlight the architectural feature. This technique breaks up the visual mass of a large wall.
If your home has horizontal lap siding (clapboard), consider using cedar shakes or scallops on the bay window. This texture change draws the eye and adds a layer of craftsmanship.
For a more modern approach, you might use vertical board-and-batten siding on the bay to contrast with horizontal siding elsewhere. This emphasizes the height of the windows rather than the width.
Designer’s Note: Color Blocking
If you keep the material the same, you can still create contrast with color. I often paint the bay window siding one shade darker or lighter than the main house body color. For example, if the house is a light “Greige” (SW Agreeable Gray), I might paint the bay window siding a medium “Taupe” (SW Mega Greige). It adds depth without looking chaotic.
What I’d do in a real project:
- Assess the Exposure: If the window faces south and gets beaten by the sun, I avoid dark vinyl siding which can warp. I would spec a fiber cement product instead.
- Check the Corners: I prefer mitered corners for cedar shakes to create a seamless wrap-around look. For lap siding, I ensure corner boards are wide enough to receive the siding ends cleanly.
- Insulation Check: When re-siding a bay window, I always insist on adding rigid foam insulation on the exterior of the framing before the new siding goes on. Bay windows are notorious energy leaks because they are exposed on three sides (and the bottom/top).
4. Window Sash and Grille Patterns
The actual glass and sash design plays a massive role in the exterior character. The configuration of the panes—known as muntins or grilles—dictates the style era.
For a traditional colonial look, a “6-over-6” or “6-over-1” grille pattern is standard. This means six panes of glass in the top sash and six (or one) in the bottom.
If you are aiming for a modern update, removing the grilles entirely for a clear view is a valid choice. This works exceptionally well if the bay window overlooks a garden or scenic view. It instantly modernizes a dated facade.
Casement vs. Double Hung
The side windows of a bay are usually narrower than the center picture window.
- Casement Windows: These crank out. They offer the best ventilation because the entire pane opens. They also seal tighter against wind than double-hung windows.
- Double Hung Windows: These slide up and down. They are better if the bay window opens onto a walkway or deck where a cranking window would be an obstruction hazard.
Designer’s Note: The Black Frame Trend
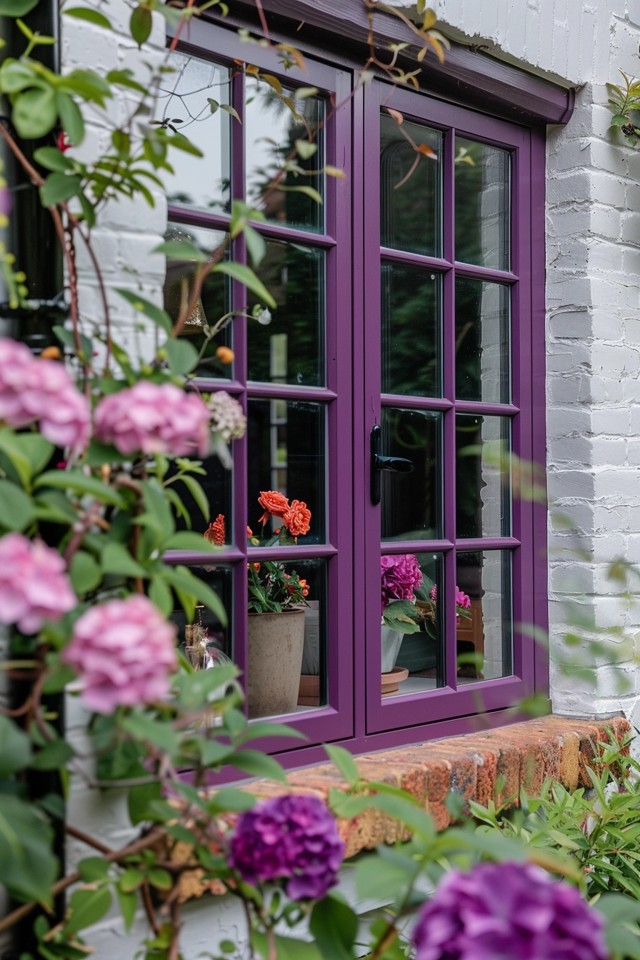
Black exterior window frames are incredibly popular right now. They act like eyeliner for your home, defining the openings. However, they work best when the trim is relatively simple. If you have very ornate Victorian trim, black frames can sometimes look too heavy. In those cases, a deep bronze or classic white is often safer.
5. Landscaping the Base
A floating bay window creates a void space underneath that can look awkward if left bare. Proper landscaping anchors the window to the ground and hides the “underside” which is rarely attractive.
The goal is to create a skirt of foliage that touches the bottom of the window trim without blocking the view from inside. You want to bridge the gap between the foundation and the start of the siding.
Planting Strategy:
- Layering: Start with taller evergreens in the back (closest to the house) and shorter flowering perennials in the front.
- Height Management: Select plants that mature at a height just below the window sill. Pruning is a chore; choosing the right plant size is design. Dwarf Boxwoods or Compact Hollies are excellent for structure.
- Texture: Use Hydrangeas for soft, billowy volume that contrasts with the hard lines of the bay window construction.
Common Mistakes + Fixes
Mistake: Planting too close to the siding.
The Fix: Center the root ball of your foundation plants at least 2.5 to 3 feet away from the wall. Plants need air circulation to prevent mold on your siding, and you need space to access the exterior for maintenance.
Hardscaping Options
If plants won’t grow due to deep shade under the overhang, use hardscaping. A clean border of river rock or decorative gravel underneath the bay window serves two purposes. First, it looks intentional and tidy. Second, it prevents mud from splashing up onto the underside of the window during heavy rains.
Final Checklist: The Bay Window Makeover
If you are planning a renovation, use this checklist to ensure you cover all the bases.
Phase 1: Assessment
- Inspect the bottom structural support (cables or brackets) for rust or rot.
- Check the “seat board” insulation from underneath. Is it cold?
- Determine the roof pitch to select the right material.
Phase 2: Design
- Choose a trim width (minimum 4 inches).
- Select a siding texture (match house or contrast).
- Pick a roof accent color (copper, black, or shingle match).
Phase 3: Execution
- Install proper flashing at the roof-to-wall intersection (critical step).
- Ensure the “drip edge” is installed to guide water away from the fascia.
- Paint or stain trim before final landscaping to avoid damaging plants.
FAQs
How much does it cost to replace a bay window exterior?
This varies wildly by location and material, but generally, replacing an existing bay window unit costs between $1,500 and $3,500 for the window itself. Labor, new roofing, and exterior trim work can easily double that. For a full makeover involving copper roofing and premium millwork, budget between $5,000 and $8,000.
Do bay windows need support from the ground?
Not always. “Cantilevered” or “Oriel” bay windows hang from the wall framing and do not touch the ground. However, they often require support cables hidden inside the wall above or decorative brackets underneath. If the projection is deep or the unit is heavy, a foundation wall or posts may be required.
Why is my bay window colder than the rest of the room?
This is usually due to the “seat board” (the floor of the bay window) and the “head board” (the ceiling). These areas protrude outside and are often poorly insulated compared to standard walls. During an exterior makeover, adding spray foam or rigid foam board to the underside of the unit is the best way to fix this.
Can I paint vinyl bay windows?
Yes, but you must use paint specifically formulated for vinyl. Standard latex paint will crack as the vinyl expands and contracts. Also, avoid painting vinyl a significantly darker color than the original, as the increased heat absorption can cause the vinyl to warp.
Conclusion
Updating the exterior of a bay window is a high-impact project. It is one of the few renovations that improves your home’s energy efficiency, interior comfort, and exterior curb appeal simultaneously.
Whether you choose to accent the feature with a copper roof and cedar shakes, or streamline it with modern black sashes and clean trim, the key is proportion. Respect the scale of your home, ensure the water management is sound, and ground the structure with thoughtful landscaping.
When done right, a bay window stops being just an appendage on your house and becomes the focal point that welcomes you home.
Picture Gallery


