
Title: Charming Farmhouse Porch Railing Ideas to Inspire
Introduction
There is something undeniably magnetic about a well-designed farmhouse porch. It is the transition point between the private sanctuary of your home and the public world, serving as a second living room during the warmer months. When I work with clients on exterior renovations, the porch railing is often the unsung hero that ties the entire architectural vision together.
I remember a specific project in upstate New York where the homeowners had a beautiful wrap-around porch, but it felt disconnected from the rest of the house because of flimsy, builder-grade vinyl railings. By swapping those out for a chunky timber frame with black metal spindles, we instantly grounded the house and gave it that custom, high-end farmhouse aesthetic. Please be sure to check out our comprehensive Picture Gallery at the end of this blog post for visual inspiration.
The right railing provides safety, defines the space, and significantly boosts curb appeal. However, choosing the right style involves navigating building codes, material durability, and maintenance realities. In this guide, we will explore the most charming farmhouse railing options and the practical details you need to make them work for your home.
The Classic “X” Pattern Railing
The “X” pattern, often called the St. Andrew’s Cross, is perhaps the most recognizable hallmark of the modern farmhouse style. It mimics the bracing found on traditional barn doors, instantly adding rustic character to a new build. This style relies heavily on symmetry and scale to look correct.
In my design practice, I always emphasize that the “X” needs to be framed substantially. You cannot use thin lumber here. I recommend using at least 4×4 posts, though 6×6 posts often look better if your porch is wider than eight feet. The top and bottom rails should be robust enough to visually support the “X” insert.
One design nuance to consider is the infill between the main posts. If you have a very long span between columns, simply repeating the “X” pattern can look busy. I often break up the visual repetition by alternating “X” panels with simple vertical balusters or by ensuring the “X” panels are wide enough (usually 36 to 48 inches) to avoid a cluttered look.
Designer’s Note: Practical Geometry
When designing an X-pattern railing, the angle of the cross pieces matters. If the panel is too narrow, the X looks squashed and vertical. If the panel is too wide, it looks flattened. The ideal aspect ratio for the open space inside the frame is close to a square or slightly rectangular. This keeps the angles pleasing to the eye.
Safety Consideration
Be aware that some local building codes categorize the “X” pattern as “climbable” or having a “ladder effect.” This can be a safety hazard for small children. Before falling in love with this style, check your local municipal codes to ensure horizontal or diagonal members are permitted on residential designs.
Vertical Balusters with a Modern Twist
Traditional vertical balusters are timeless, but to achieve that specific “farmhouse” vibe, we need to play with materials and colors. The old-school, all-white turned spindle look can lean a bit too Victorian or Colonial for a rustic farmhouse. To update this, I frequently specify square-edged balusters rather than rounded or turned ones.
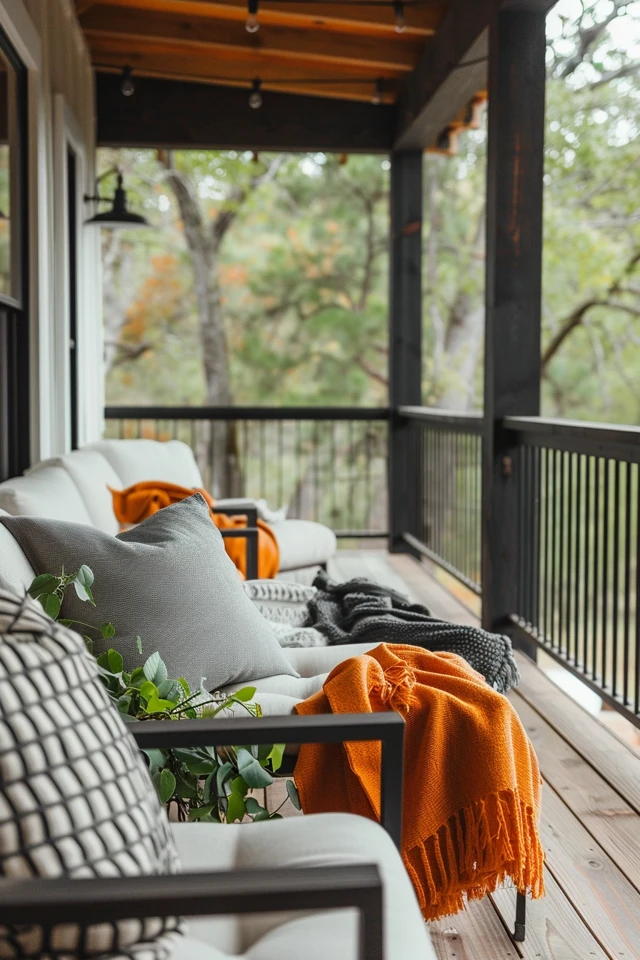
A favorite combination among my clients is a natural wood handrail paired with black metal balusters. The contrast is sharp and clean. The black metal tends to recede visually, allowing the eye to look through the railing to the landscape beyond, rather than getting stuck on the white pickets.
For the top rail, consider upgrading to a “cocktail rail” or “drink rail.” This involves placing a flat deck board (usually a 1×6 or 5/4 board) horizontally over the top of the structural rail. It creates a flat surface roughly 5.5 inches wide, which is perfect for resting a coffee mug or a glass of wine. It turns the entire perimeter of your porch into functional entertaining space.
Spacing Rules of Thumb
regardless of style, the spacing of vertical balusters is dictated by the “4-inch sphere rule.” You must ensure that a 4-inch sphere (roughly the size of a baby’s head) cannot pass through any opening in the railing. practically, this means spacing your balusters about 3.5 inches apart.
Hog Wire and Mesh Panels
For a more utilitarian, ranch-style farmhouse look, hog wire (or wild hog railing) is an excellent choice. This consists of heavy-gauge welded wire mesh framed in wood. It is incredibly durable and offers great visibility, making it a strong contender if your porch overlooks a garden or a scenic view.
The key to making hog wire look high-end rather than agricultural is the framing. You must sandwich the wire mesh between trim boards so no sharp edges are exposed. I typically use a “bread loaf” top rail or a flat cap to finish the look. The wood frame creates a warm border around the industrial metal grid.
When selecting the mesh, pay attention to the gauge and the aperture size. A 4×4 inch grid is standard and offers a nice balance of visibility and safety. Avoid chicken wire or thin hardware cloth, as they will warp and look cheap within a season. You want a rigid panel that does not flex when you push on it.
Finish Options
You can buy these panels in raw steel, which will rust over time for a distinct patina. However, for most residential porches, I recommend black powder-coated galvanized steel. It resists corrosion and provides that crisp black-and-wood contrast that defines the farmhouse palette.
Cable Railing for Clean Lines
While often associated with ultra-modern homes, cable railing fits perfectly into the “Modern Farmhouse” sub-genre. It is the best option if you want your railing to virtually disappear. This is ideal for porches with smaller footprints, as the lack of visual bulk makes the space feel larger.
Cable railings use horizontal stainless steel cables tensioned between posts. For a farmhouse aesthetic, I avoid metal posts and instead run the cables through chunky wood posts (cedar or stained pine). This retains the warmth of the farmhouse style while utilizing modern infill.
Because the cables are under immense tension, your end posts must be structurally reinforced. A standard 4×4 post can actually bow inward over time under the strain of 10 or more tightened cables. I always specify 6×6 posts for the corners and ends, or use a rigid top rail to help maintain the structural integrity.
Budget Reality Check
Cable railing is generally one of the most expensive options due to the cost of the specialized hardware and the labor intensity of installation. If you are on a tight budget, consider using cable only on the front-facing section of the porch and switching to a complementary wood style for the sides.
Material Selection and Maintenance
The material you choose dictates the longevity of your porch railing. In the farmhouse aesthetic, wood is king, but it is not the only player.
Pressure Treated Lumber
This is the most cost-effective option. It resists rot and insects. However, it has a high moisture content when new. You generally need to wait several months for it to dry out before you can paint or stain it, or the finish will peel.
Cedar and Redwood
These are premium softwoods with natural rot resistance. They take stain beautifully and have a rich, warm grain. They are softer than pressure treated wood, so they can dent, but they are much more stable and less prone to warping.
Composite and PVC
For a zero-maintenance approach, composite railings are excellent. High-end brands now offer railing kits that mimic the look of painted wood without the peeling. If you choose a white composite railing, ensure it has a UV-resistant cap stock so it doesn’t yellow over time.
Aluminum
Pre-fabricated aluminum railings are lightweight, strong, and rust-proof. They are often thinner than wood, which can sometimes look underwhelming on a grand farmhouse porch. If using aluminum, look for textured matte black finishes that mimic the look of wrought iron.
What I’d Do in a Real Project: A Mini Checklist
If I were designing a farmhouse porch railing for a client today, here is the mental checklist and process I would follow.
1. Define the View: If the house faces a lake or a mountain, I am choosing cable rail or hog wire. If it faces a street, I am choosing the X-pattern or vertical balusters for more privacy and visual weight.
2. Check the Heights: Residential code usually requires a 36-inch high rail for porches more than 30 inches off the ground. However, I often specify a 42-inch rail for a grander look, provided it doesn’t block window sightlines from inside the house.
3. Select the Cap: I almost always specify a wide top cap (2×6). It makes the railing feel like furniture rather than a fence.
4. Plan the Lighting: I plan for low-voltage LED cap lights on the posts. Lighting the perimeter of the porch at night creates a cozy, safe atmosphere.
5. Coordinate the Skirt: I ensure the design of the railing complements the porch skirting (the area under the porch floor). If the railing is busy (like an X-pattern), I keep the skirting simple.
Common Mistakes + Fixes
Mistake: Ignoring the “Sweep Space”
Many DIYers install the bottom rail flush against the porch floor.
The Fix: Leave a 3 to 4-inch gap (sweep space) between the floor and the bottom rail. This prevents snow buildup, allows leaves to blow off, and prevents the bottom of the wood rail from sitting in puddles and rotting.
Mistake: Scaling Mismatch
Using spindly 2×2 posts on a house with massive columns or heavy timber trusses.
The Fix: Match the visual weight. If your house has heavy siding or stone veneer, your railing posts need to be at least 6×6 to look proportional.
Mistake: Poor Water Management
Flat top rails allow water to pool, which accelerates rot.
The Fix: If you are using a standard 2×4 top rail, slightly bevel the top edges or ensure the lumber is crowned up. For wide flat caps (cocktail rails), use a high-quality exterior sealer and inspect the joints annually.
Final Checklist for Your Project
Before you buy materials or hire a contractor, run through this final list to ensure nothing has been missed.
- Code Compliance: Have you verified the required railing height (usually 36″ or 42″) with your local building department?
- Safety Check: Have you confirmed that your chosen design (especially horizontal variations) is permitted in your jurisdiction?
- Measurements: Have you measured the linear footage, including the stairs? (Stair railings require different angles and hardware).
- Post Placement: Have you marked out where the posts will go to ensure they don’t land in front of a window or door?
- Material Lead Time: If ordering custom colored aluminum or specific composite brands, have you checked the delivery dates?
- Budget Buffer: Have you set aside an extra 10-15% of the budget for hardware, mistakes, or lumber price fluctuations?
FAQs
What is the best paint color for farmhouse railings?
You generally cannot go wrong with crisp white or matte black. White feels traditional and matches white trim, while black creates a modern, high-contrast look. Some designers also use a dark charcoal gray or a deep forest green for a moodier aesthetic.
Can I use pressure-treated wood for the handrail?
Yes, but be careful. Pressure-treated wood is prone to splintering and warping as it dries. If you use it for the top rail where hands will touch, you must sand it thoroughly and seal it well. I often recommend upgrading just the top cap to Cedar or composite for comfort.
How do I clean my porch railing?
For wood and composite, a gentle scrub with soapy water and a soft-bristle brush is usually enough. Avoid high-pressure power washing on wood, as it can gouge the grain. For glass or cable railings, use a glass cleaner or a mild detergent to remove fingerprints and water spots.
Do I need a railing if my porch is low to the ground?
Building codes typically require a railing if the porch floor is 30 inches or more above the grade. However, even if your porch is lower, a railing can still define the architectural space and prevent accidental step-offs, especially for elderly guests.
Conclusion
Choosing the right farmhouse porch railing is about balancing the architectural heritage of the style with modern functional needs. Whether you opt for the geometric drama of the X-pattern, the invisibility of cable railing, or the rustic charm of hog wire, the goal is to create a welcoming boundary.
Remember that the porch is the handshake of your home. It sets the tone for everything that lies within. By investing in proper materials, respecting scale and proportion, and adding thoughtful details like a wide top cap, you create a space that is not just a pass-through, but a destination.
Take your time planning the spacing and selecting the finish. When done right, these railings will withstand the elements and style trends for decades to come.
Picture Gallery


