
Chic Basement Corner Bar Ideas for Your Home
Converting a basement from a storage catch-all into a functional living space is one of the most rewarding home improvement projects you can undertake. The corner of a basement, often dark and underutilized, offers the perfect footprint for an intimate home bar without dominating the entire recreation room. I recently worked with a client who had a structural support pole awkwardly placed near a corner; rather than hiding it, we incorporated it into the bar design, turning a hindrance into a focal point.
Basement bars provide a designated zone for entertaining, keeping the noise and traffic away from the main living areas upstairs. They allow for bolder design choices, like darker paint colors or industrial finishes, that you might hesitate to use in a bright, airy kitchen. Whether you are a renter looking for a temporary dry bar setup or a homeowner ready to install plumbing for a full wet bar, the corner layout is efficient and inviting.
This guide will walk you through the structural considerations, design aesthetics, and practical measurements needed to execute this project. For visual inspiration, don’t miss our curated Picture Gallery included at the end of this article. Let’s look at how to maximize that corner space effectively.
1. Assessing the Space: Wet Bar vs. Dry Bar
The very first decision determines your budget and your layout: water. A wet bar includes a sink and requires plumbing, while a dry bar is essentially cabinetry and counter space for mixing drinks. In a basement, adding a sink isn’t always straightforward.
If your basement corner shares a wall with a bathroom or laundry room, tapping into existing plumbing is relatively easy. However, if the main drain line is above the basement floor level, you will need a sewage ejector pump. This adds cost and requires a place to hide the pump mechanism, usually inside a base cabinet.
For a dry bar, you have significantly more freedom. You can utilize modular cabinetry or even freestanding furniture pieces. The lack of plumbing means you can position the bar in any corner without cutting into concrete floors.
The “L-Shape” Advantage
The classic L-shape is the most efficient layout for a corner bar. It utilizes two walls, providing ample stability for shelving and counters.
- The Return: The section of the bar that sticks out into the room (the peninsula) creates a distinct boundary between the “bartender” and the guests.
- Flow Control: This shape prevents guests from wandering behind the bar, keeping your workspace clear.
- Seating: The outer edge of the L-shape is perfect for bar stools, encouraging conversation.
Designer’s Note: The Clearance Rule
A common mistake is cramping the workspace behind the bar. You need room to bend down, open a fridge, or turn around without hitting your hip on a counter.
- Minimum Clearance: Allow at least 36 inches of width for the aisle behind the bar.
- Ideal Clearance: If you have the space, 42 inches is luxurious and allows two people to stand behind the bar comfortably.
- Depth Check: Standard base cabinets are 24 inches deep. Factor this in when marking out your floor tape.
2. Cabinetry and Countertops: Selecting Materials
Basements have a different microclimate than the rest of the house. They are cooler and naturally more humid. When selecting cabinetry, avoid cheap particle board if possible, as it can swell if exposed to moisture over time. Plywood boxes or moisture-resistant MDF are safer bets for longevity.
For the countertops, you want a surface that can handle spills, citrus juice (acid), and red wine. Marble is beautiful but porous; it will etch immediately if lemon juice hits it.
Top Countertop Choices
- Quartz: This is the industry standard for durability. It is non-porous, requires no sealing, and mimics the look of natural stone.
- Butcher Block: This adds immediate warmth to a cold basement. It is budget-friendly but requires regular oiling to prevent drying or staining.
- Granite: A classic choice that is heat and scratch-resistant. You must seal it once a year, but it is incredibly tough.
- Leathered Finish: Consider a “leathered” or matte finish for your stone. It hides fingerprints and water spots much better than high-gloss polished stone, especially under dramatic bar lighting.
Standard Height Measurements
Getting the heights right is critical for comfort.
- Bar Height: A raised bar top sits at 42 inches high. You need bar stools with a seat height of 30 inches.
- Counter Height: A standard kitchen counter height is 36 inches. You need counter stools with a seat height of 24 inches.
- Knee Clearance: For guests to sit comfortably, the countertop overhang should be between 10 to 12 inches deep. Anything less than 10 inches will force guests to lean forward awkwardly.
3. Lighting the Corner: Setting the Mood
Lighting is the make-or-break element in a basement. Because natural light is often scarce or non-existent, you have to manufacture the ambiance. A single overhead light fixture will create harsh shadows and make the space feel like a storage closet.
You need to layer your lighting. This means having light sources at different heights and intensities.
The Three Layers of Bar Lighting
- Ambient Lighting: This is your general light. Recessed “can” lights are standard here. Position them in the walkway around the bar, not directly over your head where they cast shadows on your work.
- Task Lighting: You need to see where you are pouring. Under-cabinet LED tape lighting is essential if you have upper cabinets or shelves. It illuminates the counter without glare.
- Accent Lighting: This is the jewelry of the room. Pendant lights hanging over the bar peninsula add style and a soft glow.
Pendant Light Placement Rules
Pendants are often hung too high or too low. Here is the formula I use:
- Height: The bottom of the pendant light should be 30 to 36 inches above the countertop surface.
- Spacing: Space pendants roughly 24 to 30 inches apart (measured from the center of the bulb).
- Edge Distance: Leave at least 6 inches from the edge of the counter to the side of the fixture so it doesn’t look like it’s falling off the edge.
Common Mistake: Ignoring Color Temperature
Do not mix color temperatures. If your recessed cans are 3000K (a warm white), do not buy LED strips that are 5000K (a cool, blue daylight). It will look disjointed and clinical. For a cozy bar vibe, stick to 2700K or 3000K for all bulbs.
4. Storage and Appliances: The Working Triangle
In a small corner, every inch of storage counts. However, wall-to-wall upper cabinets can make a basement feel claustrophobic and top-heavy.
A popular and airy alternative is using floating shelves made of thick wood or metal. This allows you to display your best glassware and liquor bottles, acting as decor. If you go this route, ensure the shelves are anchored into studs. Bottles are heavy; drywall anchors are not sufficient.
The Beverage Fridge Dilemma
The most common appliance failure I see in DIY basement bars involves the fridge. Standard mini-fridges disperse heat from the back. If you slide a standard fridge into a tight cabinet opening, it will overheat and burn out quickly because the hot air has nowhere to go.
You must buy a “front-venting” or “built-in” beverage center. These intake and exhaust air from the grate at the bottom front. This allows you to install them flush with your cabinetry for a high-end, custom look.
The Ice Maker Reality Check
Everyone wants a clear ice maker, but they are high maintenance.
- Gravity Drain: Most ice makers require a floor drain. If you don’t have a drain in the floor, you need a pump to push the meltwater up to your sink drain.
- Noise: Ice makers are noisy. In a concrete basement, the sound of dropping ice echoes. Look for insulated models if the bar is near a TV viewing area.
- Freezer vs. Ice Maker: A dedicated ice maker produces wet ice that slowly melts. A freezer keeps ice frozen hard. Know which one you are buying.
5. Style Concepts: Three Distinct Vibes
Basement bars are the perfect place to experiment with themes that might feel out of place in your main living room. Because the space is contained, you can create a transportive experience.
Concept 1: The Modern Speakeasy
This look embraces the lack of natural light.
- Palette: Deep charcoal, navy blue, or forest green cabinetry.
- Metals: Unlacquered brass or antique bronze hardware.
- Texture: Use a brick veneer on the back wall to simulate an old building. Use velvet upholstery on the stools for sound absorption and luxury.
- Detail: Install a tin ceiling tile or a dark painted ceiling to lower the visual height and increase coziness.
Concept 2: The Rustic Industrial
This style is durable and forgiving, great for families or high-traffic zones.
- Palette: Natural wood tones, matte black, and concrete gray.
- Materials: Use black iron piping for open shelving brackets. Consider a concrete overlay countertop (a DIY-friendly option over laminate).
- Flooring: Luxury Vinyl Plank (LVP) in a distressed wood look is waterproof and warm underfoot.
Concept 3: The Coastal Casual
If you want to fight the basement darkness, go light and bright.
- Palette: White or light gray cabinetry, light oak accents.
- Materials: Shiplap or beadboard paneling on the walls adds vertical interest and texture without darkness.
- Counters: A white quartz with subtle gray veining keeps things airy.
- Glass: Use glass-front upper cabinet doors to reflect light and make the corner feel larger.
Final Checklist: What I’d Do in a Real Project
If I were designing your basement bar tomorrow, here is the mental checklist I would run through to ensure success.
- Check the electrical load: Does the existing circuit handle a fridge, microwave, and lighting? You may need a dedicated circuit to prevent tripping breakers when the compressor kicks on.
- Test the floor level: Basement floors are sloped toward drains. Your cabinets will need shimming to be level. A laser level is your best friend here.
- Select a durable rug: Place a runner behind the bar. It catches spills and protects your back from the hard concrete floor. Choose a low-pile, washable synthetic rug.
- Plan for trash: It is easily forgotten. Dedicate one base cabinet to a pull-out trash and recycling bin. You do not want a plastic can sitting out in your chic corner.
- Ventilation check: If you are installing a dishwasher, ensure the humidity has a way to escape the room, or run a dehumidifier regularly.
FAQs
Q: How much space do I need for a basic corner bar?
A: At a minimum, you need about 6 feet by 6 feet to accommodate a small L-shaped counter and standing room. For a seated bar with stools, aim for an 8×8 or 9×9 footprint to allow for pull-out space.
Q: Can I put a bar over carpet?
A: You can, but it is not recommended. If a pipe leaks or a drink spills, drying carpet in a basement is difficult and invites mold. It is better to install floating vinyl plank flooring or tile in the immediate bar zone.
Q: What is the best sink size for a small bar?
A: Avoid full-size kitchen sinks; they eat up too much counter space. A 15-inch square bar sink or a round prep sink is sufficient for washing glasses and dumping ice. Deeper is better than wider.
Q: Do I need a permit for a basement bar?
A: If you are adding electrical outlets or plumbing lines, yes, most municipalities require a permit. If you are simply installing dry cabinetry and plugging a fridge into an existing outlet, you usually do not. Always check local codes.
Conclusion
Transforming a basement corner into a bar is one of the most effective ways to add value and enjoyment to your home. It turns wasted square footage into a destination. The key is to respect the constraints of the basement environment—moisture, lighting, and ceiling height—while leaning into the cozy, enclosed nature of the space.
Whether you choose a moody speakeasy vibe or a bright coastal look, focus on the flow of movement and the durability of your materials. A well-designed bar invites people to sit, stay, and relax. Start with your layout, secure your plumbing plan, and then have fun with the finishes.
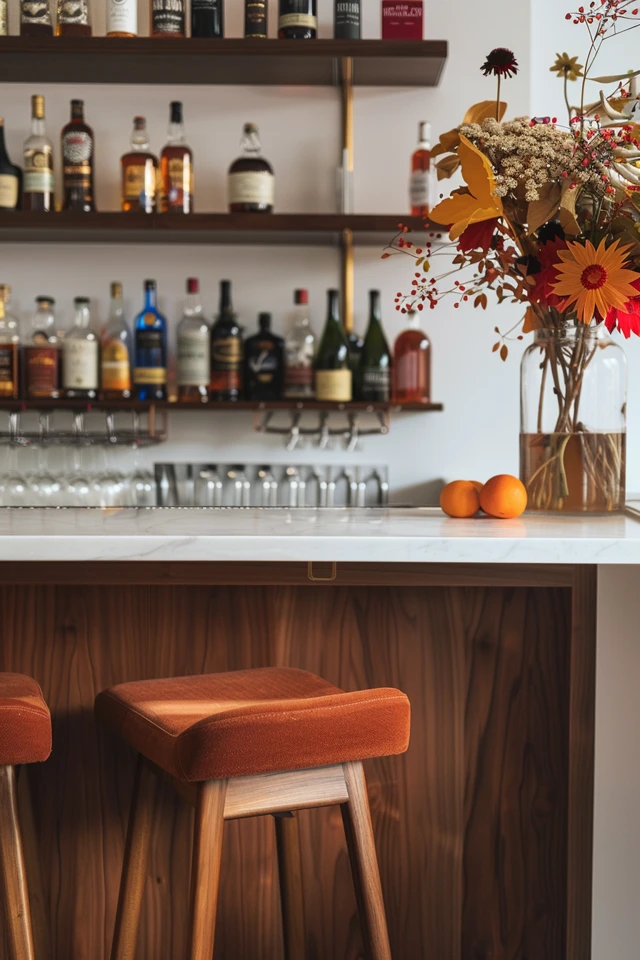
Picture Gallery


