
Chic Board and Batten Bathroom Ideas to Inspire
There is something undeniably grounded about board and batten paneling. It takes a plain, drywall box and instantly gives it architectural weight and history. In my design projects, I often turn to this treatment when a bathroom feels sterile or lacks a focal point. It provides a structured grid that makes even the smallest powder room feel custom and substantial.
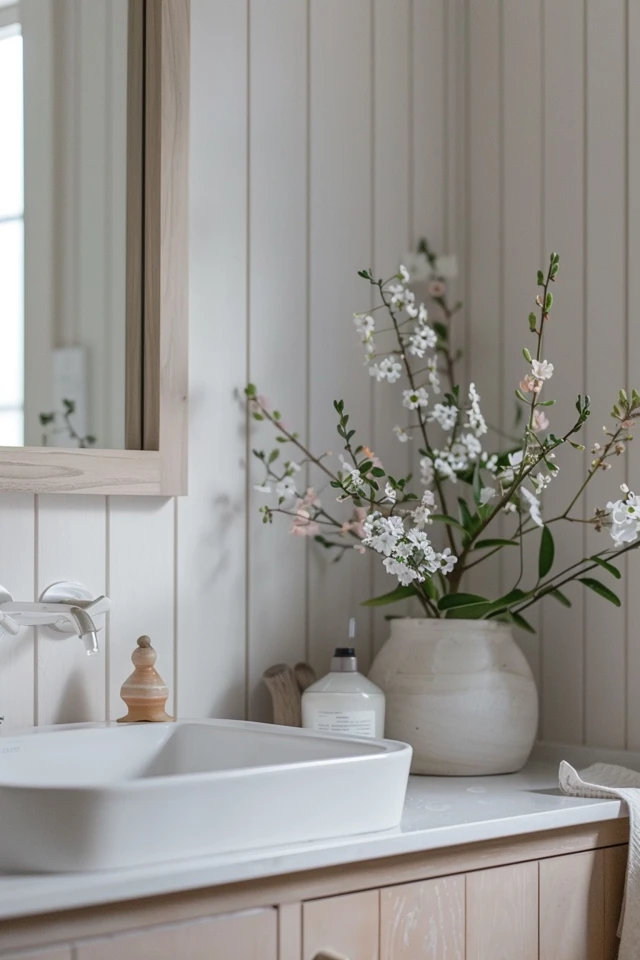
However, designing for a bathroom requires a different approach than a living room or hallway. You are dealing with high humidity, plumbing obstacles, and tight clearances. If you are looking for visual examples, don’t miss our curated Picture Gallery at the end of this post. The inspiration there covers everything from Moody Victorian styles to crisp Coastal Modern looks.
In this guide, I will walk you through the practicalities of bringing this look into your home. We will cover the specific math for spacing, the materials that won’t rot next to your shower, and how to style it so it looks expensive rather than DIY.
Why Board and Batten Works in Bathrooms
Bathrooms are full of cold, hard surfaces. You have porcelain toilets, ceramic tiles, metal faucets, and glass mirrors. Without some architectural relief, these spaces can feel clinical.
Board and batten adds a layer of warmth and texture without the visual chaos of a busy wallpaper pattern. The vertical lines draw the eye upward, which is a crucial trick in bathrooms that often have standard 8-foot ceilings. By manipulating the height of the top rail, you can make the ceiling feel a foot taller than it actually is.
Beyond aesthetics, there is a functional benefit. Bathroom walls take a beating from towel hooks, water splashes, and high traffic in tight quarters. A layer of wood (or moisture-resistant engineered wood) protected by semi-gloss paint is much more durable and scrubbable than standard drywall.
Determining the Right Height and Scale
One of the first questions clients ask me is, “How high should the paneling go?” This decision dramatically changes the vibe of the room. Here are the three standard heights I use, along with the logic behind them.
The Standard Wainscot (36 to 42 inches)
This is the traditional route. It aligns roughly with the height of a vanity or slightly above it. It keeps the room feeling open and airy.
I recommend this height if you plan to use a bold, dark color on the paneling but want to keep the upper walls white to maximize light. This is also the safest bet if you are tiling above a bathtub, as the transition lines line up naturally.
The Shaker Height (60 to 70 inches)
This is my personal favorite for powder rooms. Bringing the molding up to eye level or higher creates a cozy, enveloping feel. It allows you to install hooks directly onto the top rail for towels and robes.
This height usually adheres to the “Rule of Thirds.” If your ceiling is 9 feet tall, a 6-foot wainscot creates a pleasing 2:3 ratio. It feels intentional rather than accidental.
Floor-to-Ceiling Grid
For a more modern or transitional look, covering the entire wall in a grid pattern creates a stunning feature wall. I often use this behind a freestanding tub or on the vanity wall.
When doing full walls, keep the squares larger (around 18 to 24 inches wide) to prevent the room from feeling like a cage. Large scale implies luxury; small scale can feel busy.
Material Matters: Surviving the Humidity
Unlike a dining room, a bathroom has a microclimate. Steam from showers creates moisture that settles on horizontal surfaces. If you use the wrong materials, your beautiful wall treatment will warp or bubble within a year.
Avoid Standard MDF Near Water
Standard Medium Density Fiberboard (MDF) acts like a sponge. If water seeps into the baseboards or cuts, it swells and shreds the paint.
If you are paneling a powder room with just a toilet and sink, standard MDF is generally fine. However, in a full bath with a shower, use Moisture Resistant MDF (often green-cored) or solid wood.
PVC and Vinyl
For areas in direct contact with water, such as right next to a tub or potentially inside a shower zone (if properly waterproofed behind), cellular PVC trim is the gold standard. It paints up exactly like wood but is completely rot-proof. It is more expensive, but it buys you peace of mind.
Poplar vs. Pine
If you prefer real wood, I suggest Poplar over Pine. Poplar is a hardwood that takes paint beautifully with very little grain showing through. Pine often has knots that can bleed sap through the paint years later if not heavily primed with a shellac-based primer.
The Math of Spacing (The Designer’s Secret)
Nothing ruins a board and batten install faster than “weird math” in the corners. You want the spacing between the vertical battens to appear uniform, but walls are rarely perfectly sized for standard math.
A pleasing distance between battens is usually between 12 and 16 inches center-to-center. In a small bathroom, I lean toward 12 inches to ensure you see enough repetition to establish the pattern.
How to Calculate Spacing
- Measure the total length of the wall in inches.
- Decide roughly how far apart you want the battens (e.g., 14 inches).
- Divide the wall length by that number to get the approximate number of spaces. Round to the nearest whole number.
- Divide the wall length by that new whole number to get your exact spacing.
Example:
Wall is 60 inches. You want roughly 15-inch spacing.
60 / 15 = 4 spaces.
60 / 4 = Exactly 15 inches on center.
You will need 5 battens (one for each end, plus three in the middle).
Integration with Vanities and Plumbing
This is where DIYers often get stuck. How do you handle the paneling when it meets the vanity sink?
The “Built-In” Look
If possible, install the board and batten before installing the vanity. You can run the paneling behind the vanity for a seamless look. However, you must account for the thickness of the wood so the vanity top still fits against the wall.
Usually, the vanity top has an overhang. If your battens are 1/2-inch thick, ensure the vanity overhang is at least 3/4-inch, or the counter will hit the wood battens before the cabinet hits the wall.
The Backsplash Dilemma
If the vanity has a 4-inch stone backsplash, do not start the wood paneling directly on top of it. It creates a “ledge on a ledge” look that collects dust.
Instead, I prefer to skip the stone backsplash entirely. Use the board and batten (painted with high-quality semi-gloss) as the backsplash. Alternatively, run a tile backsplash up to the bottom of a mirror, and start the wood paneling elsewhere in the room.
Lighting and Mirrors
The grid of board and batten provides a strict structure. Your lighting and mirrors need to respect that geometry.
Sconce Placement
If you are installing wall sconces, their placement is critical. You do not want the electrical box to land half-on, half-off a vertical batten. This creates a tilting fixture that is a nightmare to fix.
Plan your batten layout first. Mark the locations of the vertical strips on the wall with painter’s tape. Then, have your electrician center the junction boxes exactly between two battens (centered in the panel) or exactly on a batten (if the batten is wide enough, like a 1×4).
Mirror Selection
Because the walls are linear and rectangular, I love using round or oval mirrors to break up the hard lines. A pivot mirror is a great choice here because it physically floats off the wall, meaning you don’t have to worry about the mirror laying flat against the raised trim.
Designer’s Note: The Baseboard Transition
Here is a lesson I learned the hard way early in my career. You cannot use a standard, thin baseboard with board and batten.
The vertical battens sit on top of the wall. If your baseboard is thinner than the batten, the vertical wood will hang over the baseboard, creating an ugly overhang that catches dust and looks unfinished.
The Fix: The baseboard must be thicker than the vertical battens. If you are using 1×3 battens (which are 0.75 inches thick), your baseboard needs to be at least 0.75 inches thick, ideally slightly more. If you can’t find thick baseboards, you can install a “spacer” piece behind the baseboard to pad it out.
Common Mistakes + Fixes
Even seasoned contractors can slip up on the details. Here are the most common errors I see in bathroom paneling projects.
Mistake 1: Ignoring the Toilet Tank
The Issue: You install a top rail wainscoting at 36 inches, but your toilet tank is 34 inches high. The rail visually crashes into the flush lever or prevents the tank lid from opening.
The Fix: Always measure the height of the toilet tank. Set your top rail at least 6 to 8 inches above the top of the tank to allow for maintenance access and visual breathing room.
Mistake 2: Poor Caulk Jobs
The Issue: In a bathroom, gaps are the enemy. Water vapor will find its way behind the wood, leading to hidden mold.
The Fix: Use a high-quality, paintable acrylic latex caulk with silicone. Caulk every single seam: where the wood meets the wall, where the wood meets the ceiling, and where the wood meets the baseboard. It should look like one seamless, molded piece.
Mistake 3: Using Flat Paint
The Issue: Flat or matte paint hides wall imperfections, but it absorbs moisture and shows water streaks.
The Fix: Use Satin as a minimum sheen. Semigloss is even better for durability. These finishes repel moisture and are easy to wipe down.
What I’d Do in a Real Project: A Mini Checklist
If I were managing your bathroom renovation today, this is the order of operations I would follow to ensure success.
- Audit the Walls: If the drywall is heavily textured (orange peel or knockdown), I would install 1/8-inch smooth hardboard over the drywall first. Board and batten looks cheap over textured walls.
- Locate Plumbing/Electrical: Mark all studs and pipe locations with tape so we don’t nail into a water line.
- Install the Horizontal Rails: I put the top rail and baseboard in first to establish the boundaries.
- Dry Fit Vertical Battens: I cut the verticals and tape them in place to verify the spacing visually before nailing anything.
- Prime the Backs: I prime the back of the wood before installation to seal it against moisture from the wall side.
- Install and Fill: Nail the boards, countersink the nails, and fill holes with wood filler (not caulk). Caulk is only for the seams.
- Paint: Two coats of high-quality cabinetry paint.
Styling Ideas to elevate the Look
Once the carpentry is done, the styling brings it to life. Here are three distinct directions you can take.
The Spa Sanctuary
Keep everything monochromatic. Paint the board and batten and the upper walls the same color—a warm “greige” (gray-beige) or soft taupe. This reduces visual noise and makes the room feel larger. Use natural wood accessories and fluffy white towels.
The Moody Powder Room
Go dark on the paneling. Navy blue, charcoal, or forest green are timeless. Use a bold, floral wallpaper on the upper walls. The structure of the paneling grounds the busy pattern of the paper. Finish with brass hardware for a pop of warmth.
Modern Farmhouse
Stick to the classic stark white paneling (Pure White or Chantilly Lace) roughly 2/3 up the wall. Paint the remaining sliver of wall and the ceiling a dark, contrasting color like Iron Ore. Use matte black hooks on the vertical battens.
Final Checklist
Before you head to the lumber yard, ensure you have ticked these boxes:
- Measurements: Have you accounted for the vanity height and toilet tank clearance?
- Material: Is your wood or MDF moisture-resistant?
- Baseboard Depth: Is your baseboard thicker than your vertical battens?
- Electrical: Are your sconce boxes centered relative to your planned grid?
- Texture: Are your walls smooth enough, or do you need a backer board?
FAQs
Can I do this in a small bathroom?
Absolutely. Vertical lines draw the eye up, making small rooms feel taller. Just be careful not to make the grid squares too small, which can make the room feel cluttered.
Is board and batten expensive?
It is one of the most cost-effective high-impact upgrades you can do. The materials are essentially 1×2 or 1×3 pine or MDF strips. The main investment is labor (or time, if DIY).
Can I use Liquid Nails instead of real nails?
I recommend using construction adhesive and nails. The adhesive keeps the board tight to the wall, preventing warping, while the nails hold it in place while the glue dries. In a bathroom, adhesive helps prevent the wood from moving as humidity changes.
How do I clean board and batten in a bathroom?
Because of the horizontal “shelf” on the top rail and baseboard, dust will settle there. Simply wipe it down with a damp microfiber cloth once a week. Avoid harsh chemical sprays that might dull the paint finish over time.
Conclusion
Board and batten paneling is more than just a passing trend; it is a fundamental architectural detail that adds value and character to your home. In a bathroom, it bridges the gap between utility and luxury, turning a strictly functional space into a room you actually want to spend time in.
By following the rules of scale, choosing the right moisture-resistant materials, and planning your layout around your plumbing, you can achieve a result that looks like it has been there since the house was built. Whether you choose a soothing monochromatic look or a bold, moody contrast, the grid of the batten provides the perfect canvas.
Picture Gallery


