
Chic Bunk Bed Dorm Room Ideas & Layouts
Walking into a dorm room for the first time often feels like stepping into a sterile, beige box. The fluorescent lighting is harsh, the linoleum floors are cold, and the furniture usually consists of two standard-issue twin beds and heavy wooden desks. However, seeing past those industrial finishes is exactly where the design magic happens.
With the right layout strategy and a focus on vertical space, even the most cramped quarters can feel like a boutique hotel room. By treating the bunk bed or loft as the architectural anchor of the room, you open up valuable floor space for lounging, studying, and entertaining. If you are looking for visual inspiration to guide your layout, please note that a curated Picture Gallery is available at the end of this blog post.
This guide isn’t just about buying cute throw pillows; it is about applying interior design principles to a temporary, shared micro-living environment. We will cover how to manipulate scale, control lighting, and maximize square footage without losing your security deposit.
1. The Art of Lofting: Layouts That Create Zones
The single most effective way to gain square footage in a dorm room is by utilizing verticality. In professional design, we refer to this as maximizing the “cubic footage” rather than just the square footage.
Most university-issued beds are adjustable. You generally have three height options: standard height, “captain’s height” (waist high with storage underneath), and full loft (bunk height). I almost always recommend the full loft for at least one of the beds in a shared room.
When you loft a bed, you create a “room within a room” underneath. This area typically measures about 40 inches wide by 80 inches long. This footprint is large enough to accommodate a specific functional zone that would otherwise clutter the main walkway.
Popular “Under-Loft” Layout Configurations:
- The Study Nook: Place the desk directly under the bed. This creates a focused, isolated environment for work. To prevent it from feeling like a cave, lighting is critical here.
- The Lounge: If you can move the desk elsewhere, place a small loveseat or two beanbag chairs under the loft. This creates a social zone separate from the sleeping zone.
- The Hidden Closet: If you are fashion-focused, place two tall dressers under the loft with a tension rod between them for hanging clothes. This doubles your wardrobe storage.
2. Textile Layering and Bedding Logic
In a room dominated by hard surfaces—cinder block walls, laminate desks, metal bed frames—textiles are your only tool for softening the space. The bed is the largest visual element in the room, so your bedding choices dictate the entire aesthetic.
Start with the basics of the Twin XL mattress. These mattresses are notoriously uncomfortable and usually covered in slick, noisy vinyl. Before thinking about aesthetics, invest in a 2-inch to 3-inch memory foam topper. This not only improves comfort but also adds volume to the bed, making it look more luxurious and less like a camp cot.
For sheets, I recommend 100% cotton percale for dorms. Dorms often lack individual climate control, and percale is breathable and cool to the touch. Avoid microfiber; it traps heat and tends to pill after a few commercial washes.
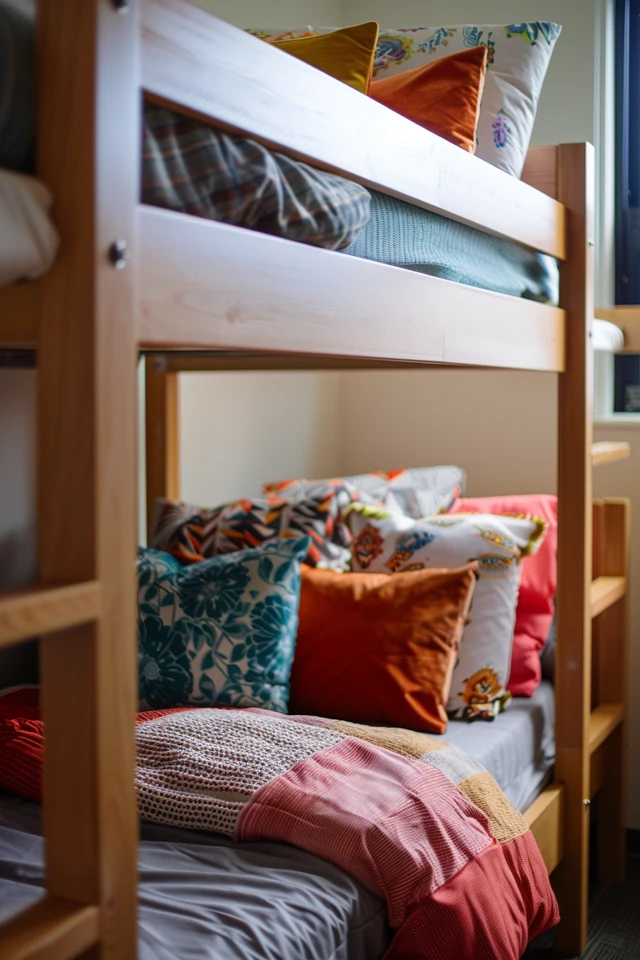
The Designer’s Pillow Formula for Twin XL:
- Back Layer: One Euro Sham (26×26 inches). This square pillow rests against the wall or headboard and provides height.
- Middle Layer: One Standard Sleeping Pillow. Use a pillowcase that matches your sheets.
- Front Layer: One Lumbar Pillow (12×20 inches) or a small decorative square. This is where you bring in texture, like velvet, faux fur, or a heavy weave.
This three-layer system is specific to narrow beds. Two standard pillows side-by-side are too wide for a twin, and stacking them looks flat. The Euro sham adds necessary vertical scale.
3. Lighting: Eliminating the “Big Light”
The overhead fluorescent light in a dorm room is the enemy of ambiance. It usually casts a green-tinted, clinical glow that flattens colors and strains the eyes. To make a dorm feel chic, you must layer your lighting at different heights.
Your goal is to introduce warm light, ideally between 2700K and 3000K (Kelvin). This temperature mimics the warm glow of incandescent bulbs and makes a small space feel cozy rather than antiseptic.
The Three Essential Light Sources:
- Task Lighting: A desk lamp with an adjustable arm. This is functional but can also be sculptural. Look for matte black or brass finishes to add a touch of sophistication.
- Ambient Lighting: Floor lamps or table lamps with fabric shades. The fabric diffuses the light, softening the harsh shadows in the corners of the room.
- Accent/Mood Lighting: This is crucial for bunk beds. Since you are sharing a room, you need a way to read or scroll on your phone without waking your roommate.
For bunks specifically, clip-on reading lights are non-negotiable. However, avoid the utilitarian plastic ones. Look for metal fixtures that clip onto the bed rail but have a proper shade. Alternatively, LED strip lights adhered to the underside of the top bunk can create a soft glow for the person sleeping on the bottom bunk.
4. Vertical Storage and Visual Noise
In a room that might only be 12×12 feet, “visual noise” makes the space feel messy even when it is clean. Visual noise is caused by seeing the labels of snack boxes, the clutter of toiletries, and mismatched school supplies.
Closed storage is the secret to a high-end look. Instead of open plastic bins where you can see the contents, opt for woven baskets, fabric cubes, or opaque drawers. Uniformity is key here. If you buy three storage bins, ensure they are identical in color and material. This repetition calms the eye.
Utilizing the “Dead Space” in Bunks:
- The Bedside Caddy: If you are on the top bunk, you do not have a nightstand. Use a felt or canvas bedside caddy that tucks under the mattress to hold your phone, water bottle, and glasses.
- Vertical Shelving Units: If the bed is lofted, you can use a tall, narrow shelving unit (like a bookcase) positioned at the head or foot of the bed. This effectively acts as a nightstand for both the top and bottom bunks if positioned correctly.
- Over-the-Door Organizers: Use the back of the room door and the wardrobe doors. Shoe organizers are great, but they can also hold snacks, extra toiletries, and electronics chargers.
5. Temporary Wall Treatments and Decor
The biggest constraint in a dorm is the inability to paint or make holes in the walls. This leaves you with large expanses of white or beige cinder block. To make the room feel finished, you must address the walls.
Removable wallpaper (peel-and-stick) has come a long way. You don’t necessarily need to paper the whole room. Creating a “feature wall” behind the bunk beds can ground the sleeping area. If wallpaper feels too risky or expensive, consider large-scale tapestry art or engineering prints.
The Rule of Scale for Wall Art:
A common mistake students make is putting up dozens of 4×6 photos. From a distance, this looks like clutter. Instead, think big.
I recommend grouping smaller photos into a large, cohesive shape (like a grid) or blowing up one or two images to poster size (24×36 inches). Large art expands the visual feel of a room, while tiny art shrinks it.
Privacy Curtains:
If you want true privacy in a shared room, use tension rods to hang curtains around the bottom bunk. This creates a canopy bed effect. For the top bunk, you can attach a track to the ceiling (using heavy-duty adhesive hooks, check weight limits carefully) to drape fabric. This turns a bunk bed into a private pod.
Designer’s Note: The Reality of Safety Codes
From the Field: Every year, I see students design incredible dorm setups that get cited during the first fire inspection. It is heartbreaking to tear down a setup you worked hard on.
The Lesson: Before you buy ceiling tapestries or canopy fabrics, read your university’s housing handbook. Most universities prohibit covering more than 20% to 50% of the wall surface with combustible materials (paper/fabric). Almost all ban fabric suspended from the ceiling because it interferes with fire sprinklers.
The Fix: If you can’t hang a tapestry on the wall, use a heavy quilt on the bed to bring in that pattern. If you can’t hang curtains from the ceiling, use a clip-on bed rail curtain that stays low and doesn’t obstruct sprinklers. Always keep fabrics at least 18 inches away from any power outlet or light fixture.
Common Mistakes + Fixes
Mistake: Ignoring the Rug Size.
Many students buy a small 3×5 rug and float it in the middle of the room. This looks like a postage stamp and makes the room feel disjointed.
The Fix: Go as big as possible. A 5×7 or 6×9 rug that tucks partially under the beds will visually connect the two sides of the room and cover the cold floor.
Mistake: The “Matchy-Matchy” Trap.
Roommates often feel pressured to buy identical comforters. This creates a “summer camp” vibe rather than a designed apartment look.
The Fix: Coordinate, don’t match. Pick a color palette (e.g., navy, cream, and mustard). One roommate can have a navy duvet with cream pillows, while the other has a cream duvet with a navy throw blanket. It feels cohesive but allows for individual personality.
Mistake: Over-furnishing.
Bringing in extra futons, huge bean bags, and ottomans often blocks traffic flow.
The Fix: Map out the “swing” of the door and the drawers. Ensure you have at least 30 inches of walking path between furniture pieces. If it doesn’t fit the clearance, it doesn’t stay.
“What I’d Do” Mini-Checklist
If I were styling a dorm room project today, here is the exact formula I would use for a high-end look on a budget:
- Base Palette: White or light gray bedding (easy to bleach/clean).
- Texture: A chunky knit throw blanket at the foot of the bed.
- Headboard: A velvet, tufted headboard cushion attached to the wall with Command strips or tied to the metal bed frame.
- Lighting: A plug-in wall sconce (no hardwiring needed) placed above the pillow for reading.
- Flooring: A large, low-pile vintage style runner rug between the beds.
- Storage: A rolling metal cart (like the Raskog) used as a mobile nightstand/vanity.
Final Checklist for Move-In Day
- Tape Measure: Don’t rely on guessing. Measure the space under the bed before buying storage bins.
- Power Strip with Surge Protection: Dorms never have enough outlets. Get one with a long cord (6-10 feet).
- Command Strips (Various Sizes): Bring three times more than you think you need. Allow them to cure for one hour before hanging weight on them.
- Step Stool: Essential for setting up the top bunk and reaching high shelves later.
- Mattress Encasement: For hygiene, put a full zippered encasement on the university mattress before your topper and sheets.
Frequently Asked Questions
Is it safe to loft a bed on cinder blocks?
No. Never use cinder blocks to raise a bed. They are unstable and can crumble under weight. Only use the approved lofting kit provided by the university or bed risers specifically designed for dorm furniture with a lip to secure the bed leg.
How do I coordinate with a roommate I haven’t met?
Start a conversation early via text or social media. Agree on “Big Ticket” items first (rugs, curtains, mini-fridge/microwave). For bedding, suggest a neutral base color so you can each add your own accent colors without clashing.
Can I use a regular twin sheet set?
Usually, no. Most dorm mattresses are Twin XL (Extra Long), which is 5 inches longer than a standard twin. Standard twin fitted sheets will pop off the corners. Always check your housing assignment, but Twin XL is the industry standard for colleges.
How do I hide the ugly under-bed storage?
If your bed isn’t lofted high enough for a seating area, use an extra-long bed skirt. Alternatively, you can use a tension rod between the bed legs and hang a fabric panel to conceal the bins behind it.
Conclusion
Living in a dorm is a rite of passage, but it doesn’t mean you have to sacrifice style or comfort. By focusing on layout functionality, layering quality textiles, and mastering lighting, you can transform a utility-grade room into a sanctuary.
The key to a chic bunk bed setup is intentionality. Every item brought into a small space needs to earn its keep, either by being highly functional or bringing significant joy. Treat the room as a puzzle where vertical space is the missing piece, and you will find that even 150 square feet can feel like home.
Picture Gallery


