
Chic Dark Brown Vanity Bathroom Makeovers
For years, the interior design world was dominated by the all-white bathroom. While crisp and clean, that trend often lacked soul and depth. We are now seeing a massive shift back toward warmth, grounding textures, and darker furniture pieces.
A dark brown vanity—whether it is walnut, stained oak, or a restored antique—instantly anchors a bathroom. It provides a focal point that feels expensive and established rather than sterile. If you are looking for visual inspiration, please note that a curated Picture Gallery is waiting for you at the end of this blog post.
However, working with dark cabinetry requires a different approach than working with white paint. You have to be intentional about lighting, contrast, and mixed materials to ensure the space feels “moody and chic” rather than “dark and heavy.”
1. Choosing the Right Wood Tone and Texture
Not all dark brown vanities are created equal. The biggest mistake homeowners make is selecting a flat, one-dimensional “espresso” finish that looks like plastic.
In high-end design, we look for visible grain and warmth. You want to see the life in the wood.
Grain Direction and Species
When selecting your vanity, look for “book-matched” or continuous grain on the drawer fronts. This means the wood grain flows seamlessly from one drawer to the next.
Preferred Wood Species:
- American Walnut: The gold standard. It has a natural, rich medium-to-dark tone without needing heavy stains. It warms up grey tiles beautifully.
- Stained White Oak: Oak has a prominent grain texture. When stained dark brown, you still see the lovely ridges and valleys of the wood, which adds tactile interest.
- Teak: Excellent for wet environments due to natural oils. It leans slightly more reddish-brown, which pairs well with brass.
The Finish Matter
Avoid high-gloss finishes on dark wood in a bathroom. High gloss shows every single fingerprint, water spot, and toothpaste splatter.
Instead, opt for a satin or matte finish. It hides daily wear much better and looks more like furniture you would find in a living room, which is the ultimate goal of a luxury bathroom.
2. Mastering the Countertop Combination
Because the vanity base is dark, your countertop choice dictates the overall vibe of the room. This is where you balance the visual weight.
Option A: Crisp Contrast (White Marble/Quartz)
This is the classic choice. A bright white top with subtle grey veining (like Carrara or Statuario) pops against dark wood.
- Why it works: It reflects light back up toward your face, which is helpful for applying makeup or shaving.
- Pro Tip: If using real marble, commit to sealing it every 6 months. Dark wood cabinets can be ruined by acidic cleaners used on stone, so be careful with your cleaning products.
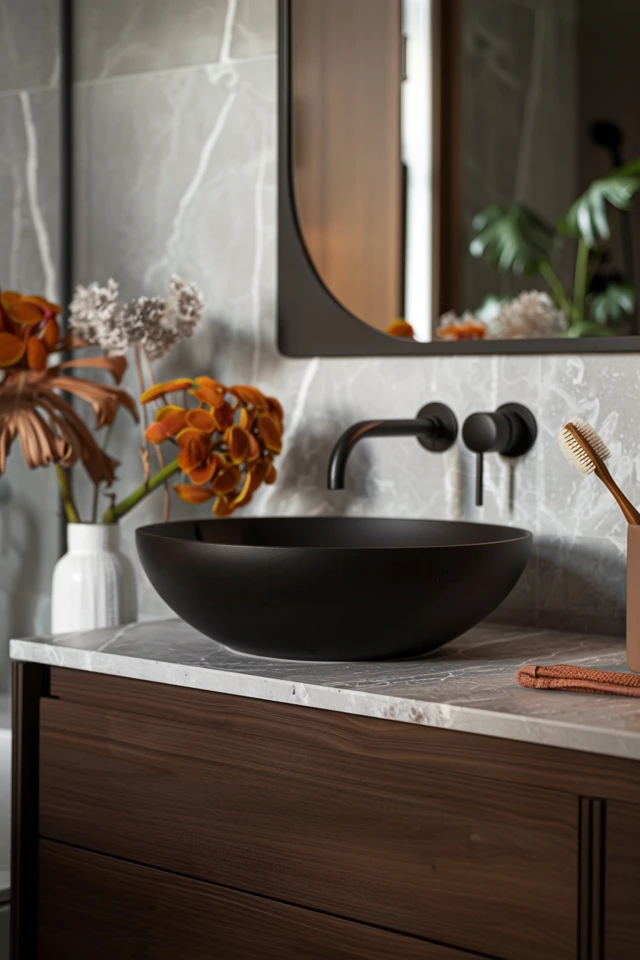
Option B: Moody Monochrome (Black or Grey Stone)
Pairing a dark walnut vanity with a soapstone or slate countertop creates a deep, masculine, spa-like atmosphere.
- Why it works: It creates a seamless, monolithic look that feels very architectural.
- Lighting Requirement: If you choose this route, you must increase your ambient lighting by at least 20% because the vanity will absorb light rather than reflect it.
Option C: Warm Neutrals (Creamy Quartzite)
Materials like Taj Mahal quartzite or warm limestone are trending hard right now. They bridge the gap between the stark white sanitary feel and the warmth of the wood.
3. Hardware and Metal Mixes
The jewelry of the vanity—the knobs, pulls, and faucets—can make or break the renovation. Dark brown is a neutral, so it plays well with almost every metal, but the vibe changes significantly.
Polished Nickel
If you want a traditional, hotel-like feel, go with polished nickel. It has a warmer undertone than chrome but provides high contrast against the dark wood.
Unlacquered Brass or Antique Gold
This is the designer favorite for a reason. The golden tones of brass pick up the warm, honey undertones often hidden in dark brown wood.
- Rule of Thumb: If your vanity is a cool-toned dark brown (almost black), brass warms it up.
- Placement: For drawers wider than 24 inches, use two knobs or one long pull (at least 6-8 inches long) to ensure the visual scale is correct.
Matte Black
Use this with caution. Matte black hardware on a dark brown vanity can disappear entirely. It creates a very subtle, modern look, but it can sometimes feel visually muddy. If you do this, ensure the vanity wood is light enough to provide at least a slight contrast.
4. Tile and Wall Coordination
A dark vanity needs a backdrop that lets it breathe. You want to avoid the “cave effect,” especially in small bathrooms without windows.
Floor Tile
You generally want contrast between the floor and the vanity feet. If you have dark wood floors and a dark wood vanity, you need a rug to break them up.
Designer Favorites:
- Large Format Limestone: A 12×24 inch tile in a sandy beige tone looks incredible with walnut.
- Checkerboard: A classic marble checkerboard floor creates a timeless base for a dark antique-style vanity.
- Mosaic: Small hexagon tiles in white with grey grout are practical, non-slip, and highlight the vanity’s dark silhouette.
Wall Color and LRV
Paint colors have a Light Reflectance Value (LRV). In a bathroom with a dark vanity, I usually aim for an LRV of 60 or higher (mid-to-light range) to keep the room feeling fresh.
Specific Paint Recommendations:
- Benjamin Moore Swiss Coffee: A creamy off-white that prevents the contrast from looking too harsh.
- Farrow & Ball Skimming Stone: A warm stony grey that creates a seamless, organic transition.
- Sherwin Williams Alabaster: A true warm white that keeps the space feeling sanitary but not sterile.
5. Lighting and Mirrors
Lighting is functional, but it is also the primary way we define the mood. When you have a dark block of furniture (the vanity), you need to wash the walls with light to balance it out.
Sconce Placement
Do not rely solely on overhead recessed cans. They create shadows under your eyes and make the dark vanity cast a shadow on the floor.
The Rules:
- Height: Mount sconces so the bulb is roughly 60 to 66 inches off the finished floor (eye level).
- Spacing: If you have a single mirror, place sconces about 36 to 40 inches apart, flanking the mirror.
- Color Temperature: Always use 2700K or 3000K bulbs. Never use 4000K or 5000K (Daylight) in a bathroom with dark wood; it will make the wood look grey and lifeless.
Mirror Selection
With a heavy vanity, you can afford a lighter-looking mirror.
- Frameless: A simple bevel edge mirror looks elegant and clean.
- Thin Metal Frame: Match your faucet finish. A thin brass frame ties the faucet to the lighting.
- Shape: If your vanity is very boxy and square, use a round or arched mirror to soften the lines.
Designer’s Note: A Real-World Lesson
The Problem:
In one of my first projects, I specified a beautiful, custom dark chocolate vanity. We installed it on a floor that was a “faux wood” porcelain tile.
The Lesson:
Real wood next to fake wood always makes the fake wood look cheap. The grain patterns clashed, and the undertones fought each other (one was red-based, one was yellow-based).
The Fix:
If you are using a wood vanity, do not use wood-look tile on the floor. Use stone, ceramic, or concrete-look tile. Let the vanity be the only “wood” star in the show. This creates a material hierarchy that feels intentional and high-end.
Common Mistakes + Fixes
Mistake 1: Ignoring the “Toe Kick”
Buying a furniture-style vanity with legs for a family bathroom. Dust, hair, and lost toothpaste caps will accumulate underneath, and it is hard to clean.
The Fix: For high-traffic kids’ bathrooms, get a vanity with a closed toe kick (a solid base). Save the legged “furniture” look for powder rooms or master ensuites.
Mistake 2: Poor Scale
Putting a heavy, dark double vanity in a tiny room creates a visual blockade.
The Fix: If the room is small, choose a floating dark vanity. Being able to see the floor extend underneath the cabinet tricks the eye into thinking the room is larger.
Mistake 3: The “Builder Grade” Gap
Installing a standard 30-inch vanity in a 32-inch niche, leaving impossible-to-clean gaps on the sides.
The Fix: If you have a weird niche size, use filler strips stained to match the vanity to close the gaps for a built-in look.
What I’d Do in a Real Project: A Mini Checklist
If I were designing a bathroom with a dark vanity today, this is exactly the formula I would use for a foolproof, magazine-worthy result:
- Vanity: 48-inch floating walnut vanity with flat-panel drawers (modern ease).
- Top: Calacatta Viola marble (white with heavy burgundy/purple veining that complements the brown wood).
- Faucet: Wall-mounted unlacquered brass taps (keeps the counter clear).
- Walls: Vertical tongue-and-groove paneling painted in a creamy beige (adds texture without noise).
- Mirror: Large arched mirror recessed into the paneling.
- Rug: A vintage Turkish runner in faded reds and blues to hide dirt and add softness.
Final Checklist for Your Makeover
Before you order materials, run through this list to ensure your dark vanity makeover is successful.
- Measure Clearance: Open the vanity drawers fully. Do they hit the door casing or the toilet? You need at least 15 inches of clear standing space in front of an open drawer.
- Check Plumbing: Does the new vanity back accommodate your existing plumbing pipes? Dark vanities often have drawers that interfere with standard P-traps. You may need a “space-saving” plumbing kit.
- Sample Test: Bring a sample of the vanity wood into the bathroom. Look at it in the morning, afternoon, and night with artificial light. Dark wood can read purple or green in bad lighting.
- Sourcing Hardware: Order one knob or pull before buying the whole set to check the weight and finish against the wood.
- Select Grout: If using white tile near the dark vanity, choose a light grey grout, not bright white. It hides dirt and bridges the gap between the dark wood and white tile.
FAQs
1. How do I clean a dark wood vanity without ruining the finish?
Avoid abrasive sponges and harsh chemical cleaners like bleach or ammonia. Use a microfiber cloth slightly dampened with warm water and a mild dish soap. Dry it immediately. Water left sitting on dark wood can cause milky white spots (bloom) in the finish.
2. Can I paint my existing vanity dark brown?
Yes, but it is difficult to mimic a stain if the wood is currently painted white. If you want a solid dark brown paint color, look at hues like Sherwin Williams “Urbane Bronze” or Benjamin Moore “Espresso Bean.” Use a high-quality cabinet enamel, not standard wall latex, to prevent chipping.
3. Will a dark vanity make my small bathroom look smaller?
Not necessarily. Dark colors recede visually. If you keep the walls light and the lighting bright, a dark vanity acts as an anchor. Just ensure you have good mirror coverage to bounce light around.
4. What is the best faucet finish for a dark espresso vanity?
Polished Nickel or Chrome provides a sharp, clean contrast that looks very modern. Brushed Brass provides a moody, vintage warmth. Avoid Oil Rubbed Bronze, as it will blend in too much and look muddy.
Conclusion
Embracing a chic, dark brown vanity is one of the best ways to bring character and longevity to your bathroom design. It moves away from the clinical feel of all-white spaces and introduces a layer of sophistication that feels grounded and welcoming.
Whether you choose a sleek floating walnut unit or a repurposed antique dresser, the key lies in the supporting details. By carefully selecting your countertop, balancing the lighting, and avoiding clashing undertones, you can create a space that feels curated by a professional.
Trust the process of layering textures. Let the wood grain shine, and do not be afraid of the dark. The result will be a bathroom that feels like a warm embrace every time you walk in.
Picture Gallery


