
Chic Floating Shelf Above Bed Ideas to Inspire
The bedroom is often the last place we decorate, yet it is the most important room for our well-being. I remember walking into a client’s master bedroom in a downtown apartment; the space was tight, and the wall above the headboard felt strangely empty, making the low ceilings feel even lower. We didn’t have room for massive artwork, and headboards with built-in storage were too bulky for the floor plan. The solution was a sleek, custom-stained floating shelf that drew the eye upward and added much-needed surface area without eating up square footage.
Adding a floating shelf above the bed is one of those high-impact design moves that blends form and function perfectly. It solves the “blank wall” syndrome while offering a dedicated spot for art, trailing plants, or even task lighting. However, it is a design choice that requires precision; get the height wrong, and you might bump your head every morning.
In this guide, I will walk you through everything from the specific measurements I use in client projects to styling tips that keep the look sophisticated rather than cluttered. If you are strictly looking for visual inspiration, please scroll to the bottom of this blog post where I have curated a comprehensive Picture Gallery just for you.
1. The Critical Numbers: Height, Depth, and Placement
Before you even look at wood samples, you need to understand the ergonomics of hanging a shelf over where you sleep. The most common mistake I see homeowners make is hanging the shelf too low. This creates a claustrophobic feeling and poses a genuine risk of injury when you sit up to check your alarm clock.
The “Golden Zone” for shelf placement is heavily dependent on how you use your bed. If you sit up to read against your headboard, you need significant clearance.
My standard rules for placement:
- Height above mattress: Generally, I aim for the bottom of the shelf to be at least 24 to 30 inches above the top of the mattress. If you have a very tall headboard, the shelf should sit about 8 to 10 inches above the top edge of the headboard to allow the design to breathe.
- Shelf Depth: This is non-negotiable for safety. Above a bed, do not exceed a depth of 6 to 8 inches. Anything deeper than 8 inches casts a heavy shadow and feels looming. A 4-inch or 5-inch depth is often the “sweet spot” for leaning art frames without overwhelming the space.
- Width relative to the bed: To make the design feel intentional, the shelf should ideally match the width of the bed frame or extend slightly beyond it (about 3-6 inches on each side). A shelf that is significantly shorter than the headboard tends to look rinky-dink and disjointed.
Designer’s Note: The “Sit-Up” Test
Before drilling a single hole, have the tallest person who sleeps in the bed sit up against the headboard (or wall) in their natural reading position. Mark the wall about 6 inches above the top of their head. This is your absolute minimum baseline for the bottom of the shelf. I have had to patch many walls because clients guessed this height and ended up with a mild concussion.
2. Selecting the Right Material and Finish
The material you choose sets the tone for the entire room. A floating shelf isn’t just a plank of wood; it is an architectural element. In my projects, I try to ensure the shelf communicates with other furniture in the room without matching perfectly. We want coordination, not a “bedroom set in a box” look.
If your nightstands are painted white, a natural white oak or walnut shelf adds warmth and texture. Conversely, if you have heavy wood furniture, a painted shelf that matches the wall color can look incredibly chic and minimalist.
Material pairings I love:
- The Scandi-Minimalist: Light, unfinished white oak or birch plywood with exposed edges. This looks fantastic against sage green or terracotta walls.
- The Moody Industrial: A dark walnut stain or even charred wood finish. This works best against dark charcoal or navy walls for a monochromatic, cozy vibe.
- The “Invisible” Look: Painting the shelf the exact same color and sheen as the wall behind it. This makes the objects on the shelf appear to float in mid-air and is excellent for small rooms where you want to reduce visual clutter.
Common Mistake: The “Clashing Undertones”
Be very careful mixing wood tones. If your floors are a cool-toned gray laminate, a honey-orange pine shelf will look cheap and out of place. Always bring a sample of the shelf wood into the room and look at it during the day and at night. If you can’t find a wood tone that complements your existing furniture, go with a painted finish (black or white) instead.
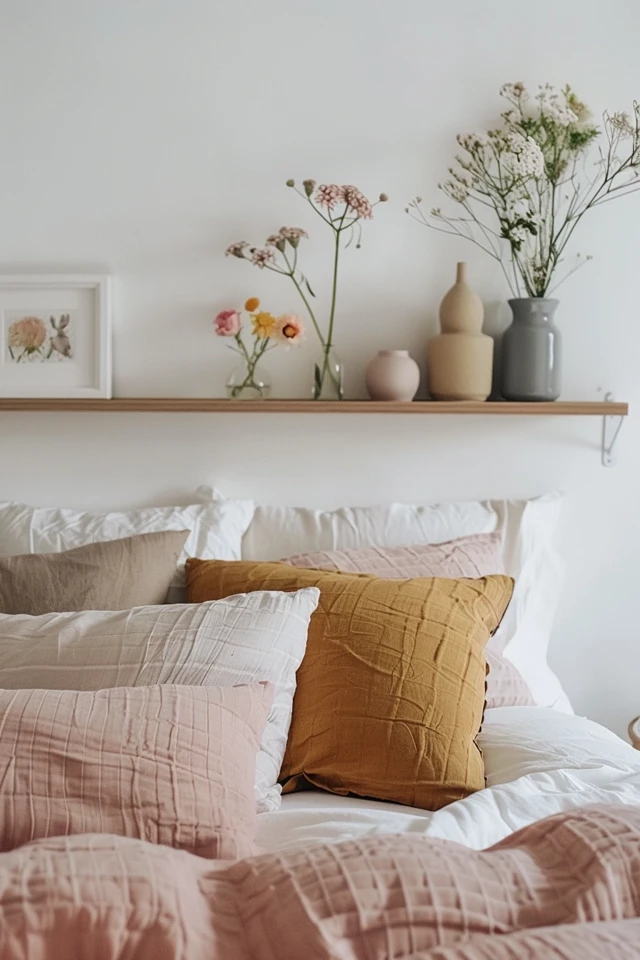
3. Styling Strategies: The Rule of Three and Layering
Styling a shelf above the bed is a delicate balancing act. Because it is high up, you don’t want it to look heavy. The goal is an airy, curated collection. I always tell my clients to think of this shelf as a gallery, not a storage unit. This is not the place for clutter, loose change, or half-read paperbacks.
I use a technique called “anchoring and layering.” You want to anchor the shelf with substantial pieces on the ends and layer smaller items in the middle.
My step-by-step styling formula:
- Lean, Don’t Hang: The beauty of a picture ledge or shelf is that you can lean art. Start with one large frame off-center. This should be the tallest object.
- Overlap for Depth: Place a smaller frame slightly overlapping the larger one. This creates a sense of depth and casual elegance.
- Add Life: You need something organic. A trailing plant like a Pothos or a String of Pearls works beautifully here. Place the plant on the opposite side of the large art to balance the visual weight.
- The “Bridge” Items: Use small, horizontal objects to bridge the gap between the tall art and the trailing plant. This could be a short stack of two or three books (spines facing out or pages facing out for a neutral look) or a small ceramic bowl.
What I’d do in a real project:
I strictly avoid heavy objects like large vases or heavy sculptures above the head. Even if the shelf is secure, the psychological fear of something falling can disrupt sleep. Stick to lightweight frames (use plexiglass instead of real glass if you are in an earthquake-prone area), canvas art, and light baskets.
4. Functionality: Lighting and Small Space Solutions
In tight urban apartments or small guest rooms, a floating shelf above the bed often has to pull double duty. It isn’t just decorative; it might be the only surface area available if there isn’t room for nightstands.
If you are using the shelf as a functional replacement for bedside tables, you have to be clever about lighting. I love installing clip-on sconces or integrating LED strip lighting into the bottom of the shelf.
Lighting ideas that elevate the look:
- Undershelf LED Strips: You can route a small channel into the bottom of a wood shelf and install a warm LED strip. This provides a soft, ambient glow that washes down the wall and headboard. It is perfect for mood lighting.
- The Sconce Hack: Mount plug-in wall sconces directly below the shelf, or clamp architect lamps onto the shelf edge. This keeps the nightstand area clear and provides excellent reading light.
- Cord Management: If you have lights on the shelf, you must manage the cords. I usually drill a hole through the shelf surface to feed cords down behind the headboard, or I use paintable cord covers that run straight down the wall. Visible, tangy wires will ruin the “chic” vibe instantly.
Designer’s Note: The “Lip” Factor
If you plan to lean frames or have slippery items on the shelf, look for a design that includes a front lip or a “picture ledge” style. A small ½-inch lip is invisible from the bed but provides a crucial safety stop to prevent picture frames from sliding off if the door slams or a truck drives by.
5. Installation and Safety: Peace of Mind
I cannot stress this enough: you must install this shelf correctly. Unlike a bookshelf on the floor, gravity is working entirely against you here. A floating shelf relies on internal brackets or a French cleat system.
For a shelf above a bed, drywall anchors are rarely enough unless the shelf is holding nothing but a feather. You generally need to hit at least two wall studs.
The Hardware Checklist:
- Floating Brackets: These are steel rods that are drilled into the studs, and the shelf slides onto them. They are invisible and very strong. However, they require a thicker shelf (usually at least 1.5 to 2 inches thick) to hide the hardware.
- French Cleats: This is a two-part angled wood or metal system. One strip goes on the wall, the other on the back of the shelf. They interlock. This is incredibly stable and distributes weight evenly across the wall. This is my preferred method for DIYers as it is easier to level.
- Toggle Bolts: If you absolutely cannot hit a stud (which happens in old houses or weird layouts), use heavy-duty toggle bolts (often called “snaptoggles”). These flip open behind the drywall and can hold significant weight. Never use the cheap plastic plugs that come with the shelf kit.
Common Mistakes + Fixes
The shelf tilting forward is a classic issue. This happens when the bracket isn’t flush with the wall or the screw holes have widened.
The Fix: Use shims behind the bottom edge of the bracket to tilt the nose of the shelf up slightly during installation. Once it is loaded with weight, it will settle into a perfectly level position.
Final Checklist: Before You Drill
Use this quick checklist to ensure your project goes smoothly.
- The Mock-Up: Use blue painter’s tape to outline the shelf dimensions on the wall. Live with it for 24 hours. Does it feel too high? Too low?
- The Stud Finder: Locate and mark your studs. If they aren’t centered where you want the shelf, you will need to adjust your placement or use toggle bolts.
- The Scale Check: Gather the items you plan to put on the shelf and lay them out on the floor. Measure the height of the tallest artwork. Ensure you have enough ceiling clearance above the shelf for that art.
- The Safety Check: Confirm that no object on your proposed shelf weighs more than 5-10 pounds individually, and that all glass is secured or swapped for acrylic.
FAQs
Is it safe to hang a shelf above my bed in earthquake zones?
If you live in California or other seismic areas, I generally advise against heavy floating shelves directly above the head. If you must have one, use a picture ledge with a deep lip, use museum putty to adhere every single object to the shelf, and swap all glass frames for Plexiglass.
How do I clean a floating shelf without knocking things over?
This is a practical annoyance! I recommend using a microfiber duster on an extendable pole for weekly dusting. For deep cleaning, take everything down. It takes two minutes and prevents the accidental shattering of your favorite vase.
Can I put a floating shelf above a bed with no headboard?
Absolutely. In fact, this is a great design hack. If you paint a color block on the wall behind the bed and cap it with a floating shelf, it creates a “virtual headboard” that saves space and looks very modern.
What if my ceilings are very low?
Keep the shelf thin. Avoid chunky, rustic beams. Look for a slim metal shelf or a thin wood ledge. Place it closer to the ceiling than the bed to draw the eye up, which tricks the brain into thinking the ceiling is higher than it is.
Conclusion
Installing a chic floating shelf above your bed is one of the most effective ways to inject personality into a bedroom. It allows you to rotate art and decor with the seasons, keeps your nightstands clutter-free, and adds architectural interest to a plain boxy room.
The key to success lies in the preparation. Measure twice (especially that clearance height when sitting up!), choose a finish that speaks to the rest of your home, and style with restraint. A well-executed shelf looks effortless, but as we have covered, it takes a bit of planning to get that “floating” magic just right.
Picture Gallery


