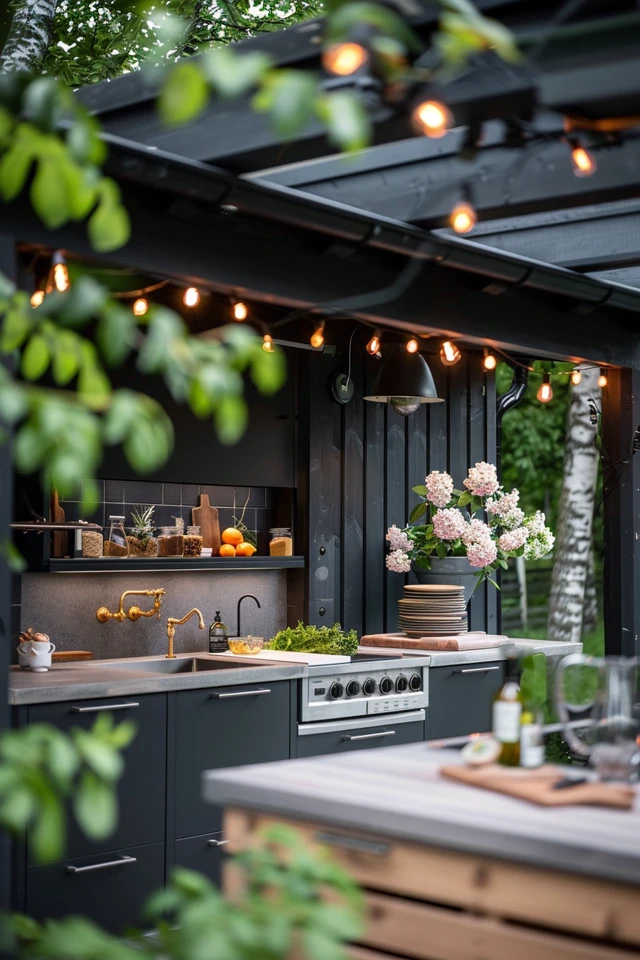
When it comes to designing an outdoor kitchen, every detail matters. From the countertops to the appliances, each element contributes to creating a functional and stylish space. One essential feature that often gets overlooked is the outdoor kitchen backsplash. Not only does it serve a practical purpose by protecting the walls from water, food, and heat damage, but it also adds visual interest to your design, tying everything together.
There are numerous options to consider when choosing an outdoor kitchen backsplash material. Ceramic and porcelain tiles offer a vast array of colors, patterns, and textures, allowing you to get creative with your design. Natural stone, such as marble and granite, provides a luxurious and rustic vibe. Galvanized steel panels create a modern and industrial-chic look. Wood pallet boards add a natural and inviting touch, while brick provides a timeless and classic aesthetic.

When selecting your outdoor kitchen backsplash, think about the overall style of your outdoor space and how it will complement other elements like the countertops and appliances. Consider factors such as maintenance, durability, and visual appeal to make the right choice. Installation follows a similar process to indoor backsplash installation and can be done as a DIY project or with the help of a professional.
Get inspired by the latest outdoor kitchen backsplash trends and design your outdoor space with style and practicality in mind. Create a beautiful and functional outdoor kitchen that enhances your outdoor living experience, and enjoy cooking and entertaining in style.
Key Takeaways:
- Outdoor kitchen backsplashes provide both function and style to your outdoor space.
- Materials like ceramic tiles, natural stone, galvanized steel, wood pallet boards, and brick offer various design options.
- Consider factors such as style, maintenance, durability, and overall visual appeal when choosing your outdoor kitchen backsplash.
- Installation of an outdoor backsplash follows a similar process to indoor backsplash installation.
- Create a beautiful and functional outdoor kitchen space by incorporating a stylish backsplash that complements your design.
Why You Need an Outdoor Kitchen Backsplash
If you have an outdoor kitchen that is situated near a wall, installing an outdoor kitchen backsplash is essential. Not only does it add style to your outdoor space, but it also serves a practical purpose by providing safety and protection for your walls.
A backsplash is designed to prevent grease stains on the wall and reduce the risk of a grease fire, especially if the wall is made of combustible materials. By acting as a barrier, the outdoor kitchen backsplash helps keep your walls clean and well-maintained, minimizing the potential for water, food, and heat damage.
Aside from its functional benefits, an outdoor kitchen backsplash adds visual interest to your outdoor kitchen design. It serves as a design feature that can complement other elements such as countertops, cabinets, and appliances, tying the whole outdoor living space together.

When choosing materials for your outdoor kitchen backsplash, it’s important to consider practicality. Look for materials that are easy to clean, offer extra heat resistance, and provide durability to withstand outdoor elements. This way, you can ensure that your backsplash remains in good condition and retains its visual appeal over time.
Design is also an essential aspect to consider when selecting your outdoor kitchen backsplash. The design should harmonize with the overall style of your outdoor space and reflect your personal taste and preferences. Whether you prefer sleek and modern or rustic and natural, there are countless design options available to suit your aesthetic.
By installing an outdoor kitchen backsplash, you can protect your walls, add visual interest, and enhance the overall aesthetics of your outdoor space. It’s a practical and stylish addition that brings both functionality and beauty to your outdoor kitchen.
How to Install an Outdoor Kitchen Backsplash
Installing an outdoor kitchen backsplash is a straightforward process that involves a few key steps. Whether you’re using tiles or bricks, the same general installation principles apply. To get started, make sure the walls are clean and free of any dirt, grease, or debris that may interfere with the adhesive’s adhesion. Creating a smooth surface is crucial for a successful installation.
If you’re using tiles, lay them on the countertop first to define the layout and determine where to start tiling. This step will help you identify if any tiles need to be cut to fit the space. Use a tile cutter for ceramic, porcelain, or glass tiles, while natural stones may require a wet saw. Cutting the tiles accurately will ensure a precise and seamless fit.
Next, mix the adhesive according to the manufacturer’s instructions, and apply it in small sections using a trowel. Begin laying the tiles or panels, making sure to use spacers to achieve even spacing and alignment. Once you’ve covered all the desired areas, allow the tiles or panels to dry overnight.
After the adhesive has fully cured, it’s time to apply the grout. Use a grout float to spread the grout at a 45-degree angle, ensuring that it fills the gaps between the tiles or bricks. Remove any excess grout using a damp sponge, gently wiping the surface to create a clean and polished finish.

For natural stones or bricks, it’s essential to seal them to protect against stains and moisture absorption. Consult the manufacturer’s instructions to determine the best sealing method for the specific material you’re using. Regular cleaning and maintenance are also vital to keep your outdoor kitchen backsplash looking its best. Use a mild cleaner and a non-abrasive sponge or cloth to remove any dirt or stains.
If you’re unsure or inexperienced in working with the chosen materials, consider hiring a professional installer. They have the necessary tools and expertise to ensure a proper and successful installation, saving you time and potential frustration. Remember to prioritize safety during the installation process by wearing protective goggles and gloves and following all product safety guidelines.

