
Chic Shiplap in Bathroom Ideas for Your Home
Shiplap has evolved far beyond the rustic farmhouses where it first gained popularity. In modern interior design, we treat it as a versatile texture that adds architectural weight to a room without the chaos of a busy pattern. It is particularly effective in bathrooms, where we often struggle to balance cold, hard surfaces like tile and porcelain with something warmer and more inviting.
However, using wood cladding in a damp, humid environment comes with a specific set of rules that you cannot ignore. I have seen too many DIY projects fail because the homeowner treated a bathroom wall the same way they would treat a living room accent wall. There are moisture barriers to consider, specific paint sheens that repel water, and material choices that prevent warping over time.
In this guide, I will walk you through how to implement this look professionally and durably. If you are looking for visual inspiration, you can scroll down to the Picture Gallery at the end of this post to see these ideas in action.
1. Choosing the Right Material for High-Humidity Zones
The single most important decision you will make in this project is the substrate material. In a living room, standard pine or affordable MDF (Medium Density Fiberboard) works perfectly fine. In a bathroom, standard MDF is a recipe for disaster because it acts like a sponge when exposed to airborne humidity.
If you are renovating a powder room that contains only a toilet and a sink, you have more flexibility. The humidity levels there are low. However, in a full bath with a shower or tub, you must upgrade your materials. I always recommend using authentic wood (like poplar or cedar) that has been sealed on all sides, or a moisture-resistant composite.
For full bathrooms used by children or high-traffic family baths, PVC shiplap is the gold standard. It looks exactly like wood once painted, but it is completely impervious to water. It will never rot, warp, or swell, no matter how long the hot shower runs.
Designer’s Note: The Warping Reality
I once worked on a coastal project where a contractor installed standard pine shiplap in a primary bathroom without acclimating the wood. Within three months, the humidity caused the boards to swell, buckling off the wall and popping the nails.
To prevent this, always bring your wood material into the house at least 72 hours before installation. This allows the wood to adjust to the home’s temperature and humidity levels, minimizing movement after it is on the wall.
Common Mistakes + Fixes
- Mistake: Using unsealed raw wood in a splash zone.
- Fix: If you use real wood, prime and paint the back and cut edges before installation. This “back-priming” creates a full seal.
- Mistake: Installing boards tight against each other.
- Fix: Use a nickel (or a 1/8-inch spacer) between boards. Wood needs room to expand and contract with seasonal humidity changes.
2. Vertical vs. Horizontal Orientation
The direction you run your boards changes the entire optical perception of the bathroom. This is one of the oldest tricks in the interior design playbook, but it is especially powerful in small spaces like bathrooms.
Horizontal shiplap is the traditional choice. It leads the eye around the room, making narrow spaces feel wider. If you have a tight powder room that feels claustrophobic, horizontal lines can visually push the walls out. It feels more casual and is generally easier to install because you have more studs to hit along the wall length.
Vertical shiplap (often called V-groove or beadboard, though the profile differs slightly) creates the illusion of height. Most standard bathrooms have ceilings between 8 and 9 feet. By running boards vertically, you draw the eye upward, making the ceiling feel loftier. This look tends to feel slightly more modern and tailored than the rustic horizontal look.
Measurements and Scale
- Standard Width: I typically specify 6-inch boards for standard bathrooms.
- Small Spaces: If the room is very small, a 4-inch or 5-inch board can look busy. Stick to 6-inch or go wider to 8-inch for a calmer look.
- Baseboards: If running vertical shiplap, ensure your baseboard is substantial enough to ground it. A 5-inch or 6-inch high baseboard is usually necessary.
What I’d Do in a Real Project
If I am designing a bathroom with low ceilings (under 8 feet), I almost exclusively use vertical shiplap. It lifts the visual weight of the room. I also ensure that the “nickel gap” (the space between boards) is clean and distinct to maintain that crisp vertical line.
3. Placement Strategies: Wainscoting vs. Full Walls
You do not need to cover every square inch of drywall to get the effect. In fact, full floor-to-ceiling shiplap on every wall can sometimes feel overwhelming and oppressive in a small bathroom. Strategic placement creates a focal point and saves money on materials.
The most practical application in a bathroom is a wainscot. This typically runs on the lower portion of the wall, capped with a chair rail or a simple ledge. This protects the drywall from splashes near the sink and toilet while leaving the upper wall open for wallpaper or a contrasting paint color.
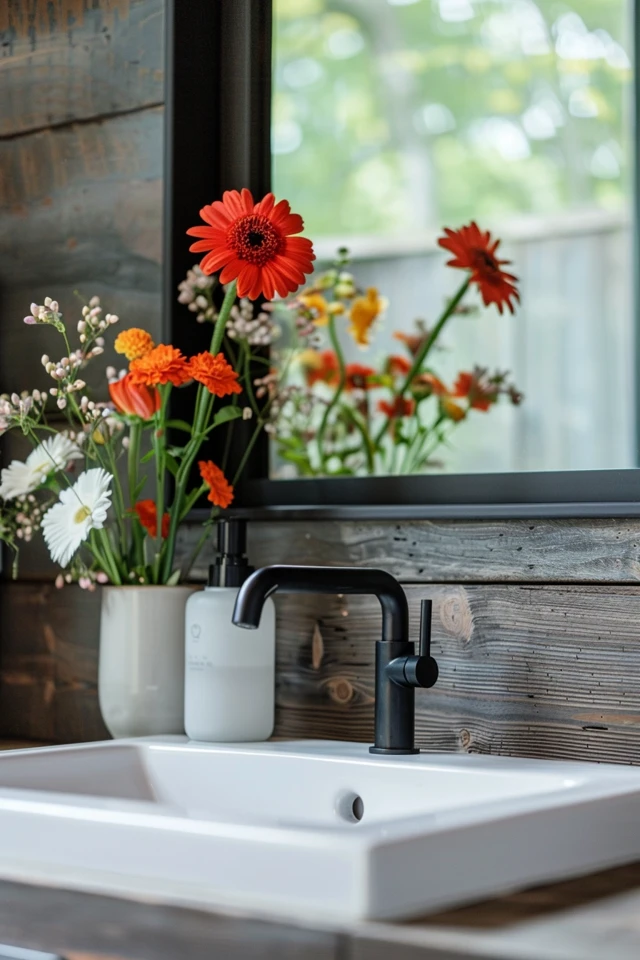
Another high-impact option is the single accent wall behind the vanity and mirror. This anchors the washing station and provides a beautiful, textured backdrop for your lighting fixtures. However, you must plan your plumbing penetrations carefully.
Designer’s Rules of Thumb
- Wainscot Height: Standard chair rail height is too low for a bathroom. I usually set bathroom wainscoting at 42 to 48 inches high. This ensures it clears the vanity backsplash (usually at 34-36 inches) significantly, avoiding awkward visual tangents.
- Backsplash Integration: If you install shiplap behind a sink, you still need a backsplash. Do not let the wood touch the countertop directly. Install a 4-inch stone splash, then start the shiplap above it.
- Ceiling Application: Don’t forget the “fifth wall.” Shiplap on a bathroom ceiling adds immense warmth, especially if kept in a natural wood tone or painted a soft blue.
Common Mistakes + Fixes
- Mistake: Ending the wainscoting at the exact same height as the vanity.
- Fix: Create separation. The wainscoting should be at least 4 to 6 inches higher than the vanity top so the mirror has a dedicated space to hang.
- Mistake: Installing lighting directly on shiplap without preparation.
- Fix: Use a jigsaw to cut the opening for the electrical box cleanly. The fixture canopy must sit flush against the high points of the shiplap, not wobble over the gaps.
4. Paint Finishes and Color Coordination
In a living room, I love a matte finish on shiplap because it looks velvety and hides imperfections. In a bathroom, matte paint is risky. It is porous and tends to hold onto moisture, which can lead to mildew growth in the grooves. It is also difficult to wipe down if you get toothpaste splatters on it.
For bathroom shiplap, I recommend a satin or semi-gloss finish. These sheens have a tighter molecular structure that repels water and stands up to scrubbing. If you want the look of matte, look for specific “bath and spa” paint lines that offer mildew resistance in lower sheens, but be prepared to pay a premium.
Color choice dictates the vibe. White (like Benjamin Moore’s Chantilly Lace) is the classic “coastal clean” look. However, we are seeing a massive shift toward moody, dark shiplap in powder rooms. Deep navy, forest green, or charcoal gray creates a cozy, jewel-box effect.
Lighting Considerations
Shiplap provides texture, which interacts with light differently than flat drywall.
- Sconce Placement: If you place a wall sconce directly on the shiplap, the light will wash down the wall. This highlights the horizontal or vertical lines.
- Shadows: Be aware that “grazing” light (light hitting the wall from a sharp angle) will exaggerate any imperfections in your installation. This is why prep work and sanding are vital.
- Paint Application: When painting dark colors, you must paint the “tongue” or the inside edge of the board before you nail it to the wall. If you don’t, and the boards shrink slightly in winter, you will see stripes of raw wood or white primer peeking through your dark paint.
5. Installation Details That Separate DIY from Pro
The difference between a project that looks high-end and one that looks homemade is usually found in the trim and corners. Professional designers obsess over transitions—where the shiplap meets the floor, the ceiling, the window, and the corners.
You cannot just butt two pieces of shiplap together in a corner and expect it to look good. Walls are rarely perfectly square. This leads to unsightly gaps. Professionals use one of two methods: coping the joint (cutting the profile of one board to fit over the other) or, more commonly with shiplap, using a square trim piece in the corner to receive the boards.
Trim work around windows is another pain point. The shiplap adds depth to the wall (usually 1/2 inch to 3/4 inch). This often means the shiplap will stick out further than your existing window casing. You may need to “build out” your window casing or add a back-band molding to ensure the window trim sits proud of the shiplap.
The Plumbing Challenge
You will likely encounter plumbing pipes for sinks and toilets.
- Toilet Supply Line: Do not just cut a giant square hole. Turn off the water, remove the escutcheon plate (the metal ring against the wall), drill a clean hole exactly the size of the pipe, install the board, and replace the plate. The plate covers the cut edge.
- Vanity Scribing: If your vanity goes wall-to-wall, install the vanity first, then butt the shiplap up to it. If the vanity is freestanding, install the shiplap first, then push the vanity against it.
Designer’s Note: The “Liquid Nails” Debate
For renters, peel-and-stick wallpaper that looks like shiplap is the only safe option. For homeowners, avoid relying solely on construction adhesive (Liquid Nails). If you ever want to remove the shiplap, adhesive will destroy the drywall behind it, forcing you to re-sheetrock the room. I prefer using 2-inch brad nails into the studs. It holds securely but causes less catastrophic damage during removal.
Final Checklist: What I’d Do in a Real Project
If I were managing your bathroom renovation, this is the checklist I would run through before purchasing a single board:
- Measure the Moisture: Is there a fan? If the room gets foggy and stays foggy, I am buying PVC material, not wood.
- Check the Depth: I will remove the electrical switch plates and check how much room I have. I will likely need “box extenders” so the switches sit flush with the new, thicker wall surface.
- Plan the Layout: I will calculate the wall height and divide by the board width. If this leaves a tiny 1-inch sliver of board at the ceiling, I will cut the bottom board down to balance it out. No slivers allowed.
- Acclimatize: I will buy the materials and let them sit in the house for 4 days minimum.
- Priming Strategy: If using a dark color, I will paint the grooves of the boards on sawhorses before installation to avoid white gaps later.
FAQs
Can I put shiplap inside a shower cubicle?
Technically, yes, but only if it is a specific PVC product installed with 100% waterproofing protocols (like silicone sealing every joint). However, I generally advise against it. It creates maintenance issues. If you want that look in a shower, use a “wood-look” porcelain tile or a stamped concrete wall system.
How do I clean shiplap in a bathroom?
Dust collects on the horizontal ledges of shiplap. In a bathroom, this dust mixes with humidity to form a paste. You should vacuum the walls with a soft brush attachment once a month. For wiping down, use a microfiber cloth dampened with warm water and a tiny drop of dish soap. Avoid harsh chemicals that can strip the paint finish.
Does shiplap make a small bathroom look smaller?
Not if done correctly. Horizontal lines widen the room; vertical lines heighten it. The texture actually adds depth, which can make walls feel like they are receding rather than closing in. Painting the shiplap white or a very light gray maximizes this expanding effect.
Is shiplap trendy or timeless?
While the “farmhouse” craze made it ubiquitous, wood cladding has been used in homes for centuries. It is a classic architectural element. To keep it timeless, avoid the distressed, “chippy” paint look. Go for clean, solid paint colors and crisp installation.
Conclusion
Adding shiplap to your bathroom is one of the most effective ways to introduce character and warmth to a sterile space. It bridges the gap between functionality and comfort, turning a utilitarian room into a genuine retreat.
The key to success lies in respect for the environment. By acknowledging that the bathroom is a wet, shifting environment and choosing your materials accordingly, you can create a feature that lasts for decades. Whether you choose a moody, dark vertical board for a powder room or a bright, white horizontal plank for a family bath, the texture will elevate your home’s design instantly.
Picture Gallery


