
Chic Shiplap Wall Bathroom Ideas I Love
Introduction
Shiplap has evolved far beyond its rustic farmhouse roots to become a staple in modern interior design. In my years of designing bathrooms, I have found few materials that offer as much texture and architectural interest for the price point. It solves the common problem of bathrooms feeling sterile or cold due to the abundance of porcelain, glass, and metal fixtures.
When applied correctly, shiplap provides a subtle rhythm to the walls that paint simply cannot achieve on its own. It works beautifully in coastal cottages, moody modern powder rooms, and transitional master baths alike. The key lies in choosing the right board width, orientation, and finish to match the specific constraints of your space.
Whether you are renovating a rental or building your dream home, there is a way to incorporate this look. For plenty of visual inspiration, make sure to scroll to the Picture Gallery at the end of the blog post. Now, let’s dive into the practical rules and design strategies I use to make shiplap work in a bathroom setting.
1. Orientation Matters: Vertical vs. Horizontal
One of the first decisions you need to make is the direction of the boards. This is not just an aesthetic choice; it is a tool for correcting architectural flaws.
Horizontal Installation
Horizontal shiplap is the classic choice. It is excellent for expanding a room visually, making narrow powder rooms feel significantly wider. The long horizontal lines guide the eye across the space, creating a sense of calm and stability.
However, you must be careful with ceiling height. If your bathroom has ceilings lower than eight feet, wide horizontal boards can make the room feel squat. In these cases, sticking to a 5-inch board width (exposure) is safer than the wider 8-inch options.
Vertical Installation
I frequently recommend vertical shiplap for bathrooms with standard or low ceilings. The vertical lines draw the eye upward, instantly making the room feel taller and more spacious.
This orientation also feels slightly more modern and less “cottage” than horizontal styling. It pairs exceptionally well with mid-century modern vanities and sleek lighting fixtures.
Designer’s Note: The “Nickel Gap”
The space between the boards, known as the “nickel gap,” is crucial. In a small bathroom, a standard 1/8-inch gap creates a crisp shadow line. If you go wider, the look becomes more rustic; if you butt them too tight, you lose the texture entirely.
2. Material Selection and Moisture Control
Bathrooms are hostile environments for wood products. Humidity, steam, and direct water splashes can wreak havoc on traditional pine boards.
Why PVC is King
For any full bathroom (one with a shower or tub), I almost exclusively specify PVC or composite shiplap products. Unlike wood or standard MDF, PVC is impervious to water. It will not warp, swell, or rot, even if the ventilation in the room isn’t perfect.
Treating MDF
If you are on a budget and working on a powder room (toilet and sink only), moisture-resistant MDF is acceptable. However, you must prime and paint all sides, including the back and the cut edges, before installation. This seals the material against ambient humidity.
The “Splash Zone” Rule
Never install wood or MDF shiplap inside a shower stall or immediately adjacent to a freestanding tub where splashing is constant. Even with marine-grade paint, the seams will eventually trap water. For shower interiors, look for wood-look porcelain tile that mimics the shiplap aesthetic without the risk.
3. Wainscoting and Chair Rails
You do not need to cover every inch of drywall to make an impact. Wainscoting is a fantastic way to introduce texture while protecting the lower half of your walls from scuffs and splashes.
The Rule of Thirds
When determining how high to run your shiplap wainscoting, avoid cutting the room exactly in half. It looks visually stagnant. Instead, use the rule of thirds.
For a standard 9-foot ceiling, I like to run the shiplap up to about 42 inches (chair rail height) or go high to 60 or 70 inches (plate rail height). The higher installation adds drama and allows you to install wall-mounted faucets directly onto the shiplap surface.
Cap Molding Details
The transition between the shiplap and the drywall above needs a clean finish. A simple 1×2 board creates a modern, ledge-like cap.
If you want a more traditional look, use a molded chair rail. Ensure the depth of the cap is sufficient to cover the thickness of the shiplap plus the drywall variation. A projection of at least 3/4 inch is usually necessary.
Combining with Wallpaper
One of my favorite design moves is placing a bold, large-scale wallpaper above white shiplap wainscoting. The shiplap grounds the space and prevents the pattern from becoming overwhelming. This is particularly effective in small windowless bathrooms.
4. Modern Styling: Paint and Width
The “Farmhouse White” look is timeless, but it is not the only option. To make shiplap feel current and chic, play with color and scale.
Moody Monochrome
Painting the shiplap, the trim, and even the ceiling in the same dark color creates an incredibly sophisticated vibe. Colors like charcoal, navy blue, or deep forest green work wonders.
When everything is the same color, the shadow lines of the shiplap provide the texture. This technique blurs the boundaries of the room, often making small spaces feel infinite rather than cramped.
Skinny Lap
Standard shiplap usually has a 5 to 7-inch reveal. “Skinny lap,” which uses 2 to 3-inch boards, offers a refined, vintage texture. It mimics the look of original beadboard found in historic homes but with cleaner lines.
Finish Sheen
In a bathroom, the sheen of your paint affects durability and aesthetics. I recommend a Satin finish for the shiplap. Flat paint is too hard to wipe down, and Semi-Gloss can highlight imperfections in the installation. Satin offers the perfect balance of washability and a soft glow.
5. Installation Logistics: Trim and Fixtures
The difference between a DIY look and a pro finish is usually in how the trim and fixtures are handled.
Baseboards and Crown
Do not run shiplap all the way to the floor without a baseboard. It looks unfinished and creates a dirt trap. Install the baseboard first, then rest the shiplap on top of it. Alternatively, install the shiplap and layer a chunky baseboard over it for a built-in look.
Electrical Box Extenders
Shiplap adds thickness to your wall (usually 1/2 inch to 3/4 inch). Your electrical outlets and switches will sit too deep if you don’t address this. You must use box extenders to bring the receptacles flush with the new wall surface. This is a safety requirement, not just an aesthetic one.
Mounting Mirrors and Sconces
When mounting heavy items like mirrors or light fixtures, you need to ensure they sit flat. If a mounting bracket lands on a gap or an uneven board, the fixture will wobble.
I often recommend blocking out the area behind the sconce with a flat piece of wood trim that matches the shiplap paint. Alternatively, ensure your contractor places solid blocking behind the drywall before the shiplap goes up so you can screw into something solid anywhere on the wall.
Common Mistakes + Fixes
Mistake: Caulking the horizontal gaps.
Many homeowners instinctively want to fill every gap. If you caulk the “nickel gap” between the boards, you destroy the shadow line that gives shiplap its character.
Fix: Only caulk the vertical inside corners and where the shiplap meets the trim. Leave the gaps between boards open.
Mistake: Poor layout planning.
Starting a wall with a full board often results in a tiny, awkward sliver of a board at the ceiling or the opposite corner.
Fix: Measure the total height of the wall and divide by the width of your board (including the gap). Adjust your starting board’s width so that you end with a substantial piece at the top and bottom.
Mistake: Ignoring the toilet tank.
Installing shiplap behind a toilet often pushes the toilet tank too far forward, potentially preventing the lid from staying up or interfering with the plumbing rough-in.
Fix: Measure the distance from the wall to the toilet bolts. Ensure your shiplap thickness doesn’t encroach on the space needed for the tank.
Designer’s Note: A Lesson on Spacing
I once designed a bathroom where we used real pine shiplap painted white. We installed it during a humid summer week. When winter came and the heater turned on, the wood shrank significantly.
The perfectly white walls suddenly had stripes of raw, unpainted wood showing in every gap. It was a disaster.
The Lesson: If you are painting shiplap yourself, paint the “tongue” and the edges of the boards before you install them. This ensures that if the boards shrink or shift, the color inside the gap remains consistent.
What I’d Do in a Real Project: Quick Checklist
If I were renovating a 5×8 guest bathroom today, here is my exact plan of attack:
1. Material: Use pre-primed finger-jointed pine or PVC if there is a shower.
2. Orientation: Vertical installation to heighten the 8-foot ceilings.
3. Height: Wainscoting up to 48 inches high to clear the vanity backsplash.
4. Color: Paint the shiplap a soft “greige” (like Benjamin Moore Revere Pewter) and keep the upper walls white.
5. Trim: Use a simple square cap molding for a modern transition.
6. Lighting: Install sconces above the mirror, mounted on the drywall portion to avoid uneven seating on the shiplap grooves.
Final Checklist
- Measure Twice: Calculate square footage and add 15% for waste and cuts.
- Locate Studs: Mark all stud locations before covering the drywall.
- Prime Cuts: Seal any cut edges of MDF or wood before installation.
- Check Level: Ensure your first board is perfectly level (for horizontal) or plumb (for vertical). Do not trust the floor or wall corner.
- Box Extenders: Purchase electrical box extenders for all switches and outlets.
- Adhesive: Use construction adhesive (Liquid Nails) in addition to nails for a secure hold that reduces rattling.
FAQs
1. Is shiplap in bathrooms going out of style?
While the rustic, distressed “farmhouse” look is fading, clean-lined shiplap remains a classic architectural element. Using vertical orientation or painting it in dark, moody colors keeps it timeless and modern.
2. Can I install shiplap over existing tile?
Technically yes, but it is risky. You must drill through the grout lines to hit studs or use heavy-duty adhesive. It also adds significant thickness to the wall. It is almost always better to demo the tile first.
3. How do I clean shiplap in a bathroom?
Use a microfiber cloth or a vacuum with a brush attachment to remove dust from the grooves. For stains, wipe with a damp cloth and mild soap. Avoid soaking the boards, especially if they are wood-based.
4. Does shiplap make a small bathroom look smaller?
No, quite the opposite. The linear nature of shiplap creates leading lines that trick the eye. Horizontal lines widen the room, while vertical lines raise the ceiling, making the space feel larger.
Conclusion
Shiplap remains one of the most effective tools in an interior designer’s kit for bringing life to a bathroom. It offers a warmth and durability that drywall simply cannot match. By selecting the right material—preferably PVC for wet zones—and paying attention to the finer details like corner trim and layout, you can achieve a custom, high-end look.
Remember to consider the scale of your room when choosing board width and orientation. Don’t be afraid to step outside the white-paint box and experiment with color. With careful planning and the right execution, your shiplap walls will be a chic feature you enjoy for years to come.
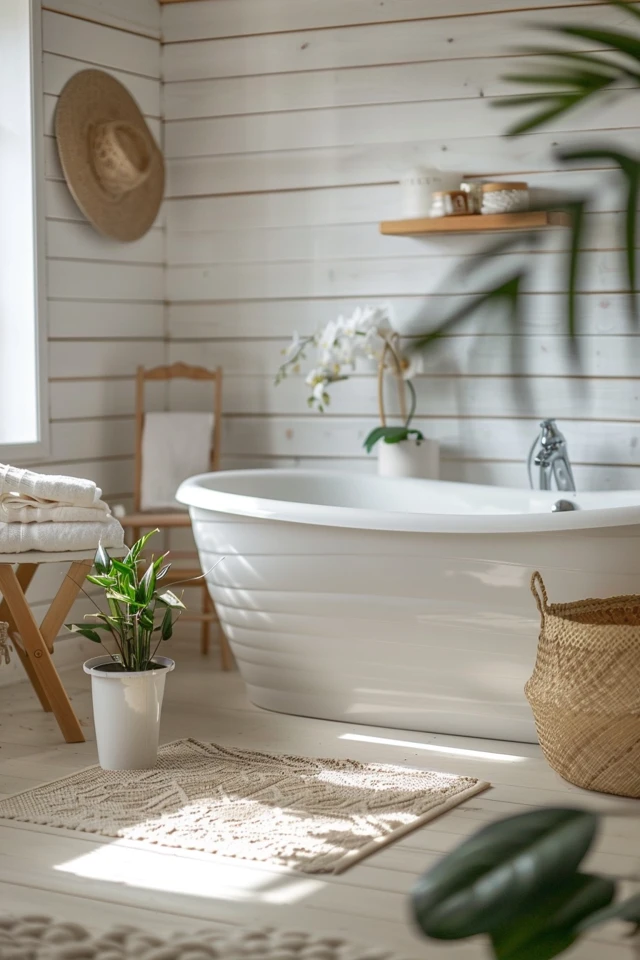
Picture Gallery


