
Title: Closet Hidden Safe Ideas for Secure Storage
Introduction
Designing a master closet is usually about showcasing your wardrobe, optimizing organization, and creating a sense of luxury. However, one of the most frequent requests I get from clients involves the exact opposite of showcasing: they want to know how to hide things. Specifically, they want to integrate a safe without ruining the aesthetic flow of the room or making the security measures obvious to anyone walking in.
Security doesn’t have to look industrial or clumsy. I remember a project where we utilized dead space behind a full-length mirror to conceal a substantial wall safe. It was seamless, functional, and completely invisible unless you knew exactly where to press on the millwork. For plenty of visual inspiration on how these solutions look in finished projects, be sure to check out the Picture Gallery at the end of the blog post.
Whether you are planning a full custom renovation or just looking for a clever spot to stash a lockbox in a rental, effective concealment is about camouflage and accessibility. The goal is to create a storage solution that feels natural to use but impossible for an intruder to locate quickly.
1. Integrating Safes into Custom Millwork
If you are in the design phase of a walk-in closet renovation, you have the best opportunity to make a safe disappear. The most effective method is building the safe directly into the cabinetry. Standard closet depths are usually 24 inches, which provides ample room for most residential security boxes.
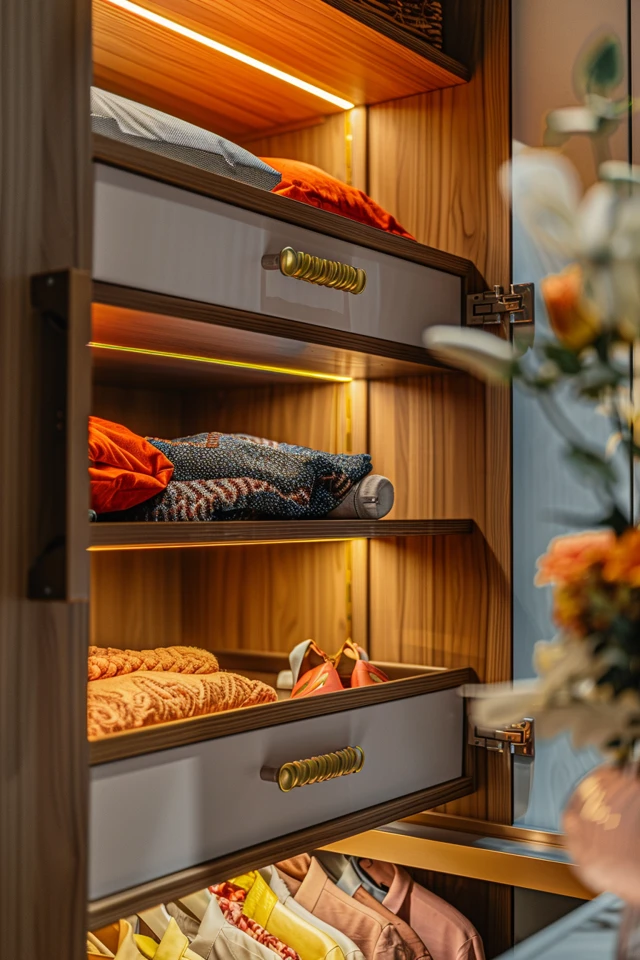
The False Drawer Stack
One of my favorite techniques is the “false drawer” facade. To the naked eye, a bank of drawers looks perfectly uniform with consistent hardware and spacing. However, two or three of the drawer fronts are actually fused together as a single door that swings open or pulls out to reveal the safe behind them.
This works best in the lower sections of a cabinet tower. Since safes are heavy, you want them sitting on a structural shelf or the floor of the cabinet, not suspended high up. A common mistake here is forgetting about the handle clearance; ensure the hardware on the false front doesn’t interfere with the mechanism of the actual safe door behind it.
Behind the Hamper
Tilt-out hampers are standard in high-end closet design. We can utilize the space immediately behind or below the hamper basket. By shortening the depth of the hamper basket by about 6 to 8 inches, we create a hidden void against the back wall.
You can install a slim wall safe in this void. To access it, you simply tilt the hamper out and reach behind. It is an area that thieves rarely investigate closely because dirty laundry is a natural deterrent.
Designer’s Note:
Always measure the swing radius of the safe door before finalizing the millwork. I once saw a DIY project where the safe was boxed in beautifully, but the door could only open 80 degrees before hitting the door frame, making it impossible to put large binders or jewelry boxes inside. A safe door needs to open at least 90 to 135 degrees for full usability.
2. Utilizing Floor Space and False Bottoms
The floor is often the most secure place for heavy storage, but it requires specific structural considerations. If you are on a concrete slab, floor safes are excellent but require jackhammering for installation. For those with wood subfloors, you are working with joists that are typically spaced 16 inches on center.
The Trap Door
In a carpeted closet, a floor safe can be concealed entirely under a rug or a section of carpet that peels back. However, in modern closets with hardwood or tile, we have to get creative.
I often design a “false bottom” in the cabinetry. This involves raising the floor of a cabinet stack by about 6 to 8 inches. The bottom shelf looks like the floor of the cabinet, but it lifts up to reveal a shallow compartment underneath. This is the perfect spot for flat safes or fireproof document bags.
The Toe-Kick Drawer
The toe kick is the recessed space at the bottom of a cabinet, usually 4 inches high and 3 inches deep. This is generally wasted space.
You can install a push-to-open drawer in the toe kick. It is too shallow for a large steel cube, but it is perfect for jewelry trays, cash, or passports. Because it sits flush with the baseboard and lacks a handle, it is virtually invisible to someone standing in the room.
Common Mistakes + Fixes:
Mistake: Installing a floor safe in a high-traffic walkway.
Fix: Place floor safes in the back corners or under hanging clothes. If you put it in the center of the room, you will eventually trip over the lip, or the cover will wear unevenly compared to the surrounding flooring.
3. Camouflage Techniques for Existing Closets
Not everyone can tear out their walls to install a custom safe. If you are working with an existing closet, you need to rely on visual diversion. The goal here is to make the safe look like a mundane household object.
The “Air Vent” Safe
This is a classic diversion tactic that is surprisingly effective. You can purchase wall safes that come with a faceplate designed to look like a standard HVAC return grille.
You cut the drywall between the studs, bolt the unit in, and screw on the grille. Unless an intruder notices that your closet has two return vents or checks for airflow, it passes unnoticed. It is a great solution for small valuables like watches and cash.
Concealment Behind Hanging Clothes
Standard safes are often bolted to the floor in the corner of a closet. The problem is that they are visible as soon as you push the clothes aside.
To fix this, I recommend building a simple plywood “box” around the safe that matches your closet’s finish (white melamine, walnut, etc.). Place a few pairs of shoes on top of the box or stack folded sweaters on it. By turning the safe into a pedestal for other items, the eye glides over it. You can create a removable front panel held on by magnetic catches for access.
What I’d do in a real project:
1. Assess the studs: Use a stud finder to locate the 16-inch gaps.
2. Check for electrical: Avoid walls that share plumbing or main electrical lines.
3. Install at eye level: If concealment allows, eye level is better for usage. Most people stop using floor safes because crouching down in the dark is annoying.
4. Renter-Friendly and Budget Solutions
Renters face a difficult challenge: they need security, but they cannot open up walls or bolt things to the subfloor. However, you can still secure your valuables effectively without losing your security deposit.
The Heavy Diversion
If you cannot bolt a safe down, your next best defense is weight and bulk. A small safe is easy to steal; a thief will simply carry the whole box out and open it later.
Place a heavy safe at the bottom of a wardrobe and fill the bottom with free weights or sandbags if the safe itself isn’t heavy enough. Then, obscure it. Use a large wicker laundry basket with the bottom cut out. Place the basket over the safe and fill the top with actual dirty laundry. It effectively hides the safe and makes the unit feel naturally heavy if nudged.
The Book Safe (Done Right)
Most “book safes” are cheap and obvious. However, you can create a legitimate diversion by using a row of real binders or magazine files on a shelf.
Buy a hollow metal box safe that is roughly the size of a standard binder. Place it on a shelf sandwiched tightly between real boring tax binders or old college textbooks. Glue a binder spine to the front of the safe door. In a sea of visual clutter, this blends in perfectly.
Pro Tip for Renters:
If you must bolt a safe, bolt it to the wall studs rather than the floor. Drywall and stud holes are much easier to patch and paint over when you move out than holes in hardwood flooring or carpet.
5. Technical Considerations: Lighting, Humidity, and Locks
A hidden safe is useless if the contents get ruined by mold or if you can’t see the dial to open it. Interior designers have to think about the environment inside the closet.
Lighting is Mandatory
Closets are often dim, and the corners where we hide safes are the darkest spots. If you are installing a safe with a mechanical dial, you need a dedicated light source.
I recommend battery-operated LED lights with a motion sensor. Mount one inside the cabinet or nook where the safe is hidden. As soon as you open the false door or move the clothes, the light hits the dial. For inside the safe, magnetic LED strips are a lifesaver.
Battling Humidity
Closets, especially those near bathrooms, can trap moisture. Safes are sealed boxes, which can lead to condensation and rust on watches or mold on paper documents.
You must use a desiccant. Simple silica gel packs work for small boxes, but for larger safes, I recommend a rechargeable dehumidifier unit. They are wireless, require no power to run, and just need to be plugged in occasionally to dry out the crystals.
Lock Selection
For hidden safes, the profile of the lock matters. A keypad adds about an inch of depth to the door, which can prevent a false cabinet front from closing flush.
If you are tight on space, look for flat electronic locks or flush-mounted key locks. If you choose a biometric (fingerprint) lock, ensure you have the mechanical override key hidden in a different room. I have seen too many clients lock themselves out because the batteries died and the key was inside the safe.
Final Checklist: Planning Your Hidden Safe
Before you cut a hole in your drywall or order a custom cabinet, run through this decision matrix to ensure the location is practical.
1. Frequency of Access
Daily Use: Must be at waist/eye level. Avoid floor safes or complex false backs.
Monthly/Yearly Use: Floor safes, high shelves, or difficult-to-reach false bottoms are acceptable.
2. Size Requirements
Measure the largest item you plan to store (e.g., a laptop, legal binder).
Add 2 inches to every dimension for interior clearance.
Check the external depth against your closet walls (standard walls are 3.5 inches deep; standard cabinets are 24 inches deep).
3. Concealment Depth
If putting it in a drawer, account for the drawer slides reducing the available width.
4. Installation Type
Bolt-Down: requires solid floor/shelf, higher security against removal.
Freestanding: requires heavy weight or excellent camouflage.
FAQs
Should I buy a fireproof safe or a burglary safe?
Ideally, you want both, but they perform different functions. Fireproof safes are insulated to keep heat out but are often easy to drill through. Burglary safes have thick steel walls but might turn into ovens during a fire. Look for a “BF” (Burglary/Fire) rating for a good residential balance.
Can I install a wall safe in any wall in my closet?
No. You must avoid load-bearing walls if you plan on cutting studs (which you shouldn’t do without a contractor). You also need to check for plumbing pipes and electrical wires. Interior partition walls are usually the safest bet.
How much clearance do I need for a hidden door?
If you are hiding a safe behind a swinging bookcase or mirror, ensure you have at least 90 degrees of clear swing. Also, check the weight rating of the hinges. A mirror with a wood backing is heavy; use three or four heavy-duty hinges to prevent sagging over time.
Is a biometric lock reliable for a closet safe?
Biometric technology has improved, but wet or cold hands can still cause read errors. Since closets are often climate-controlled, they work reasonably well. However, always ensure the safe has a keypad backup or a physical key override.
Conclusion
Integrating a hidden safe into your closet design is the ultimate blend of form and function. It allows you to protect your most valuable possessions without turning your sanctuary into a bank vault. Whether you opt for a high-end millwork solution with false drawers or a clever DIY diversion using everyday items, the principles remain the same: camouflage, structural integrity, and ease of access.
Remember that the best security system is one that nobody knows exists. By treating your safe placement as a design challenge rather than just a hardware installation, you add a layer of protection that is far more effective than steel alone. Take the time to measure your space, consider your daily habits, and choose a solution that gives you peace of mind every time you close your closet door.
Picture Gallery


