
Title: Coastal Backsplash Ideas: Freshen Up Your Kitchen!
Introduction
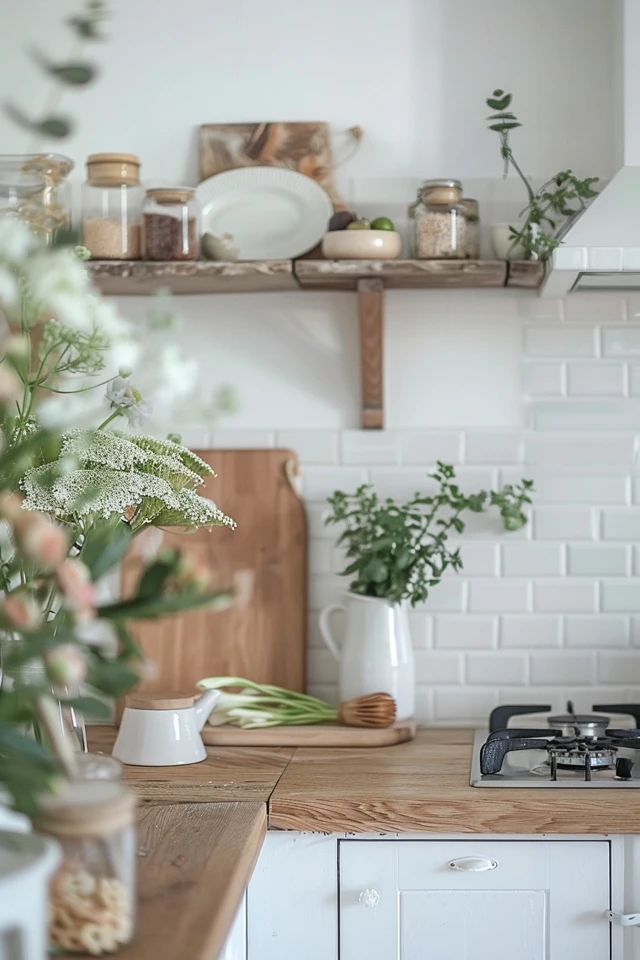
There is something undeniably soothing about a kitchen that channels the energy of the coast. Whether you live right on the water or are landlocked in the suburbs, the goal is to capture that sense of breezy, effortless light. For those looking for immediate visual inspiration, I have curated a stunning Picture Gallery at the end of this blog post to spark your imagination.
A coastal backsplash serves as the focal point that ties your cabinetry and countertops together. It is not just about gluing seashells to the wall; modern coastal design is about texture, organic materials, and a specific, airy color palette. It requires a balance of durability for heavy cooking and delicate aesthetics for morning coffee.
In my years designing kitchens, I have found that the backsplash is often the hardest decision for homeowners. It is permanent, visible, and can be expensive to change. This guide will walk you through professional strategies to select the perfect coastal backsplash, avoiding kitschy themes in favor of timeless elegance.
1. Defining the Modern Coastal Palette
The first step in selecting your backsplash is establishing your color story. A common misconception is that “coastal” means bright turquoise or navy blue everywhere. While those colors have their place, a sophisticated coastal kitchen usually relies on neutrals found in nature.
Think about the colors of dried sea grass, wet sand, weathered driftwood, and sea glass. These shades are softer and more livable than primary brights.
The Power of Whites and Creams
White is the standard for coastal kitchens, but the shade of white matters immensely. If your cabinets are a cool, stark white, your backsplash should match that coolness to avoid looking yellow.
Conversely, if you have creamy, warm white cabinets, a stark white tile will make them look dirty. Always bring a tile sample into your kitchen and look at it under your specific lighting at different times of day.
Soft Blues and Greens
If you want to introduce color, look for “misty” tones. These are colors that have a gray undertone, which makes them feel grounded rather than childish.
- Sea Glass Green: This offers a translucent, watery look that reflects light beautifully.
- Chambray Blue: A soft, denim-like blue adds depth without overpowering the room.
- Warm Gray: Inspired by pebbles and storm clouds, this pairs excellently with brass hardware.
2. Material Selection: Beyond Standard Ceramic
While ceramic subway tile is a classic choice, a coastal kitchen often benefits from materials that offer more depth and variation. The goal is to mimic the organic imperfections found in nature.
Zellige and Handmade Tiles
Handmade tiles, often called Zellige, are my top recommendation for a high-end coastal look. These tiles have uneven edges and varying surface textures.
When light hits a wall of handmade tile, it ripples like the surface of the water. Because no two tiles are exactly alike, you get a beautiful, shimmering effect that feels organic.
Glass Tile
Glass is a natural fit for coastal themes because of its translucency. However, you must be careful with the finish.
Avoid standard, flat glossy glass tiles found in big-box stores, as they can look dated. Instead, look for “poured” glass or glass with a matte or tumbled finish. These mimic the look of beach glass found in the sand.
Natural Stone and Marble
Carrara marble or varying shades of limestone bring elegance to a beach house. They mimic the movement of waves and clouds.
However, stone requires maintenance. If you cook with a lot of lemon (a coastal staple) or tomato sauce, you need to be vigilant about sealing your stone annually. Acid etch marks are real, and they are permanent.
3. Textures and Wood Elements
For a truly authentic coastal cottage feel, sometimes the best backsplash isn’t tile at all. Wood paneling offers a texture that tile simply cannot replicate.
Shiplap and Tongue & Groove
Horizontal shiplap boards create distinct shadow lines that widen the room visually. This is perfect for smaller kitchens that need to feel more expansive.
Designer’s Note: If you use wood behind a sink, you must use a high-quality, exterior-grade paint. I often specify a satin or semi-gloss finish for wood backsplashes to ensure they can be wiped down easily.
Beadboard
Beadboard offers vertical lines, which draws the eye upward. This is an excellent trick for kitchens with low ceilings (under 8 feet).
The spacing of the “beads” matters. Standard beadboard has beads every 2 inches. For a more modern look, look for “wide plank” beadboard with 4-inch or 6-inch spacing.
Durability Concerns with Wood
Wood is porous. I typically advise against using wood directly behind a professional-grade range where grease splatter is heavy and heat is high.
In these “splash zones,” consider doing a short backsplash of stone or quartz that matches the countertop, about 4 to 6 inches high, and then starting the wood paneling above that. This gives you the look you want with the protection you need.
4. Tile Patterns and Layouts
The way you lay out your tile changes the entire vibe of the kitchen. Even a simple white tile can look completely different depending on the pattern.
The Herringbone
Laying rectangular tiles in a herringbone pattern mimics the movement of fish or waves. It adds high energy to the room.
If you choose this pattern, keep the grout color very close to the tile color. High-contrast grout with herringbone can look too busy and chaotic for a relaxing coastal space.
Vertical Stack
Stacking rectangular tiles vertically (one right on top of the other) is a modern approach. It feels like bamboo or reeds.
This is a great way to make a space feel taller. It works exceptionally well with mid-century modern coastal styles or “California Cool” aesthetics.
The Scallop (Fish Scale)
This is the most literal interpretation of a coastal theme. The tile is shaped like a fan or a scale.
Pro Rule of Thumb: Use scallop tiles sparingly. They work best in small areas, like a wet bar or a butler’s pantry. Doing an entire large kitchen in scallop tile can feel overwhelming and slightly cartoonish.
5. Technical Details: Grout and Spacing
As a designer, I spend just as much time picking the grout as I do the tile. Grout can make or break the installation.
Grout Color
For coastal kitchens, you generally want the grout to disappear. You want the eye to see the texture of the tile, not a grid of lines.
I almost always specify a grout color that is one shade darker or lighter than the tile, but rarely a high contrast. If you have white tile, go with a soft warm gray or an off-white. Avoid black or dark charcoal grout in a coastal kitchen; it is too industrial.
Spacing and Grout Lines
The size of the grout line dictates how “clean” the look is.
- Standard Tile: 1/8 inch is standard, but can look a bit utilitarian.
- Rectified Tile: If the edges are perfectly straight, I push for a 1/16 inch grout line. This creates a seamless wall of color.
- Handmade Tile: You will likely need a larger grout line (1/8 to 3/16 inch) to accommodate the irregular shapes. Embrace this; the irregularity is part of the charm.
Transition Points
A common headache is knowing where to end the backsplash.
The Rule: The backsplash should end exactly in line with the upper cabinets. Do not extend it past the upper cabinets to meet the edge of the counter. It creates an awkward visual step.
If you have an open wall with no upper cabinets, you have two options. You can tile up to the standard height of 18 inches, or tile the entire wall to the ceiling for a dramatic, luxury effect.
6. Lighting the Backsplash
You cannot talk about backsplashes without talking about lighting. The lighting is what reveals the texture you paid for.
Under-Cabinet Lighting
This is mandatory for a functional kitchen. LED strip lighting hidden behind the bottom lip of your upper cabinets will wash down over the backsplash.
If you chose a glossy or glass tile, be aware that you will see the reflection of the individual LED dots if you don’t use a diffuser channel. Always install LED strips inside an aluminum channel with a frosted lens.
Kelvin Temperature
For a coastal kitchen, you want light that feels like daylight.
Look for bulbs that are 3000K (bright white) to 3500K.
Avoid 2700K (too yellow) or 5000K (too blue/clinical). 3000K will keep your white tiles looking white, not yellow.
Designer’s Note: Lessons from the Field
I once designed a beautiful coastal kitchen with a handmade, crackle-finish subway tile. It was stunning. However, we installed it behind the stove before realizing the “crackle” meant the glaze had tiny fissures in it.
Within a month, tomato sauce splatter had seeped into the tiny cracks of the tile glaze. We couldn’t clean it out.
The Lesson: If you choose a crackle finish or natural stone, you must seal the tile itself before grouting, and again after installation. And you must re-seal it regularly. If you are a messy cook, stick to solid ceramic or porcelain.
Common Mistakes + Fixes
Mistake: Using bright blue grout to force a beach theme.
Fix: Use a neutral grout and bring in blue through accessories like vases, towels, or a stand mixer. These are easier to change than grout.
Mistake: Ignoring the electrical outlets.
Fix: Nothing ruins a beautiful backsplash like a stark white plastic outlet in the middle of a gray tile. Buy outlets and cover plates that match your tile color. Better yet, install “plug molding” strips tucked under the upper cabinets so the backsplash remains uninterrupted.
Mistake: Picking a busy countertop and a busy backsplash.
Fix: Choose one hero. If your countertop is a dramatic quartzite with heavy veining, keep the backsplash simple and solid. If the countertop is plain white quartz, you can go wild with a patterned backsplash.
What I’d Do in a Real Project
If I were designing a coastal kitchen today for a client with a mid-range budget and kids, here is my exact mini-checklist:
1. Material: A slightly undulating ceramic subway tile in a “mist” or “oyster” gray.
2. Size: 2.5 x 9 inches (slightly longer and thinner than standard).
3. Pattern: Offset brick pattern (classic and timeless).
4. Grout: Mapei “Warm Gray” or similar, kept to a tight 1/16 inch spacing.
5. Trim: I would use a pencil liner tile to finish any exposed edges rather than a metal Schluter strip, as it looks softer.
6. Height: I would take the tile all the way to the ceiling around the range hood to create a focal point.
Final Checklist
Before you order materials, run through this list to ensure you have covered all your bases.
- Sample Check: Have I viewed the tile sample in my kitchen morning, noon, and night?
- Quantity: Did I order 15% extra for cuts and breakage? (20% if doing a herringbone pattern).
- Texture: Is the surface easy enough to wipe down behind the stove?
- Thickness: Will the tile thickness interfere with my outlets or window trim?
- Trim pieces: Have I ordered the “bullnose” or edge pieces for the ends of the wall?
- Batch numbers: Ensure all boxes of tile come from the same dye lot to avoid color variation.
FAQs
Can I install a backsplash over existing tile?
Technically yes, but I strongly advise against it. It adds thickness that causes problems with outlets and window casings. It also usually looks bulky. Remove the old tile and repair the drywall first.
Is peel-and-stick tile tacky for a coastal kitchen?
Technology has improved, and there are some high-quality vinyl options for renters. However, in a permanent home, real tile adds value. Peel-and-stick often fails near the heat of the stove or the humidity of a dishwasher.
How much does a backsplash installation cost?
Labor varies wildly by region. Generally, expect to pay between $10 and $25 per square foot for labor, plus the cost of materials. Intricate patterns like herringbone will usually double the installation cost due to the time and cuts required.
Conclusion
Creating a coastal backsplash is about more than just picking a blue tile. It is about layering textures, choosing the right shade of white, and paying attention to the way light interacts with the surface.
By following the rules of scale and sticking to organic, natural materials, you can create a kitchen that feels like a deep breath of fresh ocean air. Remember to prioritize durability alongside aesthetics, and your kitchen will serve you well for years to come.
Picture Gallery


