
Colorful Cinder Block Garden Projects I Love
When I first started in design, I viewed cinder blocks—technically known as Concrete Masonry Units (CMUs)—strictly as industrial building materials. I associated them with unfinished basements and construction sites, not chic outdoor living spaces. However, a tight-budget project for a rental patio completely changed my perspective.
I discovered that these heavy, inexpensive blocks are essentially architectural legos for adults. They offer clean lines, modular flexibility, and incredible durability against the elements. With the right color palette and placement, they can transform from “construction leftover” to “mid-century modern masterpiece.”
In this guide, I am going to share my favorite ways to utilize these blocks, focusing on structural integrity, color theory, and practical planting. If you are looking for visual inspiration, don’t miss the Picture Gallery at the end of this blog post.
Preparing and Painting: The Foundation of Design
The difference between a DIY disaster and a designer-grade project usually lies in the prep work. Cinder blocks are extremely porous. If you apply paint directly to a raw, dirty block, the concrete will suck the moisture out of the paint, leading to peeling and uneven coverage within a season.
You must start by thoroughly cleaning the blocks. I recommend using a wire brush to remove loose debris, followed by a pressure washer or a strong hose setting. Let them dry completely—this usually takes 24 to 48 hours in the sun. If you paint damp concrete, you trap moisture inside, which causes bubbling.
Once dry, apply a high-quality masonry primer. Do not use standard drywall primer. Masonry primer creates a bonding surface that bridges the small pores in the concrete. For the topcoat, look for elastomeric masonry paint or a high-quality outdoor acrylic latex.
Designer’s Note:
One thing that often goes wrong is “efflorescence.” This is a white, powdery salt deposit that migrates to the surface of concrete when moisture moves through it. If you see this white powder, scrub it off with a mixture of vinegar and water before priming. If you paint over it, the paint will flake off immediately.
Common Mistakes + Fixes
- Mistake: Using spray paint for the base coat.
- Fix: Spray paint sits on the surface and doesn’t penetrate the pores well. Roll or brush your first coat of primer and paint to work it into the texture. Use spray paint only for stencils or touch-ups.
- Mistake: Painting the inside of the planting hole.
- Fix: Only paint the exterior visible faces and the top rim. Leave the inside raw to allow the soil and roots to breathe without contacting paint chemicals.
The Structural Privacy Wall
One of the most effective uses for cinder blocks is creating a vertical planter wall. This acts as a room divider for outdoor spaces, perfect for separating a dining area from a play area or shielding a patio from neighbors.
When building a vertical wall, safety and weight distribution are paramount. A standard cinder block weighs about 30 to 35 pounds. If you stack them more than three rows high without support, you risk them toppling over if someone bumps into them.
For a permanent installation, use landscape block adhesive (often found near retaining wall supplies) between every layer. Apply a generous bead of adhesive to the top of the bottom block before setting the next one. This binds them together effectively for walls under four feet.
What I’d do in a real project:
- Height Limit: I never go higher than four courses (about 32 inches) without using rebar or mortar for reinforcement.
- Pattern: I stagger the blocks. Place two blocks side-by-side, then center the next block on top of the seam. This “running bond” pattern is structurally stronger than stacking them directly on top of each other.
- Orientation: I turn some blocks perpendicular to the wall so they stick out. These protruding blocks become the planters, creating a 3D living wall effect.
The Modern Bench and Seating Area
Custom outdoor furniture is notoriously expensive, but cinder blocks allow you to build a bench that fits your exact dimensions. This is particularly useful for narrow balconies or odd-shaped corners where standard furniture won’t fit.
The classic design involves two stacks of blocks serving as the legs, with 4×4 lumber threaded through the holes to create the seat. However, the spacing and height are critical for comfort.
Standard dining chair height is 18 to 20 inches. A standard cinder block is 8 inches tall. If you stack two blocks, you are at 16 inches. Once you add a cushion (which I highly recommend), you hit that perfect 18-19 inch sweet spot.
Designer’s Note:
Lumber sizing is confusing. A “4×4” piece of wood is actually 3.5 inches by 3.5 inches. The holes in a cinder block are usually around 5 inches wide. This means the wood will wobble inside the hole. To fix this, you need to use shims or wrap the ends of the wood in rubber stripping to create a snug fit before inserting them.
Comfort and Styling Rules
- Span Limit: Do not span the wood beams more than 4 to 5 feet between the block supports. If you go wider, the wood will bow in the middle when you sit. If you need a longer bench, add a third stack of blocks in the center.
- Softening the Edge: Concrete is hard and sharp. I always recommend sanding the edges of the wood beams and finishing them with an outdoor spar varnish.
- Textiles: Use outdoor-rated foam for cushions. Contrast the industrial block with soft textures like canvas or woven pillows to make the space inviting.
Geometric Raised Garden Beds
Raised beds are excellent for controlling soil quality and saving your back, but buying cedar kits adds up fast. Cinder blocks allow you to create modular beds that can be expanded later.
You can arrange the blocks in simple rectangles, L-shapes to frame a corner, or even U-shapes to create a “keyhole” garden where you stand in the center.
The depth of the soil matters immensely. A single layer of blocks (8 inches) is sufficient for lettuce, herbs, and succulents. However, if you plan to grow tomatoes, peppers, or root vegetables, you need at least two layers (16 inches) of depth for healthy root systems.
Common Mistakes + Fixes
- Mistake: Placing blocks directly on grass or dirt without a barrier.
- Fix: Put down a layer of cardboard or thick landscape fabric first. This kills the grass underneath and prevents weeds from growing up through your new soil.
- Mistake: Soil leaking through the cracks.
- Fix: Line the interior walls of your block bed with landscape fabric before filling it with dirt. This keeps the soil in while allowing water to drain.
Color Blocking and Design Aesthetics
The “cinder block look” fails when people choose colors randomly. To make these projects look high-end, you need a cohesive color strategy that complements your home’s exterior and the surrounding landscape.
I often use a “color blocking” technique. For a stack of blocks, paint the bottom row a dark, grounding color (like charcoal or navy) and the upper rows a lighter shade (like sage or terracotta). This lowers the visual center of gravity.
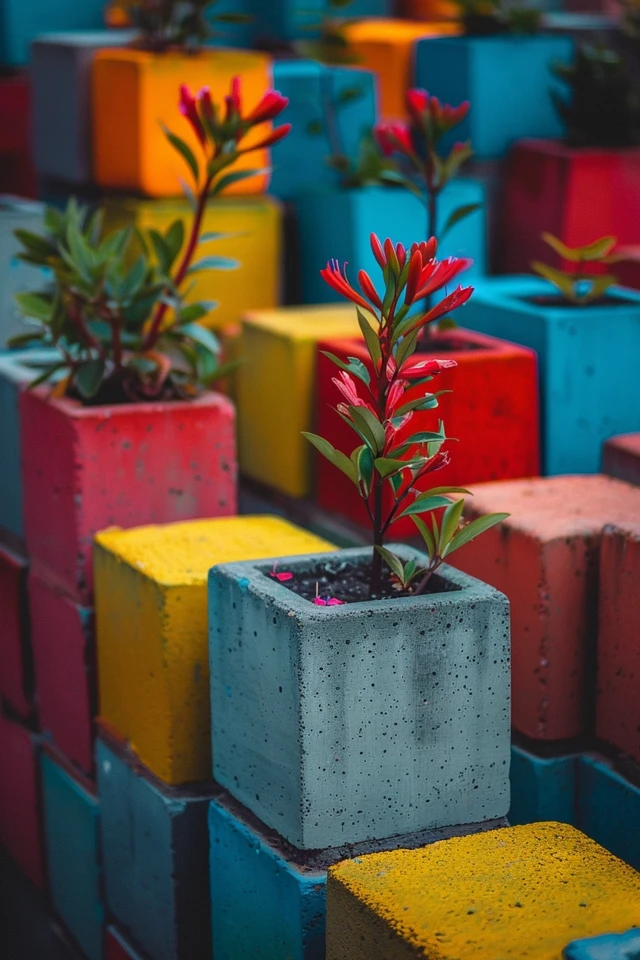
Alternatively, keep the blocks a neutral white or gray and paint the inside of the planting holes a vibrant color like neon yellow or turquoise. This provides a subtle “pop” that is only visible from certain angles, adding depth and intrigue.
Designer’s Note:
Consider the heat absorption. If you live in a very hot climate, painting blocks black will cause them to absorb massive amounts of heat. This can cook the roots of the plants inside. In hot zones, stick to white, beige, or pastels to reflect the sun.
Plant Selection for Concrete Containers
Not all plants thrive in cinder blocks. Concrete is alkaline, meaning it can raise the pH of the soil over time. It is also porous, so the soil dries out faster than in plastic or glazed ceramic pots.
You should choose hardy, drought-tolerant plants. Succulents, sedums, and ornamental grasses are fantastic choices because they handle the dry conditions well.
Herbs like rosemary, thyme, and oregano originate from the Mediterranean and actually prefer the drainage and warmth that concrete blocks provide. Avoid moisture-loving plants like ferns or impatiens unless you are committed to watering them daily.
What I’d do in a real project:
- Trailing Plants: I always plant trailing varieties like creeping jenny or sweet potato vine in the upper blocks. As they grow, they cascade down and soften the harsh concrete lines.
- Soil Mix: I never use garden soil from the ground. It compacts too much in containers. I use a high-quality potting mix blended with perlite to ensure the soil stays fluffy and drains quickly.
Sculptural Features: Tables and Fire Pits
Beyond planters, you can use blocks to create sculptural elements. A simple coffee table can be made by stacking four blocks in a square and topping it with a piece of tempered glass or a treated wood slab.
The open holes in the blocks can serve as storage for rolled-up outdoor blankets or gardening tools. It creates a piece that is functional, heavy enough to withstand wind, and visually interesting.
A note on fire pits: You will see many tutorials online for cinder block fire pits. As a professional, I must caution you. Standard cinder blocks can explode or crack under high heat because of trapped moisture.
If you want the cinder block aesthetic for a fire pit, you must line the interior with fire brick and high-heat mortar. The cinder blocks should only be the decorative outer shell, never the surface touching the flame.
Final Checklist: The Project Roadmap
Before you head to the hardware store, use this checklist to ensure you have covered all your bases. This is the exact mental process I go through for client installs.
1. Measure and Mark
- Map out the footprint of your project with painter’s tape or flour on the ground.
- Calculate the number of blocks needed.
- Always buy 10% more blocks than you think you need to account for breakage or design changes.
2. Site Preparation
- Level the ground. This is non-negotiable. Use a long level and a bag of paver sand to create a flat base.
- If the base isn’t level, your wall or bench will lean and become unstable as you stack higher.
3. Material Gathering
- Standard CMU blocks (8x8x16).
- Landscape block adhesive (for permanent structures).
- Masonry primer and exterior paint.
- Landscape fabric (for planter beds).
- Safety gear: heavy gloves (concrete roughs up hands quickly) and safety glasses.
4. The Build
- Scrub and dry blocks.
- Paint blocks before assembly (it is much easier than crouching down later).
- Level the first row perfectly.
- Stack and glue subsequent rows.
- Install landscape fabric lining.
- Fill with soil and plants.
FAQs
Q: Will chemicals from the concrete leach into my vegetable garden?
A: Modern concrete blocks are generally considered safe for gardening. However, older blocks (made decades ago) might contain fly ash. If you are worried, or using reclaimed blocks of unknown origin, simply line the planting hole with heavy-duty plastic or landscape fabric to create a barrier between the concrete and your soil.
Q: Do I need to drill drainage holes?
A: Usually, no. The standard cinder block has a completely open bottom. As long as you place the block on soil, gravel, or sand, the water will drain out. If you place the blocks on a concrete patio, the water might pool. In that case, elevate the blocks slightly with small shims or put a layer of gravel at the bottom of the block hole.
Q: Can I leave these out all winter?
A: Yes, concrete is incredibly durable. However, if you live in an area with freeze-thaw cycles, moist soil inside the block can expand when freezing and crack the concrete. To prevent this, ensure your soil drains very well. I also recommend covering the tops of the planters with burlap or plastic during the harshest winter months if they contain perennials.
Q: How do I fix a block that chips?
A: If a corner chips off, you can use a concrete patch filler found in a tube (similar to caulk). Overfill the chip slightly, let it dry, and then sand it down before touching it up with paint.
Conclusion
Cinder blocks are the ultimate equalizer in garden design. They bridge the gap between high-end modern architecture and DIY accessibility. By focusing on proper surface preparation, structural safety, and thoughtful plant pairings, you can create a space that feels intentional and curated.
Remember that the beauty of these projects lies in their flexibility. If you build a bench and decide next year you want a planter wall instead, you can disassemble and reconfigure the blocks. It is a low-risk, high-reward way to experiment with layout and color in your outdoor sanctuary.
Start with a small project, like a simple three-block planter, to get a feel for the materials. Once you realize how easy it is to manipulate the space, you will likely find yourself planning a whole new patio layout.
Picture Gallery


