
Colorful & Inspiring Painting Chicken Coop Ideas
When I design an outdoor space for a client, I treat every structure as a crucial piece of the visual puzzle. Garden sheds, pool houses, and yes, chicken coops, are architectural elements that contribute to the overall landscape aesthetic. Gone are the days when a coop was simply a utilitarian box hidden in the back corner of the yard. Today, these structures are focal points that deserve as much design attention as a guest cottage or a pergola.
Designing a coop involves balancing the charming “farm-to-table” lifestyle with the gritty reality of keeping livestock. A well-painted coop isn’t just about curbing appeal; it is about protecting the wood from the elements and creating a sanitary environment for your flock. The right paint can actually make cleaning easier and prolong the lifespan of the structure significantly.
If you are looking for visual inspiration, you can jump right to our curated Picture Gallery at the end of this post. However, I highly recommend reading through the guide below first. We are going to cover the essential intersection of safety, durability, and color theory to ensure your project stands the test of time and weather.
Safety First: Choosing the Right Paint
Before we get into color palettes and styling, we have to discuss materials. As a designer, I prioritize the safety of the occupants above aesthetics. Chickens are respiratory-sensitive creatures, and they will peck at almost anything, including flaking paint.
When selecting your paint, you must look for low-VOC (Volatile Organic Compounds) or zero-VOC formulas. While exterior paints need to be tough to withstand rain and sun, many modern formulations offer high durability without the harsh chemical off-gassing of older oil-based paints. I strictly recommend water-based latex exterior paints or traditional non-toxic lime washes for coops.
Never use lead-based paints or creosote on a coop. If you are repurposing an old shed or playhouse, test the existing paint for lead before sanding. If lead is present, you must encapsulate it or have it professionally removed. You simply cannot risk your flock ingesting lead chips, which can also transfer to the eggs you eat.
Designer’s Note: The Reality of “Cute” Coops
In my years of consulting on exterior renovations, I have seen many homeowners make a classic mistake. They paint a coop to look like a dollhouse, using intricate stencils and matte finishes that look beautiful on day one.
The reality check hits about two weeks later. Chickens generate a lot of dust and waste. A matte finish holds onto dirt, mud, and “chicken splatter” like a magnet. When you try to scrub it, the finish burnishes or rubs off.
My Pro Lesson: always specify a semi-gloss or gloss finish for any surface within the “splash zone” (the bottom 24 inches of the exterior and the entire interior). The higher sheen acts as a protective shell that allows you to take a hose or a stiff scrub brush to the coop without ruining the paint job.
Color Theory and Landscape Integration
Choosing a color for your coop is different than choosing a color for a bedroom. You have to consider the surroundings. A coop exists in a green, organic environment that changes with the seasons.
The Echo Effect
The safest and most cohesive design strategy is to echo the main house. If your home is white with black shutters, a white coop with black trim looks intentional and high-end. It signals that the coop is a permanent part of the property’s architecture.
The Complementary Contrast
If you want the coop to stand out as a garden feature, look at the color wheel. Green is the dominant color of your landscape. Red is the direct complement to green, which is why classic “barn red” looks so striking in a field. It creates a visual vibration that draws the eye.
Camouflage and Immersion
For a coop that recedes into the garden, use dark, moody tones. Charcoal, forest green, or even deep navy blue will help the structure blend into the shadows of trees and shrubs. This is an excellent strategy for smaller yards where you do not want the coop to visually clutter the space.
Interior vs. Exterior: A Dual Approach
One of the biggest misconceptions is that you should paint the inside of the coop the same color as the outside. From a functionality standpoint, these are two different zones with two different requirements.
The Exterior Strategy
The outside is for weatherproofing and curb appeal. Here is where you use your accent colors, fun trims, and decorative hardware. You want three coats of high-quality exterior latex to seal the wood against rot.
The Interior Strategy
The inside is for hygiene and light. I almost exclusively recommend painting the interior bright white or a very light gray.
There are two reasons for this:
1. Mite Detection: Red mites are a common chicken pest that hide in cracks during the day. On a dark wood wall, they are invisible. On a bright white wall, you can see them immediately and treat the problem before it gets out of hand.
2. Light Extension: In the winter, chickens need light to continue laying. A white interior reflects the available natural light, making the space brighter and more cheerful for the birds during shorter days.
Five Inspiring Color Palettes
If you are stuck on exactly which shades to choose, here are five specific palettes I use in landscape design that work beautifully for outbuildings.
1. The Modern Scandinavian
Main Body: Deep Charcoal or Matte Black
Trim: Natural Cedar or Stained Wood (No paint)
Door: Bright Yellow or Teal
Vibe: This creates a sleek, architectural look. The dark body hides dirt splash-back effectively, while the natural wood adds warmth.
2. The English Cottage Garden
Main Body: Soft Sage Green or Buttery Cream
Trim: Crisp White
Accents: Pale Pink or Lavender (flower boxes)
Vibe: Soft, romantic, and blends perfectly if you have rose bushes or hydrangeas planted nearby. This requires more cleaning but looks stunning.
3. The Classic American Farm
Main Body: Barn Red or Navy Blue
Trim: Bright White
Roof: Galvanized Metal or Gray Shingles
Vibe: Timeless. This screams “country living” and offers high contrast against green grass.
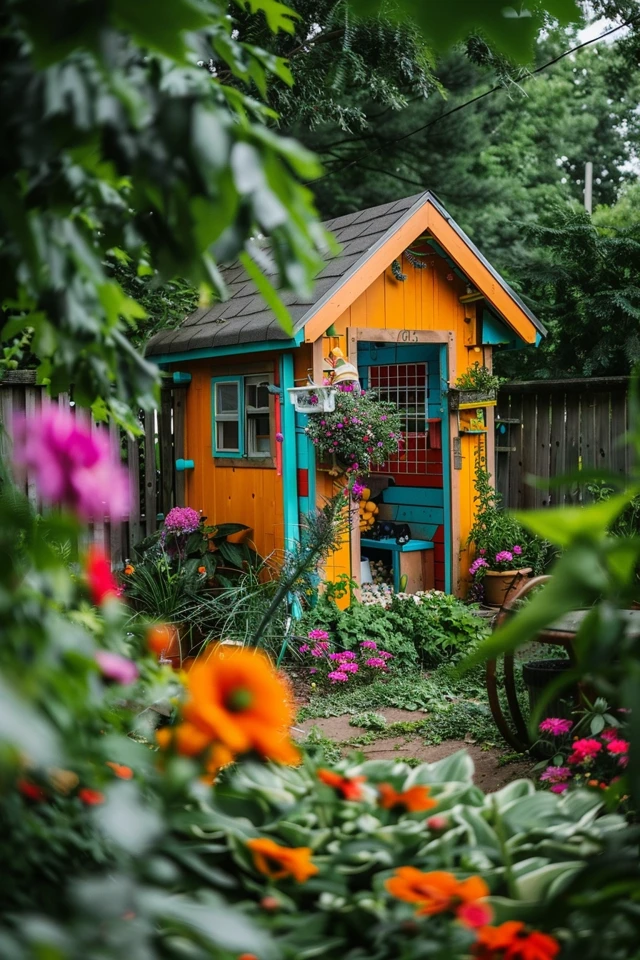
4. The Desert Sunset
Main Body: Terracotta or Warm Peach
Trim: Turquoise or Teal
Vibe: Fun, bohemian, and warm. This palette works exceptionally well in dry climates or xeriscaped yards with gravel instead of grass.
5. The “Invisible” Structure
Main Body: Dark Olive Green or Bronze
Trim: One shade lighter or darker than the body (monochromatic)
Vibe: This is for the gardener who wants the plants to be the star. The coop disappears into the foliage.
Practical Application: Step-by-Step Guide
Painting a coop requires slightly more prep than painting a wall because raw wood is thirsty and outdoor conditions are harsh.
Step 1: The Clean Out
If this is an existing coop, you must pressure wash it. You need to remove all dust, cobwebs, and droppings. Let the wood dry for at least 48 hours. If the wood is damp, the paint will bubble.
Step 2: Sanding and Repair
Check for splinters. Chickens have sensitive feet (bumblefoot is a common issue caused by cuts), so sand down rough edges on the pop door and any exposed framing. Fill large gaps with exterior-grade wood filler to prevent drafts and keep predators from prying boards loose.
Step 3: The Primer
Do not skip primer. Raw exterior wood contains tannins (especially cedar and redwood) that will bleed through paint and create yellow stains. Use a high-quality, stain-blocking exterior primer.
Step 4: Painting
Apply at least two coats of your chosen exterior paint. Allow 4 to 6 hours of dry time between coats, or whatever the can specifies. Do not paint in direct, scorching sunlight, as the paint will dry too fast and leave brush marks.
Step 5: Curing Time
This is the most critical step. Paint feels dry to the touch in hours, but it takes days to cure (harden). Do not put chickens back in immediately. I recommend waiting 3 to 5 days for the fumes to fully dissipate and the shell to harden.
Common Mistakes + Fixes
Even experienced DIYers can run into trouble with coops. Here are the issues I see most often and how to correct them.
Mistake: Painting Shut the Hardware
People often paint right over hinges and latches.
Fix: Tape off your hardware with blue painter’s tape, or better yet, remove the hardware completely before painting. Sticky latches are a safety hazard if you can’t lock the coop securely at night.
Mistake: Ignoring the Roof Overhang
Painters often miss the underside of the eaves.
Fix: Wasps and hornets love raw wood under eaves. Painting this area discourages them from nesting and seals the end-grain of your roofing rafters against rot.
Mistake: Using Interior Paint Leftovers
“I have half a gallon of kitchen paint, I’ll just use that.”
Fix: Interior paint lacks the UV inhibitors and mildewcides found in exterior paint. It will peel and mold within a year. Invest in a quart of proper exterior paint; it is worth the small cost.
What I’d Do in a Real Project: A Checklist
If I were managing your coop build, this is exactly how I would execute the finish selections:
Check the HOA: Before buying paint, I would confirm there are no restrictions on outbuilding colors in your neighborhood.
Coordinate the Roof: I would choose the paint color only after knowing what the roof material is. You can’t change a metal roof easily, so the paint must match the roof, not the other way around.
Test the White: If using white, I would test it outdoors. Bright white can be blinding in full sun. I usually select a “warm white” or “cream” to reduce glare.
Add “Peck Protection”: I would install a metal kickplate or leave the bottom 6 inches natural wood if the chickens are free-ranging heavily around the perimeter, as they scratch mud onto the base constantly.
* Plan for Maintenance: I would keep a small baby food jar of the trim paint and the body paint inside the house for quick touch-ups on the inevitable scratches.
Lighting and Decor Considerations
Paint is the canvas, but the accessories complete the look.
Lighting
Scale is important here. A tiny solar light looks silly on a large coop. I recommend a barn light fixture that is roughly 1/4 the height of the door it sits next to. Ensure any electrical wiring is encased in conduit so chickens cannot peck through the insulation.
Planting
To soften the edges of a freshly painted coop, plant durable shrubs around the base. Hostas (if in shade) or tough ornamental grasses work well. Be aware that chickens will eat delicate flowers. If you want window boxes, place them high enough that the chickens cannot jump into them and dig out the dirt.
Final Checklist
Before you dip your brush, ensure you have ticked these boxes:
1. Is the weather forecast clear for the next 4 days?
2. Is the paint exterior-grade and low-VOC?
3. Have you removed or taped off all metal hardware?
4. Is the wood clean, dry, and sanded?
5. Do you have a plan for where the chickens will sleep while the paint cures?
6. Have you chosen a finish (semi-gloss/gloss) that is easy to scrub?
FAQs
Can I use chalk paint on a chicken coop?
You can, but it requires a very strong exterior sealer. Chalk paint on its own is porous and will not withstand rain or chicken manure. By the time you buy the paint and the sealer, it is often more work than using a standard exterior semi-gloss.
Is whitewash safe for chickens?
Yes, traditional whitewash (made from hydrated lime and water) is naturally antibacterial and insect-repellent. It is a classic choice for coop interiors. However, it rubs off easily and needs to be reapplied annually.
How often should I repaint my coop?
If you use high-quality exterior latex and prep the wood correctly, your paint job should last 5 to 7 years. You may need to touch up the trim or the area around the pop door every 2 years due to high traffic.
What color repels flies?
There is a folklore belief that “haint blue” (a light blue-green) repels insects. While science is mixed on this, painting the ceiling of your coop porch or the interior a light blue is a beautiful tradition that certainly won’t hurt.
Can I paint pressure-treated wood immediately?
No. Fresh pressure-treated lumber is wet with chemicals. You typically need to wait 3 to 6 months for it to dry out completely before paint will adhere. If you paint it too soon, the moisture will push the paint off as it escapes.
Conclusion
Painting your chicken coop is one of the most satisfying weekend projects you can undertake. It instantly transforms a backyard utility area into a charming landscape feature. Beyond the aesthetics, a good paint job protects your investment, ensuring your coop remains rot-free and sanitary for years to come.
Remember to prioritize preparation over speed. The time you spend sanding and priming will pay off when you are spraying down a clean, glossy surface six months from now. Whether you choose a bold, modern black or a traditional farmhouse white, your flock will appreciate the shelter, and you will appreciate the view from your kitchen window.
Now that you are armed with the technical knowledge and design principles, it is time to look at some real-world examples.
Picture Gallery


