
Concrete Block Fence – Ideas for Stylish Privacy
When most people hear “concrete block fence,” they immediately picture a drab, gray industrial barrier or the back wall of a grocery store. This material has suffered from a branding problem for decades, often seen as purely utilitarian and lacking in soul. However, in the right hands, concrete blocks are actually one of the most versatile, durable, and structurally sound materials for landscape design.
I remember a project in Phoenix where the homeowners were desperate to replace a rotting wood fence but terrified that concrete would make their backyard feel like a parking lot. By using a combination of smooth stucco finishing and strategic breeze block inserts, we transformed their perimeter into a mid-century modern sanctuary. The result didn’t just provide security; it became the focal point of their entire outdoor living area.
There is a vast difference between a raw cinder block wall and a designed hardscape feature. If you are looking for visual inspiration, you can jump right to the Picture Gallery at the end of the blog post. For those ready to plan the details, let’s explore how to turn heavy masonry into high-end design.
1. The Breeze Block Revival: Mid-Century Texture
Breeze blocks, also known as architectural screen blocks, are having a massive resurgence in landscape architecture. These are concrete blocks with decorative cutouts that allow light and air to pass through while still maintaining a visual barrier. They are the perfect solution for homeowners who want privacy without closing off their property entirely.
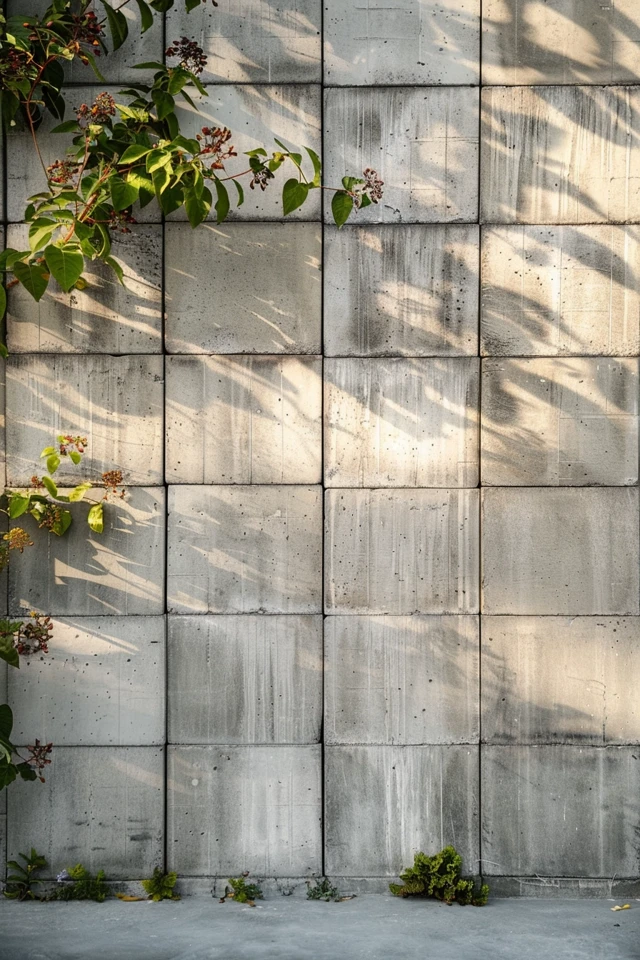
The beauty of breeze blocks lies in the shadows they cast. Throughout the day, the changing angle of the sun projects shifting geometric patterns onto your patio or pool deck. This adds a dynamic layer of visual interest that a solid wall simply cannot provide.
From a practical standpoint, these are excellent for high-wind areas. Because air can flow through the pattern, there is less wind load on the fence compared to a solid barrier. This makes them less likely to crack or lean over time during storms.
Designer’s Note:
When laying out breeze blocks, I almost always use a “stack bond” pattern rather than a “running bond.” Stack bond means the blocks are aligned perfectly on top of one another, creating a grid. This emphasizes the geometric pattern of the cutout. A running bond (brick style) breaks the pattern and can look messy with intricate block designs.
Lighting the Pattern
You cannot install a breeze block wall without a lighting plan. I recommend placing ground-level well lights about 12 to 18 inches away from the base of the wall. Aim the beam upward at a 15-degree angle to graze the face of the blocks. This highlights the texture and depth of the concrete at night.
2. Smooth Stucco and Rendered Finishes
If the patterned look isn’t for you, a smooth-rendered concrete wall offers a clean, contemporary backdrop for your garden. This involves building a structural wall using standard gray Concrete Masonry Units (CMUs) and then coating them with stucco or a smooth-trowel finish. This creates a monolithic look that feels very high-end and minimalist.
The color you choose for the render changes the perception of space. White stucco is classic for Mediterranean or Palm Springs styles, bouncing light around and making small yards feel larger. However, it requires significant maintenance to keep clean from mud splash and moss.
Conversely, painting a smooth concrete wall in a dark charcoal or matte black makes the wall recede visually. When you plant green foliage in front of a dark wall, the plants pop incredibly well. The wall disappears, and your garden looks lush and infinite.
The Importance of Coping
A common mistake I see in DIY rendered walls is the lack of proper coping. Coping is the cap on top of the wall. It is not just decorative; it is the roof of your fence.
- Overhang: The cap should overhang the face of the wall by at least 1 to 2 inches. This forces rainwater to drip off the edge rather than running down the face of the stucco, which causes staining and streaking.
- Slope: The top of the cap should have a slight pitch or slope to prevent water from pooling. Standing water eventually seeps into the masonry and can cause cracks during freeze-thaw cycles.
3. Mixed Materials: Wood, Metal, and Greenery
Concrete can feel “heavy” or “cold” if used in excess. The best way to mitigate this is by breaking up the masonry with warmer materials. A popular technique in modern design is to build concrete columns or low walls and fill the negative space with horizontal wood slats.
I often design walls with a 24-inch high concrete base (seat wall height) topped with 4 feet of horizontal cedar or Ipe wood fencing. This gives you a total height of 6 feet for privacy. The concrete base protects the wood from ground moisture and rot, significantly extending the life of the timber.
Inserting Metal Panels
Laser-cut metal screens are another fantastic insert option. Corten steel, which weathers to a rusty orange patina, looks stunning against gray concrete. The rust color complements the cool tones of the cement and ties in well with desert or drought-tolerant landscaping.
Living Walls
If you are stuck with an existing ugly concrete wall, you don’t always need to demolish it. You can turn it into a “green wall.” I recommend planting Ficus pumila (Creeping Fig) or Boston Ivy at the base.
Within two growing seasons, these aggressive climbers can cover a standard 6-foot wall entirely. Just be aware that Creeping Fig attaches itself to the masonry. If you ever rip it down, you will likely need to re-stucco the surface.
4. Structural Considerations and Foundation
We cannot talk about concrete fences without addressing the engineering. Unlike a wood fence, a concrete wall is heavy and brittle. If the ground moves, the wall cracks.
Every concrete block fence requires a solid footing. This is a trench filled with poured concrete and reinforced with steel rebar.
- Depth rules: In areas with a frost line (where the ground freezes), the footing must go below that line to prevent “heaving.” In warm climates, a trench 12 to 18 inches deep is usually sufficient for a 6-foot wall, but local codes vary.
- Rebar placement: You need vertical rebar coming out of the footing and threading up through the hollow centers of the blocks. I typically space these every 4 feet. You then fill those specific block cells with concrete (grout) to lock the rebar in place.
Handling Water Drainage
A concrete wall acts like a dam. If your yard slopes toward the wall, water will build up behind it during heavy rains. This hydrostatic pressure can push the wall over.
To prevent this, we install “weep holes” along the bottom course of blocks. These are small gaps or PVC pipes inserted through the wall that allow trapped water to drain out. Do not skip this step, even in dry climates.
5. Cost vs. Longevity Analysis
Clients often suffer sticker shock when they see the quote for a masonry fence compared to a wood privacy fence. A concrete wall can cost 2 to 3 times more upfront than a standard cedar fence.
However, the timeline changes the value proposition. A wood fence typically lasts 15 to 20 years, often requiring staining or picket replacement every few years. A properly built concrete fence creates a permanent structure that can last 50 to 100 years with minimal maintenance.
For renters or those on a tighter budget who still want the look, you can achieve a similar aesthetic using “split-face” blocks. These blocks have a rough, textured face that looks like stone. Because they are finished on one side during manufacturing, they do not require stucco or painting, which saves on labor costs.
Budgeting Tip
If a full concrete wall is out of budget, consider a “pilaster” design. This is where you build concrete columns every 8 feet and fill the span with wood fencing. You get the stateliness of masonry without the cost of a continuous footing and solid wall.
Common Mistakes + Fixes
I have seen many homeowners attempt DIY masonry or hire the lowest bidder, only to regret it a year later. Here are the most common pitfalls.
Mistake: Painting Too Soon
New concrete contains moisture and high alkalinity. If you paint it immediately after building, the moisture trying to escape will push the paint off, causing bubbling and peeling. This is called efflorescence.
The Fix: Let the concrete cure for at least 28 days. Before painting, wash the wall with a masonry cleaner and use a primer specifically designed for masonry with a high pH tolerance.
Mistake: Ignoring the Neighbor’s Side
I once saw a dispute where a homeowner built a beautiful stucco wall but left the neighbor’s side as raw, messy block with oozing mortar. It created a neighborhood war.
The Fix: Masonry walls are usually built on the property line. Discuss the finish with your neighbor. Ideally, both sides should be finished. If that is not in the budget, ensure the “ugly” side creates a clean, struck joint so it looks tidy, even if it isn’t stuccoed.
Mistake: Scale Disasters
A 6-foot wall of solid gray block in a small courtyard can feel claustrophobic and prison-like.
The Fix: Use the “Rule of Thirds.” The top third of the wall should be visually lighter. Use a breeze block course or a wood lattice on top to break up the mass while maintaining height for privacy.
What I’d Do in a Real Project
If I were designing a concrete privacy fence for a typical suburban backyard today, here is the exact mini-checklist I would follow:
- Check Zoning: Confirm the max height allowed. Front yards are usually limited to 3 or 4 feet, while backyards can go to 6 feet.
- Foundation Check: Dig a test hole to see if the soil is sandy or clay. Clay expands, requiring more rebar.
- Material Selection: I would choose a 4-inch wide block (rather than the standard 8-inch) for the main panels to save space, with 8-inch columns for stability.
- Texture Plan: I would stucco the main body smooth and cap it with a pre-cast concrete coping stone in a contrasting color.
- Lighting: I would run low-voltage wire inside the trench before pouring the footing to allow for seamless fixture installation later.
Final Checklist
Before you mix a single bag of mortar, ensure you have ticked these boxes:
- Property Survey: Locate your exact property pins. Building a permanent concrete wall 6 inches onto your neighbor’s land is a very expensive mistake to fix.
- HOA Approval: Many associations have strict rules about wall materials and colors.
- Utility Locating: Call 811 (in the US) to have underground gas and electric lines marked before digging footings.
- Drainage Plan: Identify where the water will flow once the wall blocks its natural path.
- Finish Schedule: Decide if you are painting, stuccoing, or leaving it raw before you buy the block. Some blocks are made to be covered; others are made to be seen.
FAQs
Is a concrete block fence soundproof?
It is one of the best materials for sound attenuation. The mass of the concrete reflects noise rather than letting it vibrate through, making it ideal for homes near busy roads.
Can I mount a heavy gate to a block wall?
Yes, but you need to plan for it. The column holding the gate hinges needs extra steel reinforcement and should be filled solid with concrete. Do not use standard hollow wall anchors for heavy gates; they will pull out over time.
How high can I build a concrete fence without an engineer?
In most US municipalities, any retaining wall or fence over 3 feet tall may require a permit, and anything over 6 feet usually requires an engineer’s stamp. Always check local codes.
Can I add height to an existing block wall?
It depends on the existing footing. If the original footing was only designed for a 4-foot wall, adding 2 more feet of heavy block could cause it to sink or tip. Consult a mason to inspect the footing first.
Conclusion
A concrete block fence is an investment in the architecture of your home. It moves beyond the temporary nature of wood fencing and establishes a permanent, structural boundary that defines your outdoor space. Whether you opt for the retro charm of breeze blocks, the sleek minimalism of smooth stucco, or the warmth of mixed materials, the key is to respect the weight and permanence of the material.
Plan your drainage, respect the scale of your yard, and don’t skimp on the foundation. When done correctly, concrete provides a level of privacy, sound dampening, and sophisticated style that no other fencing material can match. It turns a backyard into a private courtyard, providing the perfect shell for your landscape design.
Picture Gallery


