
Cool 11 Year Old Birthday Party Ideas Unveiled
Planning a birthday bash for an 11-year-old is a unique design challenge that sits right between childhood and the teenage years. At this age, kids are becoming acutely aware of aesthetics and “vibes,” meaning the cartoon characters of the past won’t cut it anymore. As a designer, I approach these events the same way I approach a room renovation: by focusing on flow, lighting, and a cohesive color palette that feels sophisticated yet age-appropriate.
The goal is to create an environment that feels “grown-up” enough for them to feel cool, but functional enough to withstand high energy and potential messes. For a dose of visual inspiration, make sure to scroll down to our curated Picture Gallery at the end of this blog post. We want to create spaces that look great in photos but work perfectly in reality.
I have compiled my favorite high-concept party themes that rely heavily on interior styling principles. These ideas prioritize spatial planning and smart decor over disposable plastic knick-knacks. Let’s dive into how to execute these looks with a professional touch.
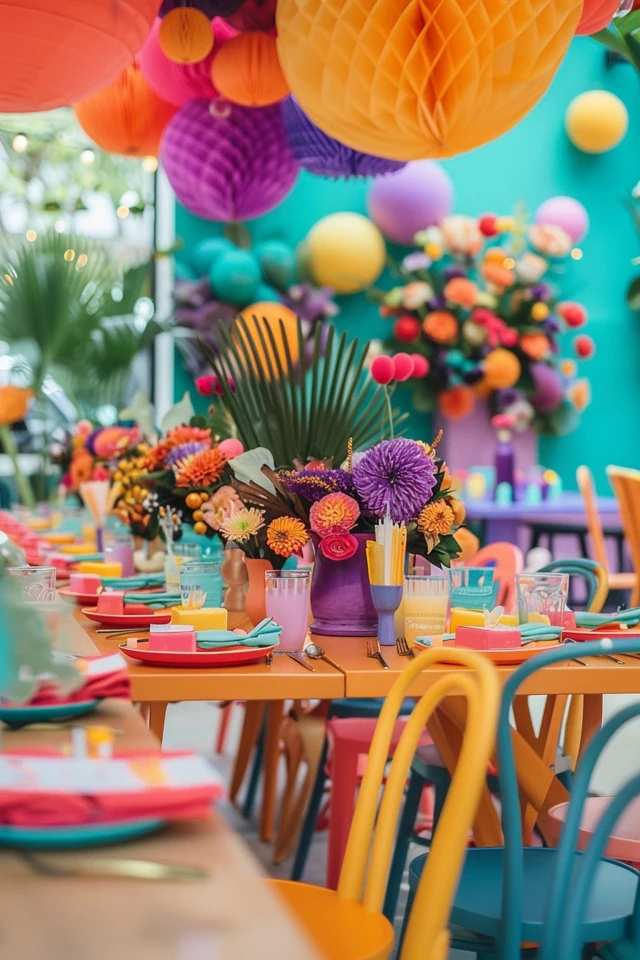
The “Grown-Up” Al Fresco Dinner Party
There is nothing an 11-year-old wants more than to feel sophisticated. An outdoor dinner party, styled like a wedding or a high-end brunch, hits this note perfectly.
The key here is bringing indoor comfort to the outdoors. You want to create a defined dining “room” on your patio or lawn using structural elements and textiles.
Layout and Spacing
When setting up a long dining table, the spacing is critical for comfort. You need to allow 24 inches of table width per guest to ensure they aren’t bumping elbows while eating.
If you are using a standard 6-foot folding table, you can fit three kids on each side and one at each head, totaling eight guests. If you have more guests, butt two tables together and cover the seam with a long table runner.
Ensure you have at least 36 inches of clearance around the perimeter of the table. This allows for service flow and prevents guests from feeling trapped in their seats.
Styling the Tablescape
Skip the paper tablecloths. Use a heavy-weight linen or cotton drop cloth (available at hardware stores) as a tablecloth. The texture photographs beautifully and protects the table underneath.
Layering is the secret to a professional look. Start with the tablecloth, add a runner down the center, and use charger plates under the dinner plates.
Designer’s Note:
The biggest issue with outdoor dining is wind. I always use heavier styling items, like ceramic vases or potted succulents, to weigh down the tablecloth and napkins. Avoid tall, top-heavy centerpieces; keep decor under 12 inches high so guests can see each other across the table.
Common Mistakes + Fixes
Mistake: Inadequate lighting once the sun goes down.
Fix: Do not rely on a single floodlight. String bistro lights overhead in a zigzag pattern to create a warm, even glow. Use battery-operated LED taper candles on the table for safety and ambiance.
What I’d Do in a Real Project
I would use melamine dishware that mimics the look of handmade ceramic pottery. It is shatterproof but looks expensive. I would also place outdoor rugs under the table to define the zone and prevent chair legs from sinking into the grass.
The Backyard Cinema Lounge
This is a classic theme, but the execution often falls flat due to poor equipment setup or uncomfortable seating. We want to create a true lounge experience, not just a blanket on the grass.
This setup requires careful attention to landscape constraints and moisture control. It functions like a temporary outdoor living room.
Screen and Projector Placement
The screen needs to be the focal point. Place it against a flat surface like a garage wall or hang a designated projector screen between two trees.
Check the “throw distance” of your projector. Most consumer projectors need to be 10 to 15 feet away from the screen for a 100-inch image.
Ensure the path between the projector and the screen is clear. If kids walk through the beam, it ruins the immersion. I recommend placing the projector on a low coffee table in the center of the seating arrangement.
Flooring and Seating Layers
Grass gets damp at night, even in the summer. You must create a moisture barrier. Start with a heavy-duty waterproof tarp on the grass.
Cover the tarp completely with layered area rugs. This is a great time to use older rugs or washable Ruggables. The layering creates a bohemian, cozy aesthetic.
For seating, use a mix of bean bags, floor cushions, and low beach chairs. Arrange them in a semi-circle to ensure everyone has a good viewing angle.
Designer’s Note:
A common complaint is that audio from projectors is too quiet for an outdoor setting. Connect a separate Bluetooth soundbar or portable speaker to the projector. Place the speaker near the screen, not near the projector, so the sound matches the image source.
Common Mistakes + Fixes
Mistake: Ambient light washing out the screen.
Fix: Turn off all landscape uplighting and motion-sensor security lights near the screen area. Use low-level lanterns along the perimeter for safe walking paths without polluting the viewing area.
What I’d Do in a Real Project
I would build a “concession stand” cart on the patio separate from the viewing area. This keeps the food mess away from the rugs and electronics. I would also have a basket of rolled throw blankets, as temperatures drop quickly after sunset.
The DIY Spa Sanctuary
Transforming a living room or large bathroom into a spa requires strict attention to surface protection. 11-year-olds love face masks and manicures, but red nail polish on a beige carpet is a disaster.
The goal is to create a serene, minimalist environment that feels like a luxury hotel, while secretly “kid-proofing” the room.
Zoning the Space
You need three distinct zones: a waiting lounge, a wet treatment area (face masks), and a dry treatment area (nails).
Separating these zones prevents bottlenecks. The wet area should be near a sink, ideally in the kitchen or dining room where floors are hard surfaces.
The lounge area can be in the living room. Use white slipcovers or large white sheets over sofas to create that crisp spa aesthetic while protecting your upholstery.
Lighting and Ambiance
Clinical lighting kills the spa vibe. Turn off the overhead “big light.”
Use lamps with warm white bulbs (2700K color temperature). If you have dimmers, set them to 50%.
Scent is a powerful design element here. Use an essential oil diffuser with eucalyptus or lavender. Avoid synthetic candles, as they can be overwhelming in a crowded room.
Designer’s Note:
Circulation is key. Leave at least 30 inches of walking space between stations. If you have a nail station at a dining table, ensure there is room for kids to pull chairs out without hitting the wall or another guest.
Common Mistakes + Fixes
Mistake: Ruined tabletops from acetone or spills.
Fix: Use glass or acrylic tops on tables if possible. If not, use thick vinyl placemats under every workstation. Never let kids handle nail polish remover over a wood finish.
What I’d Do in a Real Project
I would set up individual mirrors for each guest at the table. This prevents them from crowding around a single bathroom mirror. I would also provide matching robes (even inexpensive waffle-weave ones) to unify the visual look and protect their clothes.
The “Glamping” Sleepover
Sleepovers are standard, but an indoor “glamping” setup elevates the concept. This involves setting up individual A-frame tents or teepees in a large open space like a basement or family room.
This design relies heavily on repetition and symmetry. It looks incredibly impressive when aligned perfectly.
Scale and Measurements
Standard individual A-frame tents are usually about 4 feet deep and 3-4 feet wide. You need to measure your room accurately before committing to this theme.
Allow for a 24-inch aisle between the rows of tents for walking. If the tents are too close, it feels claustrophobic and becomes a fire hazard.
Don’t forget vertical clearance. If you are in a basement with soffits or low ductwork, ensure the tops of the tents (usually 4-5 feet high) clear the ceiling comfortably.
Textiles and Bedding
Comfort is the priority. A thin yoga mat inside the tent is not enough for a full night’s sleep.
Use twin-size air mattresses or 3-inch thick foam sleeping pads.
Coordinate the bedding. You don’t need to buy new sets; use matching throw blankets at the foot of each mattress to create visual cohesion. White sheets are always a safe, hotel-like choice that makes the colored accents pop.
Designer’s Note:
Battery-operated fairy lights are non-negotiable here. Wrap them around the wooden poles of the tents. However, ensure the battery packs are tucked away in small pouches or under the mattress to prevent them from becoming hard lumps the kids sleep on.
Common Mistakes + Fixes
Mistake: Overheating the room.
Fix: A room with 8-10 kids generates a lot of body heat. Lower the thermostat by 3-4 degrees before the party starts. Use oscillating fans in the corners of the room to keep air moving without blowing directly on faces.
What I’d Do in a Real Project
I would place a breakfast tray at the entrance of each tent. This acts as a nightstand for water bottles, glasses, or phones. It keeps items off the floor where they might get stepped on in the dark.
The Creative Art Studio
For the artistic 11-year-old, a studio party is ideal. However, this is the highest-risk theme for your home’s finishes.
The design strategy here is “industrial chic.” Lean into the messy aesthetic but control it with heavy-duty materials.
Surface Protection Strategy
Cover the floor with painter’s drop cloths. Canvas looks better than plastic and is less slippery. Tape the edges down with blue painter’s tape to prevent tripping.
Use butcher paper to cover the entire table surface. Tape it underneath the table edges for a clean look. This allows kids to draw directly on the “tablecloth.”
Lighting for Detail Work
Unlike the spa or movie themes, you need bright, cool lighting here. Art requires visibility.
Aim for 3000K to 4000K lighting. If your room is dim, bring in floor lamps or clamp lights. Shadows on the work surface will frustrate the kids.
Ergonomics and Work Height
Ensure the table is at a comfortable working height. Standard dining height (30 inches) is best.
If you are doing messy work like tie-dye or acrylic pouring, standing might be better than sitting. In that case, use counter-height tables (36 inches) or raise standard tables using bed risers.
Designer’s Note:
Create a “drying zone” away from the main activity area. This is often overlooked. You need a safe, flat surface where wet projects can sit undisturbed. A folding card table in a corner works perfectly.
Common Mistakes + Fixes
Mistake: Bottlenecks at the supply station.
Fix: Do not put all supplies in one big pile. Create “clusters” of supplies along the center of the table so every 2-3 kids have their own set of scissors, brushes, and water cups.
What I’d Do in a Real Project
I would use aprons as part of the decor. Hang them on the backs of chairs or on a coat rack at the entrance. It adds to the studio vibe and serves a practical purpose. I would also use clear glass jars for supplies to add sparkle and allow kids to see materials easily.
Final Checklist for Party Prep
Before the guests arrive, run through this designer-approved checklist to ensure your home is ready for function and flow.
- Walk the path: Walk from the front door to the party zone. Is the path clear? remove breakable vase or unstable side tables.
- Check the bathroom: Stock extra toilet paper in plain sight. Put out fresh hand towels. Remove personal toiletries from the counters.
- Dim the lights: Adjust lighting to the appropriate level for the specific theme.
- Music check: Test the volume levels. You should be able to talk over the music without shouting.
- Charging station: Designate a spot with a power strip for kids to charge their phones, keeping them away from the food and drinks.
- Pet strategy: Ensure pets are in a safe, quiet room away from the noise and open doors.
- Trash logic: Place a large, open trash can (without a lid) in the main party area. If the trash is hard to find, kids will leave plates on the tables.
FAQs
How do I handle food service for 11-year-olds without ruining my furniture?
I recommend a “grazing table” approach set up on a kitchen island or a designated dining table. Avoid passing food trays in carpeted areas. Choose “dry” foods like sliders, pizza, and fruit skewers rather than soups or saucy pastas. Always provide small plates; kids are less likely to drop crumbs if they have a plate in hand versus holding a napkin.
What is the best time of day for these parties?
For the Cinema Lounge and Glamping themes, late afternoon (4:00 PM) to the next morning works best so you get the dark evening hours. For the Spa or Art Studio themes, a brunch or early afternoon slot (11:00 AM – 2:00 PM) utilizes natural light better and keeps the energy manageable.
How much space do I really need for a sleepover?
A good rule of thumb is to allocate about 20-25 square feet per child for sleeping and changing. If your room is 200 square feet, cap the guest list at 8 children to ensure it doesn’t feel like a sardine can.
Can I mix these themes?
Absolutely. A “Dinner Party” often transitions naturally into a “Cinema Lounge.” However, try to keep the activities in separate zones if possible. Flipping a room from dining to sleeping while 10 kids are watching is chaotic. It is better to move the group from the patio (dinner) to the basement (movie) to maintain the flow.
Conclusion
Designing a party for an 11-year-old is about respecting their growing maturity while acknowledging they are still kids who want to have fun. By applying interior design principles—scale, lighting, zoning, and flow—you can elevate a standard birthday into a memorable event.
Focus on the atmosphere. The difference between a chaotic gathering and a “cool” party often comes down to lighting and layout. Use rugs to define spaces, lamps to set the mood, and durable materials to keep your stress levels low. With these structural plans in place, you can host a stylish event that parents appreciate and tweens actually enjoy.
Picture Gallery


