
Cool Pool House Bar Ideas for Summer Fun
There is a specific kind of magic that happens when you can transition from floating in the pool to mixing a cocktail without ever stepping inside the main house. A well-designed pool house bar isn’t just about luxury; it is about keeping wet feet off your hardwood floors and keeping the party contained in the backyard. If you are looking for visual inspiration, you can jump right to our Picture Gallery at the end of this blog post.
I remember one of my first landscape design projects where we focused entirely on the aesthetic of the bar but ignored the flow of traffic. We ended up with a stunning marble counter that got incredibly hot in the sun, and the bartender was constantly trapped in a corner every time someone wanted a soda. That experience taught me that function must come before form, especially when water and sun are involved.
Whether you are renovating a full cabana or just carving out a niche in a small shed, the principles of good hospitality design remain the same. We need to look at durability, ergonomics, and that elusive resort-style atmosphere. Let’s dive into how to build a bar that actually works for summer living.
1. Layout and Flow: The 30-Inch Rule
The biggest mistake homeowners make with pool bars is underestimating the space needed for people to move. In a kitchen, we usually ask for 42 to 48 inches of aisle space, but in a pool house, you can get away with slightly tighter tolerances if necessary. However, never go below 36 inches behind the bar.
If you are planning a galley-style setup where the bartender has a back counter and a front bar, you need room to bend down and open a fridge. If your aisle is too narrow, you will bang your hips on the counter edge every time you reach for a drink. I always tape out the floor plan with blue painter’s tape before ordering cabinetry to physically walk the space.
Another critical dimension is the bar overhang. If you want people to sit comfortably on stools, you need an overhang of at least 12 to 15 inches. Anything less, and your guests will be knocking their knees against the cabinet wall, which is uncomfortable and damages the finish over time.
Designer’s Note: Beware of the “bottleneck effect.” Do not place the beverage fridge or the ice maker at the single entry point behind the bar. Place self-serve items (like soda and water) at the edge of the bar accessible from the guest side, so kids don’t have to enter the “work zone” to get a drink.
Common Mistakes + Fixes
- Mistake: Placing the bar too close to the pool edge.
- Fix: Keep a minimum of 6 to 8 feet between the water’s edge and your barstools to prevent splashing chlorine into the food area and to allow safe walking traffic.
- Mistake: Ignoring ceiling height for pendant lights.
- Fix: Ensure the bottom of your pendant light is 30 to 32 inches above the countertop so it doesn’t obstruct the view across the bar.
2. Material Matters: Surviving the Splash Zone
Indoor materials often fail miserably in a pool house environment. Humidity, UV rays, and chlorinated water are aggressive forces that will degrade standard finishes. When selecting a countertop, you must avoid porous stones like standard polished marble, which will etch immediately upon contact with lemon juice or wine.
My go-to recommendation for pool house bars is leathered granite or soapstone. The textured “leathered” finish hides water spots and fingerprints much better than a polished surface. Engineered quartz is popular indoors, but be careful using it in direct sunlight; the UV rays can cause the resin in the quartz to yellow over time.
For flooring, slip resistance is the only metric that matters. You want a tile or paver with a high dynamic coefficient of friction (DCOF)—look for a rating of 0.42 or higher for wet areas. Porcelain pavers are excellent here because they don’t absorb water and often come with textured finishes that grip bare feet.
Renters or Budget-Conscious Tip: If you can’t install stone counters, consider a butcher block sealed with marine-grade spar varnish. It adds warmth and is relatively affordable, but it does require re-sealing every year or two to prevent water damage.
3. The Appliance Ecosystem
A warm beer is the quickest way to ruin a pool party. Your refrigeration setup is the heart of the bar, but not all fridges are created equal. You must look for “outdoor rated” appliances, even if your pool house has a roof. Indoor fridges rely on specific ambient temperatures to function; an outdoor unit has a more robust compressor designed to handle temperature swings.
The ice maker is the second most important appliance. A clear ice maker is a luxury that elevates the experience because clear ice melts slower than cloudy ice, keeping drinks cold without diluting them. However, these require a drain line. If you don’t have plumbing for a gravity drain, you must buy a unit with a built-in pump.
Do not forget the sink. A bar without a sink is just a counter. You need a place to dump half-finished drinks and rinse shakers. A small 15-inch bar sink is sufficient. If you are doing a retrofit and running a drain line is impossible, you can use a portable camping sink setup hidden in a cabinet, but it requires manual emptying.
What I’d do in a real project:
- I would prioritize a double-drawer fridge over a standard door fridge. Drawers allow you to see everything from the top down without bending over, and they lose less cold air when opened.
- I would install a glass rinser next to the sink (like you see in coffee shops). They are affordable, easy to plumb, and very practical for rinsing sugary residue out of cups.
4. Lighting the Night
Lighting transforms a pool house from a daytime changing room into an evening lounge. The goal here is layers of light, not a single bright overhead source. You need task lighting for mixing drinks and ambient lighting for mood.
Under-cabinet tape lighting is a favorite trick of mine. Running an LED strip under the bar overhang creates a soft glow that illuminates the barstools and the floor. This looks high-end and also serves a safety function by illuminating the walking path without blinding guests.
For overhead fixtures, ensure they are wet-rated if there is any chance of wind-blown rain reaching them. Natural materials like woven rattan pendants look beautiful, but you must buy synthetic versions (resin wicker) rather than natural grass, which will mold in the humidity.
Designer’s Note: Always install dimmer switches. At 2:00 PM, you don’t need the lights on. At 6:00 PM, you want them at 80%. By 9:00 PM, you want them at 30% to mimic candlelight. This simple electrical upgrade changes the entire vibe of the space.
5. Styling: The Resort Vibe
Styling is where you soften the hard edges of stone and stainless steel. Since this is a pool area, we have to talk about breakability. Glass is the enemy of the pool deck. If a glass breaks, you often have to drain the pool to ensure no shards are left in the water.
Invest in high-quality acrylic or polycarbonate drinkware. The technology has improved drastically; many high-end acrylics now have the weight and clarity of crystal without the danger. Store these on open shelving to add color and accessibility to the back bar.
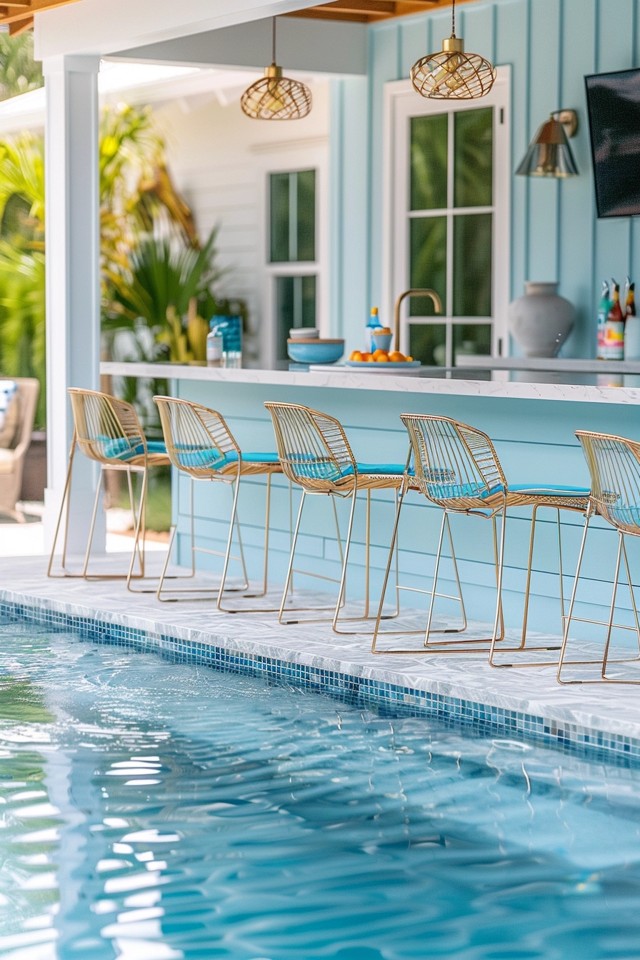
Barstools are your primary opportunity to introduce color and texture. I prefer stools with a back for safety, especially when alcohol is involved. Look for powder-coated aluminum frames which resist rust better than steel. If you choose cushions, ensure the fabric is solution-dyed acrylic (like Sunbrella), which is fade-resistant and bleach-cleanable.
Common Mistakes + Fixes
- Mistake: Buying indoor wicker furniture.
- Fix: Ensure the weave is High-Density Polyethylene (HDPE). It looks like wicker but won’t crack or peel in the sun.
- Mistake: Forgetting trash storage.
- Fix: Dedicate one cabinet specifically for a pull-out trash bin. Nothing ruins a styled bar faster than a loose garbage bag tied to a door handle.
Final Checklist: Before You Build
Before you commit to a contractor or start your DIY weekend, run through this list to ensure you haven’t missed the practical details.
- Check Electrical Load: Does your panel have room for a fridge, ice maker, and blender running simultaneously? You will need GFCI outlets for everything.
- Measure Your Stool Height: Standard counter height is 36 inches, requiring a 24-26 inch seat height. Bar height is 42 inches, requiring a 30-inch seat height. Don’t mix them up.
- Plan for Winter: If you live in a freeze zone, where will you store the cushions? Are the water lines equipped with shut-off valves for easy winterization?
- Ventilation: If you are boxing in a fridge with cabinetry, did you leave ventilation gaps? Without airflow, the compressor will burn out in a season.
- The “Wet Test”: Are your chosen floor tiles slippery when wet? Get a sample, pour water on it, and step on it with bare feet.
FAQs
Do I really need a sink in a pool house bar?
Technically no, but functionally yes. Without a sink, you will constantly be running back to the main house to wash sticky hands, rinse fruit, or clean glasses. It creates a disconnect. If plumbing is too expensive, consider a dry bar setup but stock it heavily with wet wipes and a large hidden trash bin.
How much does a pool house bar cost?
This varies wildly. A DIY dry bar using stock cabinets and a mini-fridge can be done for under $2,000. A custom built-in wet bar with stone counters, plumbing, and premium outdoor appliances can easily range from $15,000 to $30,000. The plumbing and electrical trenching usually eat up the biggest portion of the budget.
Can I use an indoor fridge outside if it’s under a roof?
It is risky. Indoor fridges are not insulated for extreme heat. If it is 95 degrees outside, an indoor fridge will run continuously to keep up, shortening its lifespan and driving up your electric bill. It also likely won’t maintain a safe food temperature on very hot days. Outdoor-rated units are worth the investment.
What is the best countertop for a budget?
Concrete is a great mid-range option that fits the outdoor aesthetic perfectly. It is durable and can be a DIY project if you are handy. For a tight budget, tile countertops are durable and heat resistant, though keeping the grout lines clean can be a maintenance chore. Use dark grout to hide dirt.
Conclusion
Creating a cool pool house bar is about more than just buying a beverage fridge and some tiki mugs. It requires a thoughtful approach to how you move through the space, how materials handle the elements, and how lighting sets the mood. By focusing on the “unsexy” details like aisle clearance, slip resistance, and electrical loads first, you ensure that the fun part—the hosting—goes off without a hitch.
Remember that the best design feels effortless. When your guests have a comfortable place to sit, a cold drink in hand, and the lighting is just right, they won’t notice the GFCI outlets or the drainage slope—they will just know they never want to leave. Start with a solid plan, respect the constraints of the outdoors, and enjoy your summer sanctuary.
Picture Gallery


