
Covering An Ugly Fireplace In A Rental: Decorative Solutions
Living in a rental often means inheriting design choices that you would never make for yourself. One of the most common eyesores is a dated, dirty, or simply “ugly” fireplace that serves as the focal point of your living room. Whether it is 1970s orange brick, stained grout, or a mantel that looks like it belongs in a basement, you are not stuck with it.
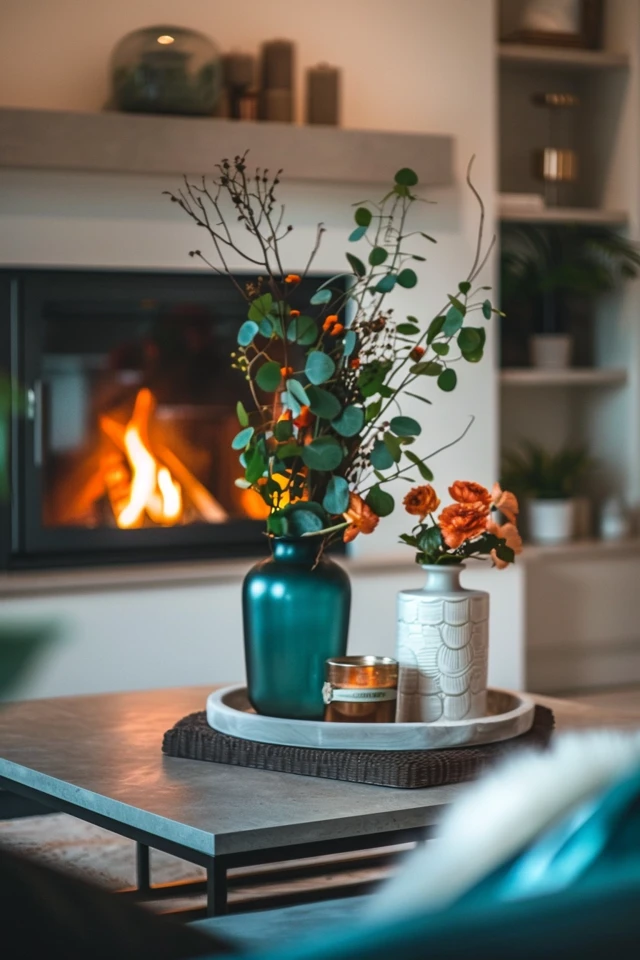
To help you visualize how these temporary fixes look in real-world settings, please remember that we have curated a full Picture Gallery at the very end of this blog post for your inspiration. You can transform your space without losing your security deposit by using clever layering, removable materials, and strategic furniture placement. This guide will walk you through professional designer secrets to masking a fireplace while maintaining safety and style.
At-a-Glance: Key Takeaways
- Temporary is powerful: Peel-and-stick tiles, contact paper, and tension-fit surrounds can completely change the look of a fireplace without permanent damage.
- Distraction is a strategy: Using oversized art, mirrors, and layered decor can draw the eye away from the fireplace’s less desirable features.
- Safety first: Always ensure that your decorative solutions are heat-resistant if you plan on actually using the fireplace. If it is non-functional, your options are virtually limitless.
- Measurements matter: Use the 1/3 rule for mantel styling and ensure your hearth rug is at least 6 to 12 inches wider than the fireplace opening on each side.
- Lighting is the “secret sauce”: Battery-operated sconces and floor lamps can change how shadows fall on dated masonry, making it look intentional rather than neglected.
What This Style Means (and Who It’s For)
The “Rental-Friendly Fireplace Refresh” is a design philosophy centered on reversible aesthetics. It is for the apartment dweller, the long-term renter, or even the new homeowner who isn’t ready for a $5,000 demolition project. This style focuses on “masking” rather than “replacing.” It acknowledges that while the structure cannot change, the visual surface is entirely up for negotiation.
This approach is perfect for those who value a cohesive interior but are constrained by a lease. It bridges the gap between “living with it” and “making it yours.” By using materials that can be peeled off or moved, you create a home that reflects your personality. It is a mix of DIY craft and high-end styling, prioritizing textures like matte vinyl, brass accents, and natural wood to elevate cheap or dated builder-grade materials.
The Signature Look: Ingredients That Make It Work
To successfully cover an ugly fireplace, you need a toolkit of specific materials. These are the “ingredients” that create a professional, polished finish rather than a DIY project that looks like an afterthought.
- Heat-Resistant Vinyl or Peel-and-Stick Tile: Look for products specifically rated for “fireplace surrounds.” These come in marble, subway tile, or Mediterranean patterns. They are thick enough to hide the texture of the brick underneath.
- Magnetic Fireplace Covers: If your fireplace has a dated gold or black metal frame, magnetic strips or heat-paint-coated magnetic covers can instantly modernize the look.
- Custom-Cut Plywood Mantels: A “sleeve” mantel is a hollow wooden box that slides directly over your existing mantel. It is held in place by gravity and a few hidden tension screws, requiring zero holes in the original structure.
- Large-Scale Fire Screens: A decorative screen is the easiest way to hide a stained firebox. Choose a laser-cut metal design or a classic three-panel mesh screen in a modern finish like brushed gold or matte black.
- Pressure-Fit Trim: Using lightweight molding and command strips, you can create a faux-paneling look around the fireplace “breast” (the wall above the mantel) to add architectural interest.
Layout & Proportions (Designer Rules of Thumb)
When you are trying to hide something ugly, scale is your best friend. If your decor is too small, it will only highlight the fireplace’s flaws. Here are the professional measurements I use for every rental project:
The Rule of Thirds for the Mantel: Divide your mantel into three vertical zones. Place your tallest item (like a leaning mirror or art piece) in the left or right third, not dead center. This creates a dynamic “V” shape that guides the eye away from the hearth below. Your art should be roughly 2/3 the width of the mantel itself.
Hearth Rug Sizing: A small rug looks like a bath mat. If you are covering an ugly hearth stone, use a rug that is at least 3 feet by 5 feet. It should extend 8 to 12 inches past the sides of the fireplace. This “grounds” the fireplace and masks the floor-level transition. I recommend a low-pile wool rug because it is naturally flame-resistant and heavy enough to stay flat without permanent adhesives.
Art Height: If you are hanging a piece of art above the fireplace, the bottom of the frame should sit 4 to 6 inches above the mantel. Hanging it too high (the common “TV height” mistake) leaves a gap of “dead space” that makes the fireplace look shorter and more squat than it actually is.
Furniture Distance: In a standard living room, your coffee table should be 16 to 18 inches away from your sofa, but keep your primary seating at least 3 feet away from the fireplace. This prevents the room from feeling cramped and allows the fireplace to be a backdrop rather than an obstacle.
Step-by-Step: How to Recreate This Look
Follow these steps to transform your fireplace over a single weekend. This process assumes you are working with a standard brick or stone fireplace with a wooden or stone mantel.
- Deep Clean the Surface: Use a heavy-duty degreaser or TSP substitute to clean the brick and mantel. Peel-and-stick materials will not adhere to soot or dust. Let it dry for 24 hours before applying any adhesive.
- Template the Surround: Use butcher paper or newspaper to create a template of the flat areas around the firebox. This allows you to cut your vinyl or contact paper accurately on a flat table rather than trying to trim it while it is stuck to the wall.
- Apply Your Surface Layer: Start at the top center of the surround and work your way down. Use a plastic squeegee to remove air bubbles. If you are using peel-and-stick tiles, use a level to ensure your first row is perfectly straight, as fireplace masonry is often crooked.
- Install the “Sleeve” Mantel: Measure the width, depth, and height of your existing mantel. Build or buy a box with three sides (top and two faces) that is 1/2 inch larger in every dimension. Slide it over the old mantel. If it feels loose, use small wooden shims hidden underneath to snug it up.
- Style the Firebox: If the fireplace is non-functional, paint the inside of the firebox with black chalkboard paint (if the landlord allows) or simply place a stack of birch logs inside. For a “glow” without the fire, use a cluster of battery-operated pillar candles of varying heights (4, 6, and 9 inches).
- Layer the Hearth: Place your hearth rug down first. Then, add a large basket filled with textured blankets on one side and a tall floor plant (like a Sansevieria) on the other. This softens the hard edges of the masonry.
Designer’s Note: One thing that almost always goes wrong is “bubbling” when using contact paper on brick. Brick is porous and uneven. If you try to stick thin vinyl directly to rough brick, it will look like plastic wrap. To prevent this, I suggest taping a piece of thin, lightweight foam board or hardboard over the brick using heavy-duty double-sided mounting tape (the kind that comes off with heat). Apply your “tile” or vinyl to the board instead. This gives you a perfectly flat, professional surface that hides the brick texture entirely.
Budget Breakdown: Low / Mid / Splurge
Transforming a fireplace doesn’t have to be expensive, but the more you spend, the more realistic the textures will be.
Low Budget ($50 – $150):
Focus on distraction and basic coverage. A high-quality fire screen ($60), a large thrifted mirror to lean on the mantel ($40), and a few rolls of matte black contact paper ($20) to cover a dated gold trim. Use existing books and candles for styling.
Mid Budget ($150 – $500):
This allows for structural-looking changes. You can afford a custom-built wood mantel sleeve ($150), high-end peel-and-stick “mother of pearl” or marble tiles ($120), and a dedicated wool hearth rug ($150). You might also add two battery-operated wall sconces ($80) to the wall above the mantel.
Splurge ($500+):
At this level, you can commission a custom-fit “facade.” This is a lightweight frame that leans against the existing fireplace, essentially creating a brand-new fireplace front. It can include a new mantel, a faux-stone surround, and integrated lighting. This is the ultimate “renter’s dream” because it is a single piece of furniture that you take with you when you move.
Common Mistakes (and How to Fix Them)
Even with the best intentions, certain mistakes can make a rental fireplace look worse. Here is how to spot and correct them.
The Mistake: Using high-gloss finishes. Glossy contact paper or plastic-looking tiles reflect light in a way that screams “fake.” It highlights every bump in the brick underneath.
The Fix: Always opt for matte or “honed” finishes. They absorb light and look much more like real stone or painted wood.
The Mistake: Leaving the “inner” edges exposed. Many people cover the front of the fireplace but leave the 2-inch returns (the parts that go into the firebox) original. This breaks the illusion.
The Fix: Wrap your material around the corners and at least 1 inch into the firebox opening. Use high-heat spray paint (matte black) for the interior edges to create a clean, crisp line.
The Mistake: Cluttering the mantel. Placing dozens of small knick-knacks on the mantel makes the fireplace feel heavy and messy.
The Fix: Use the “Rule of Three.” Group items in threes, varying the height and texture. For example: a tall brass candlestick, a medium-sized ceramic vase, and a small horizontal book. Leave empty space between these groups to let the eye rest.
Room-by-Room Variations
Fireplaces aren’t just in the living room. Depending on where yours is located, you might want to adjust your strategy.
The Bedroom Fireplace:
Bedroom fireplaces are usually smaller and more ornamental. Instead of a heavy fire screen, consider using a fabric “fireboard.” This is a piece of plywood wrapped in a beautiful textile or wallpaper that fits snugly inside the fireplace opening. It adds softness to the room and blocks drafts.
The Home Office Fireplace:
If you have an ugly fireplace in your office, turn it into a bookshelf. Measure the interior of the firebox and slide in a custom-built wooden insert with two or three shelves. It hides the grimy interior and provides functional storage for your reference books or printer paper.
The Dining Room Fireplace:
Dining room fireplaces often have higher mantels. This is the perfect place for a “gallery lean.” Instead of hanging art, lean several pieces of varying sizes against each other. It feels casual yet sophisticated and covers a large portion of the wall above the fireplace without requiring a single nail.
What I’d Do In a Real Project (Checklist)
If I were designing your space today, this is the checklist I would follow to ensure a “no-fail” result:
- Check the lease: Confirm that “removable” decor is permitted.
- The “Sniff Test”: Smell the fireplace. If it smells like old soot, use an odor-neutralizing primer or a deep-cleaning charcoal bag inside the firebox before covering it.
- Material Sample: Buy one sheet of the peel-and-stick tile and leave it on the brick for 48 hours. Peel it off to ensure it doesn’t leave a residue or pull off the brick’s face.
- Lighting Check: Turn on your room’s main lights. If the fireplace looks “yellow,” swap your light bulbs for “soft white” (2700K-3000K) to neutralize the dingy tones of old masonry.
- Weight Test: If you are leaning a heavy mirror on a rental mantel, ensure the mantel is actually structural and not just decorative foam (common in 1990s builds).
Finish & Styling Checklist
To give your fireplace that final “designer” touch, go through this list of finishes and textures. A mix of these will make the fireplace look expensive.
- Metallic: Add something in aged brass, blackened steel, or polished chrome. This adds a “hard” element that looks permanent.
- Organic: Add a piece of driftwood, a potted plant, or a bowl of moss. This softens the transition between the “fake” surface and the room.
- Textile: A hearth rug is mandatory. Choose something with a subtle pattern to hide any inevitable dust or ash.
- Height: Ensure at least one item on your mantel reaches halfway to the ceiling. This draws the eye upward and makes the room feel taller.
- Depth: Layer items in front of each other. Don’t line everything up in a straight row like soldiers.
FAQs
Can I paint my rental fireplace?
Generally, no. Brick is porous, and once it is painted, it is almost impossible to return to its original state. However, you can use “liquid chalk” or specialized “removable” paints for small accents, but always test in an inconspicuous area first. Your best bet is always a physical cover or facade.
Are peel-and-stick tiles safe for a working fireplace?
It depends on the product. You must look for tiles rated for “high heat” or “fireplace surrounds.” Standard vinyl floor tiles will melt or release fumes if they get too hot. If you frequently use your fireplace, I recommend sticking to metal screens and “sleeve” mantels rather than adhesive surface covers.
How do I hide the ugly gold trim on the glass doors?
The easiest way is high-heat magnetic tape. You can buy strips of magnetic material, spray paint them matte black with high-heat engine paint, and snap them right over the gold. It is completely removable and looks like a brand-new modern insert.
What if my fireplace has no mantel at all?
You can buy a “floating shelf” that installs with just two or three small screws. This adds the architectural “line” that a fireplace needs to look complete. When you move, the small holes are much easier to patch than a full fireplace renovation.
How do I handle a fireplace that is tucked into a corner?
Corner fireplaces are notoriously difficult to style. Use a large, tall plant on the “open” side of the fireplace to balance the weight. Avoid putting a TV above a corner fireplace; instead, use a large piece of vertical art to help the fireplace feel like a deliberate design choice rather than an architectural mistake.
Conclusion
An ugly fireplace doesn’t have to define your rental experience. By thinking like a designer and using temporary, high-impact materials, you can turn a source of frustration into the highlight of your home. Remember to focus on scale, prioritize matte finishes over glossy ones, and always keep safety in mind if you plan on lighting a fire.
The beauty of rental decorating is that it forces you to be creative. Whether you choose a simple fire screen and a few candles or a full-blown peel-and-stick marble transformation, the goal is to create a space that feels like yours. Use the rules of proportion we discussed to ensure your decor looks intentional, and don’t be afraid to experiment with textures and layers.
Picture Gallery


