
Creating the Ultimate Backyard Tiki Bar Ideas
Introduction
There is something undeniably magical about the allure of a tiki bar. It is one of the few design concepts that allows you to completely transport yourself to a different time and place without leaving your property. When designed correctly, it strikes a balance between kitschy nostalgia and genuine tropical relaxation.
However, building a backyard retreat requires more than just throwing some bamboo fencing around a table. It involves careful spatial planning, material selection that withstands the elements, and lighting design that sets the mood after sunset. For a huge dose of inspiration, don’t miss our curated Picture Gallery included at the end of this article.
In this guide, I will walk you through the structural and stylistic layers of creating a professional-grade tiki bar. We will cover everything from ergonomic measurements to weatherproofing strategies, ensuring your personal oasis lasts for years.
1. Assessing Your Space and Establishing Flow
Before buying a single bamboo pole, you must determine the optimal footprint for your bar. In landscape design, flow is everything. You never want your bar to create a bottleneck in your backyard traffic.
Start by identifying a flat, stable surface. If you are building on a deck, ensure the structure can support the added weight of the bar, appliances, and guests. If you are building on grass, you will need to lay a concrete pad or pavers to prevent the structure from sinking or rotting from ground moisture.
Consider the orientation of the sun. You do not want your guests squinting directly into the sunset, nor do you want the bartender baking in the afternoon heat. Orient the bar so the main seating area faces North or East if possible, or ensure your roof structure provides adequate shade during peak hours.
Designer’s Note: The “Working Triangle” Outdoors
Just like an indoor kitchen, a bar needs a working zone. A common failure I see is a lack of surface area for the bartender. Ensure you have at least 36 to 42 inches of clearance behind the bar. This allows you to open a mini-fridge door or bend down to grab ice without hitting the back wall.
Common Mistakes + Fixes
Mistake: Placing the bar too close to the house or pool.
Fix: Leave a minimum of 48 inches of walkway around the perimeter of the bar area. This allows guests to pull out a stool without blocking the path for others.
2. Structuring the Build: Materials and Weatherproofing
Authenticity is key to the tiki aesthetic, but durability is key to your sanity. Natural materials like untreated bamboo and palm thatch look amazing on day one but can deteriorate quickly in wet or snowy climates.
For the main structure, I recommend using pressure-treated lumber or galvanized steel for the framing. You can then “skin” this frame with bamboo slats or reed fencing. This gives you the structural integrity of a modern build with the visual warmth of the tropics.
When it comes to the roof, you have a major decision to make: natural vs. synthetic thatch. Natural thatch is cheaper and biodegradable, but it sheds over time, attracts bugs, and eventually rots. Synthetic thatch (often made from high-density polyethylene) looks incredibly realistic, lasts 20+ years, and is fire-retardant.
What I’d do in a real project:
- Flooring: I would specify composite decking or stamped concrete. It is slip-resistant and easy to hose down after a spill.
- Countertops: I prefer a poured concrete counter with a live-edge wood look, or marine-grade plywood sealed with multiple coats of spar varnish. Avoid standard indoor granite; it feels too formal for a tiki bar.
- Bamboo care: If using real bamboo, coat it annually with a clear UV-resistant sealant. This prevents it from turning gray and brittle.
3. Bar Ergonomics: Heights, Depths, and Seating
Comfort is often the most overlooked aspect of DIY bar projects. If the counter is too high or the overhang is too shallow, guests will not linger. As a designer, I stick to strict measurements to ensure the human body fits the furniture comfortably.
Standard Bar Measurements:
- Bar Height: The standard finished height for a bar top is 42 inches.
- Stool Height: You need bar-height stools (30 inches from floor to seat), not counter-height stools (24 inches).
- Knee Clearance: The countertop must overhang the front wall of the bar by at least 10 to 12 inches. Without this, your guests’ knees will knock against the front panel.
- Elbow Room: Allocate 24 inches of width for every seat. If you cram stools closer than this, your guests will be bumping elbows while lifting their drinks.
Don’t forget the foot rail. If you are building a custom bar, install a rail or step about 6 to 9 inches off the ground. Dangling legs cut off circulation and become uncomfortable after about 15 minutes. A simple galvanized pipe or a sturdy wooden beam works perfectly for this.
4. Lighting the Night: Ambiance and Safety
Lighting makes or breaks the tiki vibe. The goal is to create a moody, mysterious atmosphere that mimics a tropical sunset or a torch-lit beach. Avoid cool white or daylight bulbs (4000K-5000K) at all costs; they look like clinical office lighting.
Stick to warm white bulbs (2700K or lower). String lights are a staple, but elevate the look by draping them inside the roof structure to create a soft, internal glow. This indirect lighting flatters faces and highlights the texture of your thatch roof.
Layering Your Light Sources:
- Task Lighting: Install a small, shielded LED strip under the bartender’s side of the counter. This allows you to see what you are mixing without ruining the mood lighting for the guests.
- Accent Lighting: Use low-voltage landscape spotlights to uplight nearby palm trees or ferns. This expands the visual space of the bar into the surrounding garden.
- The “Kitsch” Factor: This is the one place where novelty lighting is acceptable. A few pufferfish lanterns or vintage-style glass floats add necessary character, but use them sparingly as accents, not primary light sources.
Safety Check:
Ensure all electrical runs are rated for outdoor use (GFCI outlets are mandatory). If you are hanging lights from a thatch roof, ensure the bulbs do not emit high heat, especially if using natural thatch. LED bulbs are the safest choice here.
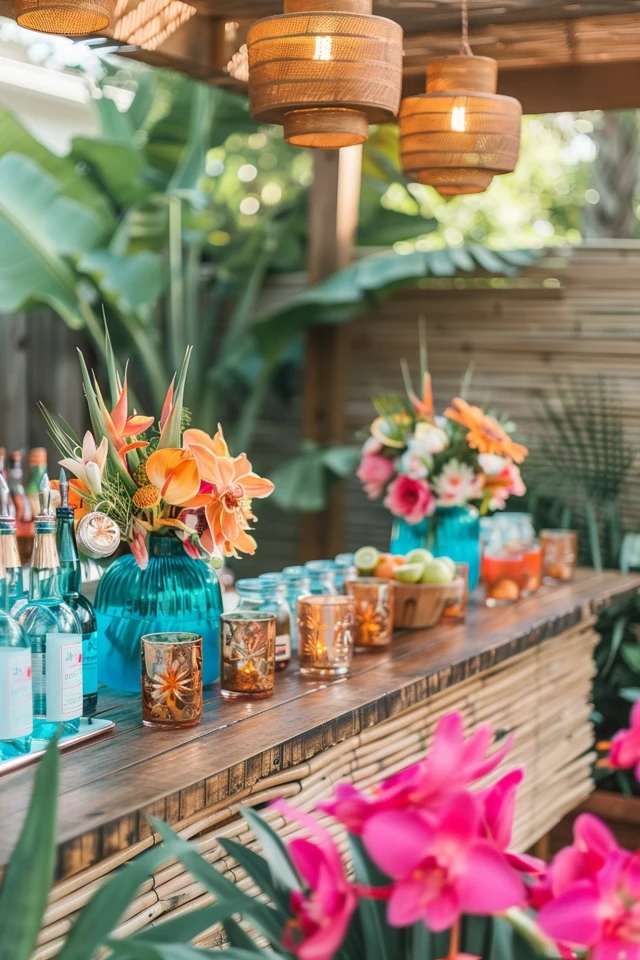
5. Decor and Styling: The “High-Low” Mix
The difference between a cheesy party city setup and a high-end tiki oasis lies in the curation of decor. You want to layer textures rather than relying on plastic signs. Think “Adventure Club” from the 1940s rather than “Spring Break.”
Start with the walls and structural posts. Wrapping columns in Manila rope adds instant nautical texture. Using matting—like Lauhala or Bac Bac matting—on the ceiling hides the ugly underside of plywood and framing while adding a rich, woven texture.
For accessories, hunt for vintage ceramic mugs, glass fishing floats, and carved wood statuary. Avoid plastic leis or cardboard cutouts. Real wood, real glass, and real fabrics ground the space and make it feel permanent.
Plants are non-negotiable.
You cannot have a tiki bar without lush greenery. If you live in a cold climate, use potted tropicals like Hibiscus, Majesty Palms, or Birds of Paradise that can be moved indoors during winter. If you lack a green thumb, high-quality artificial plants have come a long way—mix them in with live foliage to fake a dense jungle look.
Designer’s Checklist for Styling:
- Textiles: Use outdoor performance fabrics with tropical prints for seat cushions. Stick to two or three accent colors (e.g., coral, teal, and leaf green) to keep it cohesive.
- Signage: A custom carved wooden sign adds a personal touch. Look for local artisans who work with cedar or redwood.
- Sound: Don’t forget audio. Hide Bluetooth speakers in the rafters or use rock-shaped speakers in the landscaping. A tiki bar without Exotica music is just a shed.
Final Checklist: From Planning to Pouring
Before you invite the neighbors over, run through this final punch list to ensure your project is ready for prime time.
Planning Phase
- Check local zoning laws and HOA regulations regarding detached structures.
- Mark utility lines (call 811) before digging post holes.
- Determine if you need running water (sink) or electricity (blenders/lights). This often requires permits.
Build Phase
- Treat all cut ends of lumber with wood preservative.
- Install a slight slope in the flooring for water runoff.
- Apply marine-grade sealant to the bar top (minimum 3 coats).
Finishing Phase
- Test all lighting at night to check for glare.
- Stock the “back of house” with a trash bin, bottle opener, and towel hooks.
- Purchase a heavy-duty cover for the bar area if you have harsh winters.
FAQs
How much does a DIY tiki bar cost to build?
A simple, open-air structure built from scratch can cost between $500 and $1,500 for materials. A fully plumbed, wired, and professionally thatched bar can easily range from $5,000 to $15,000 depending on finishes and appliances.
How do I protect my tiki bar in the winter?
If you use natural thatch, you may need to wrap the roof in a tarp during heavy snow seasons to prevent rot. Remove all textiles, glassware, and appliances. If you have a sink, blow out the water lines to prevent freezing pipes.
Can I build a tiki bar if I am a renter?
Yes, focus on a freestanding “dry bar.” Use a sturdy bamboo table or a rolling bar cart. You can create the vibe using a large patio umbrella with a thatch cover and portable, battery-operated lanterns.
What is the best wood for outdoor bar tops?
Teak, cedar, and redwood are naturally rot-resistant. However, they are expensive. A more budget-friendly option is pressure-treated pine, but it must be heavily sanded, stained, and sealed with a high-quality spar urethane to prevent warping and splinters.
Conclusion
Creating the ultimate backyard tiki bar is about more than just construction; it is about storytelling. You are building a stage set for memories, laughter, and relaxation. By focusing on solid structural principles, ergonomic comfort, and layered lighting, you ensure that the space functions as beautifully as it looks.
Don’t be afraid to let the design evolve over time. The best tiki bars are collected, not just decorated. Add a mug from a trip here, a new carving from a market there. Over time, your bar will develop a patina and character that is uniquely yours. Now, go mix a Mai Tai and enjoy your slice of paradise.
Picture Gallery


