
Art Supplies – Creative Corner Ideas for Your Home Space
Creative hobbies have a notorious habit of expanding until they consume every available horizontal surface in a home. What starts as a small watercolor kit on the dining table eventually turns into a permanent installation of brushes, paper pads, and mixing palettes. The friction of setting up and tearing down your supplies every time you want to create is the single biggest killer of artistic momentum.
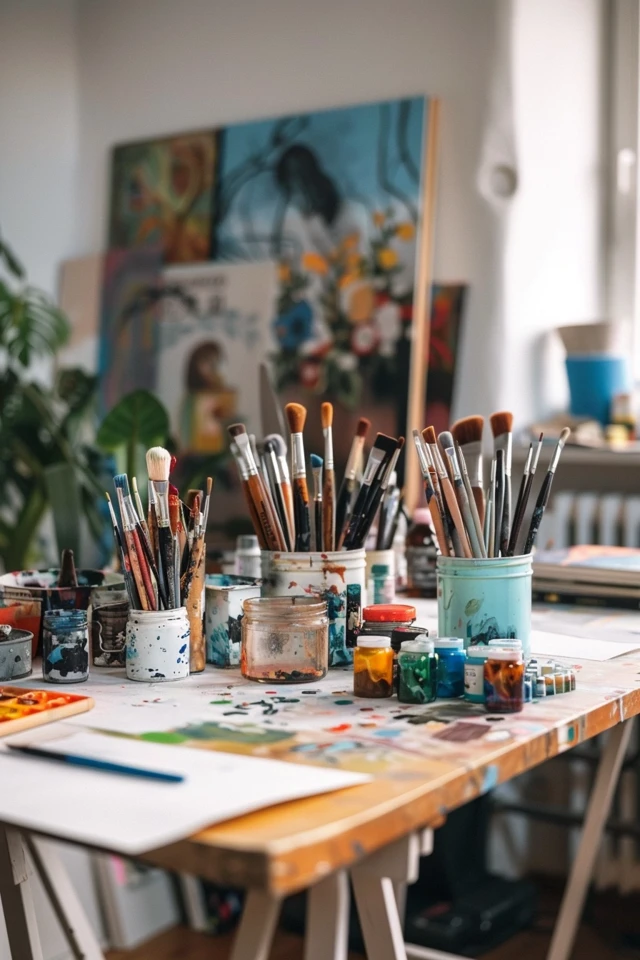
To maintain a consistent practice, you need a dedicated zone that invites you to sit down and work immediately. This does not necessarily require a separate studio room or a massive renovation budget. For visual inspiration on how these setups look in real homes, check out the Picture Gallery at the end of this post. Even a converted closet or a specifically zoned corner of a guest bedroom can function as a professional-grade workspace if you prioritize organization and ergonomics.
1. Assessing the Space and Lighting Logic
The first step in designing a creative corner is identifying the right location based on lighting, not just available floor space. In the design world, “North Light” is the gold standard for artists because it provides consistent, indirect illumination that doesn’t shift dramatically throughout the day. If you have a north-facing window, place your desk perpendicular to it to maximize this natural resource.
If you don’t have ideal natural light, don’t worry, but do avoid placing your workspace in direct, harsh southern sunlight. Direct beams create high-contrast shadows and glare on wet paint or graphite, causing eye strain. If a south-facing room is your only option, install solar shades or sheer white curtains to diffuse the light evenly across the room.
Space planning requires knowing your “active footprint.” A standard desk is usually 24 to 30 inches deep, but for art, you generally want 30 inches minimum to accommodate an easel or large sketchpads. Behind your chair, you need a minimum of 42 inches of clearance to roll back comfortably without hitting a wall or bookshelf.
Designer’s Note: The Flooring Trap
I once designed a studio for a client who loved the look of a vintage Persian rug under her easel. Within two weeks, a tube of oil paint fell bristles-down. It was a disaster.
- For art corners, function must override aesthetic softness.
- If you are a renter or have hardwood, use a rigid, clear polycarbonate chair mat.
- Avoid standard plastic office mats that crack; look for polycarbonate or tempered glass.
- If you must use a rug for warmth, choose a low-pile, tightly woven indoor/outdoor polypropylene rug that can be scrubbed with bleach or hosed down.
2. Storage Solutions for Different Mediums
Categorizing your art supplies is the key to a functional workflow. We separate storage into three categories: “Daily Reach,” “Deep Storage,” and “Works in Progress.” Your Daily Reach items are things like favorite brushes, pencils, and current sketchbooks. These belong on the desk surface or in the top drawer.
Vertical storage is the secret weapon for small creative corners. Installing a pegboard system above the desk gets clutter off your workspace while keeping tools visible. Unlike a drawer where items go to die, a pegboard reminds you of the tools you have. Use standard 1/4-inch pegboard hooks for scissors, tape, and rulers.
For “Deep Storage” (extra paper reams, gallons of gesso, spare canvas), use closed cabinetry or opaque bins. Visual clutter kills creativity for many people. Seeing a chaotic pile of supplies can feel overwhelming before you even pick up a brush. Opaque white bins with clear, printed labels keep the room looking serene.
Common Mistakes + Fixes
- Mistake: Storing paper vertically on a bookshelf.
- Fix: Paper over 100lb weight will slump and curl over time. Store paper flat. If you don’t have space for a flat-file cabinet (the dream piece), use under-bed storage boxes or stackable letter trays for smaller sheets.
- Mistake: Using deep open shelves for small items.
- Fix: Paint tubes and markers get lost on deep shelves. Use shallow picture ledges (usually 3 to 4 inches deep) mounted to the wall. They are perfect for lining up paints so you can see every color at a glance.
3. The Work Surface: Materials and Ergonomics
The table is the anchor of your creative corner. Standard computer desks are often too delicate for serious crafting or art. You need a surface that can withstand heat, moisture, and scratching. A solid wood butcher block is beautiful, but be aware it is porous; oil paints or inks will stain it permanently unless it is heavily sealed with polyurethane.
High-pressure laminate (HPL) is often a better choice for messy crafts. It is impervious to most solvents and cleans up easily with a magic eraser. If you are doing precision cutting with X-Acto knives, always use a self-healing cutting mat. Do not rely on the desk surface itself.
Height is another critical variable. A standard desk height is 29 to 30 inches. However, many artists prefer to stand or use a drafting stool. A counter-height table (36 inches) or bar-height table (42 inches) allows you to stand while working, which encourages better arm movement for large-scale drawing. If you choose a standing height, ensure you buy a drafting chair with an adjustable foot ring so your legs don’t dangle.
What I’d do in a real project:
- I almost always spec a generic “dining table” rather than a “desk” for art spaces.
- Dining tables are deeper (usually 36 to 40 inches), providing ample room for supplies and a laptop simultaneously.
- I look for tables with metal legs for stability; wobbly tables are frustrating for detail work.
4. Lighting Technicalities: CRI and Color Temperature
Lighting is the most technical aspect of an art corner, and getting it wrong will distort your color perception. Standard residential light bulbs are usually “Soft White” (2700K – 3000K), which casts a yellow/orange hue. This makes blues look dull and whites look yellow.
For a creative space, you must swap your bulbs for 5000K (often labeled “Daylight”). This temperature creates a neutral white light that mimics noon sunlight. It ensures that the colors you mix on your palette are the colors that will end up on the canvas.
Beyond temperature, look at the Color Rendering Index (CRI). This is a scale from 0 to 100 measuring how accurately a light reveals color. Standard LEDs are around 80 CRI. For art, you need 90+ CRI. High CRI bulbs prevent “metamerism,” where colors match under one light source but look completely different in daylight.
Lighting Placement Rules:
- Avoid the center ceiling fixture: Relying on a single overhead light causes your body to cast a shadow over your work surface.
- Use Task Lighting: Clamp an articulating arm lamp to your desk.
- Handedness Matters: If you are right-handed, place the lamp on your left. If you are left-handed, place it on your right. This prevents your hand from casting a shadow on the tip of your pen or brush.
5. Managing the “Messy” Reality
Interior design photos often show pristine studios, but real creativity creates waste. You need a dedicated system for trash and cleanup within arm’s reach. A tiny wastebasket isn’t enough. Get a medium-sized bin with a foot pedal lid to contain smells from solvents or messy rags.
If you paint with acrylics or oils, you must consider sink access. Washing brushes in a bathroom sink can ruin plumbing over time as paint solids accumulate in the P-trap. If a utility sink isn’t an option, use the “three-bucket system” for cleaning brushes at your desk to minimize how much paint goes down the drain.
For drying art, utilize vertical space again. A laundry drying rack or a wall-mounted wire line with clips works perfectly for watercolors or prints. If you work with canvases, install a high shelf specifically for drying wet paintings safely away from pets and dust.
Designer’s Note: The Cart Solution
The single most versatile item for a home art studio is a 3-tier metal rolling cart (like the IKEA Raskog).
- Top Tier: Solvents, water jars, and active brushes.
- Middle Tier: Tubes of paint and palettes.
- Bottom Tier: Rags, paper towels, and cleaning sprays.
This allows you to pull your supplies close when working and roll them into a closet when you have guests.
6. Styling and Inspiration
While function comes first, the space should also spark joy. However, avoid cluttering your actual workspace with decor. The art supplies themselves are colorful and busy; adding knick-knacks creates visual noise. Keep the desk clear.
Instead, use the wall space directly in front of you for inspiration. A large bulletin board or a magnetic strip allows you to pin up reference photos, color swatches, or inspiring postcards. This “mood board” can change with every project, keeping the space fresh without permanent clutter.
Consider the wall color of the room carefully. Most galleries are painted bright white or a neutral gray (approx 18% gray) for a reason. Bright colors on the walls can reflect onto your work surface, subtly tinting your view. For example, a red wall will bounce pink light onto your white paper. Stick to neutral walls in the immediate vicinity of your desk.
Final Checklist: The “Ready to Create” Setup
If I were setting up a creative corner for a client this weekend, here is the exact punch list I would follow to ensure success:
The Basics
- Clearance: Verified 42 inches of chair backup space.
- Surface: Desk or table is at least 30 inches deep.
- Protection: Floor is protected by a polycarbonate mat or drop cloth.
The Lighting
- Bulbs: All overhead bulbs swapped to 5000K LED.
- Task Light: Articulating arm lamp installed on the opposite side of the dominant hand.
- CRI: Verified bulbs are 90+ CRI for color accuracy.
The Organization
- Daily Reach: Cup or tray for immediate tools is on the desk.
- Vertical Storage: Pegboard or wall shelves installed for tools.
- Paper Storage: Flat storage solution established (no vertical stacking).
- The Cart: Rolling cart assembled for paints and wet media.
FAQs
How do I fit an art studio in a bedroom without it looking messy?
The key is “closed storage.” Use a wardrobe or a dresser designated solely for supplies. When you are done working, everything must go back into the cabinet. A rolling cart that tucks into a closet is also a great solution. If the mess is hidden, the bedroom remains a sanctuary.
What is the best way to organize disparate supplies like yarn, paint, and beads?
Do not try to mix these in one system. Use clear, shoebox-sized plastic bins. Dedicate one bin entirely to “Beading,” one to “Acrylics,” and one to “Sketching.” Label them. Stack them. Never create a “miscellaneous” bin; it becomes a junk drawer instantly.
Can I use a garage for my art studio?
Yes, but temperature control is vital. Oil paints, acrylics, and glues have strict temperature ranges. Freezing temperatures can ruin emulsions, and extreme heat can dry out supplies. You must insulate the space or bring liquids inside during extreme weather. Also, ensure the garage has adequate ventilation if you are using spray fixatives or solvents.
Is a glass desk good for art?
Glass is excellent for easy cleanup and works well as a light box for tracing if you put a lamp underneath. However, it is cold to the touch, which can be uncomfortable for long sessions, and it creates a glare. If you use a mouse for digital art, glass tracks poorly, so you will need a large mousepad.
Conclusion
Creating a dedicated space for art supplies is about more than just buying bins; it is about respecting your creative practice. When you have a space that is ergonomically sound, well-lit, and organized, the barrier to entry lowers significantly. You stop negotiating with the mess and start creating immediately.
Remember that this space does not need to be Instagram-perfect from day one. Start with a good surface, correct lighting, and a chair that supports your back. Let the storage solutions evolve as you understand your workflow better. The goal is a space that serves your art, not the other way around.
Picture Gallery


