
Creative Bunk Bed Fort Ideas for Kids’ Rooms
Introduction
There is something universally magical about a fort. As a child, creating a hidden nook offers a sense of security, ownership, and boundless imagination that a standard bedroom setup simply cannot match. Turning a bunk bed into a dedicated fort is one of the most efficient ways to maximize play space while adding a “wow” factor to the room.
However, executing this design requires more than just draping a sheet over the top rail. You need to consider structural integrity, ventilation, and how the design impacts the visual flow of the room. For visual inspiration on how to execute these designs, be sure to check out the Picture Gallery at the end of this blog post.
In this guide, I will walk you through professional methods for creating bunk bed forts that are safe, stylish, and functional. We will move beyond temporary blanket forts and look at semi-permanent solutions that can grow with your child.
1. The Tension Rod Method: No-Sew and Renter Friendly
For many parents, especially those renting or not wanting to drill into an expensive bed frame, tension rods are the secret weapon. This method allows you to create retractable “walls” for the bottom bunk without damaging the furniture.
Selecting the Right Rods
You cannot use standard, flimsy café rods for a kids’ room. Look for heavy-duty tension rods with a diameter of at least 1 inch. These need to withstand a child pulling on the fabric as they enter and exit the fort.
Measure the opening between the bed posts precisely. Purchase a rod that extends at least 4 inches beyond your maximum width to ensure the internal spring has enough compression force to hold tight.
Fabric Weight and Drapery
As a designer, I always recommend using mid-weight canvas or heavy cotton twill for these applications. Flimsy polyester sheets look messy and don’t block enough light to create that cozy “hidden” feeling inside.
However, you must avoid heavy upholstery velvet or blackout fabrics that seal the space too tightly. The interior of a bottom bunk can get hot quickly, so airflow is your top priority.
Installation Tips
- Mount the rod on the inside of the bed frame posts, not the face. This creates a cleaner look from the outside.
- Use ring clips rather than a rod pocket. This allows the fabric to slide easily, letting the child “open the curtains” without yanking the rod down.
- Hem the curtains so they hover exactly 1/2 inch off the floor. Fabric that drags collects dust and creates a tripping hazard.
2. The Plywood Facade: Creating a Custom Built-In Look
If you want the look of a high-end custom joinery bed without the $5,000 price tag, adding a plywood facade is the way to do it. This involves attaching thin panels to the existing bunk bed frame to create “windows” and “doors.”
Choosing Your Material
Use 1/4-inch or 1/2-inch Baltic Birch plywood. It is lightweight, takes paint beautifully, and has attractive edges that don’t necessarily require edge banding if sanded smooth. Avoid MDF (Medium Density Fiberboard) for this specific application because it is heavy and creates fine dust that is not ideal for kids’ sleeping zones.
Fabricating the Panels
Cut panels that fit the dimensions of the safety rails and the opening of the bottom bunk. Use a jigsaw to cut out shapes like portholes, castle battlements, or cottage windows.
Designer Rule of Thumb: When cutting windows, ensure the opening is either too small for a head to fit through (under 3.5 inches) or large enough for a whole body to pass through easily (over 9 inches). This prevents entrapment hazards.
Mounting for Safety
Do not use glue. You want this to be removable when the child outgrows the theme. Use U-brackets or carriage bolts with smooth, rounded heads facing the interior of the bed.
Ensure every screw is countersunk and filled, or covered with a safety cap. A child will run their hands over every square inch of this fort, so tactile safety is paramount.
3. Lighting the Interior: The “Cave” Problem
The biggest mistake I see in DIY bunk forts is a lack of interior lighting. When you enclose the bottom bunk, you are essentially creating a dark cave. Without proper illumination, the space becomes unusable for reading or playing LEGOs.
The Right Color Temperature
Avoid harsh, blue-toned LEDs. Aim for a color temperature of 2700K (Warm White). This mimics the cozy glow of incandescent bulbs and is conducive to relaxation and sleep hygiene in the evening.
Safe Installation
Never use plug-in lamps inside a confined fort space; the risk of knocking them over or touching a hot bulb is too high. Instead, use LED tape lights installed inside an aluminum channel with a diffuser.
Mount these channels in the upper corners of the bottom bunk ceiling (the slats of the top bunk). The diffuser is essential—it prevents the harsh “dots” of light from hurting young eyes and protects the strip from peeling off.
Switch Placement
Place the switch inside the fort where the child can reach it easily. Ideally, use a remote-controlled dimmer so you can lower the lights to a “nightlight” level from the doorway without invading their space.
4. The Loft Layout: Utilizing the Space Under a High Sleeper
If you have a loft bed rather than a standard bunk, you have significantly more vertical space to work with. This allows for a standing-height fort that can double as a reading nook or homework station.
Defining the Floor
A fort needs a defined floor to feel like a separate room. Do not rely on the existing bedroom carpet. Use a distinct area rug that fits perfectly between the bed legs.
I recommend a low-pile wool rug or a washable cotton flatweave. High-pile shags are nightmare traps for LEGO pieces and crumbs. Ensure the rug is taped down with rug grippers to prevent sliding.
Wall Treatments
Since the back wall is visible, treat it as an accent wall. Peel-and-stick wallpaper is fantastic here. A mural of a forest, a star map, or a brick texture can instantly define the theme without overwhelming the rest of the bedroom.
Storage Integration
Inside the loft fort, space is tight. Use soft storage solutions like hanging wall pockets made of canvas. These can hold books, flashlights, and toys without taking up floor space or presenting sharp corners to bump into.
5. Interior Styling: Comfort and Acoustics
The difference between a wooden box and a cozy fort lies in the textiles. Sound bounces around in wooden bunk beds, creating a loud, echoing environment. Styling needs to address both comfort and acoustics.
The Ceiling Treatment
If the bottom bunk looks up at the raw slats of the top mattress, it ruins the illusion. Staple a piece of fabric (tightly) to the underside of the top bunk slats. A starry night print or a simple neutral linen works wonders here.
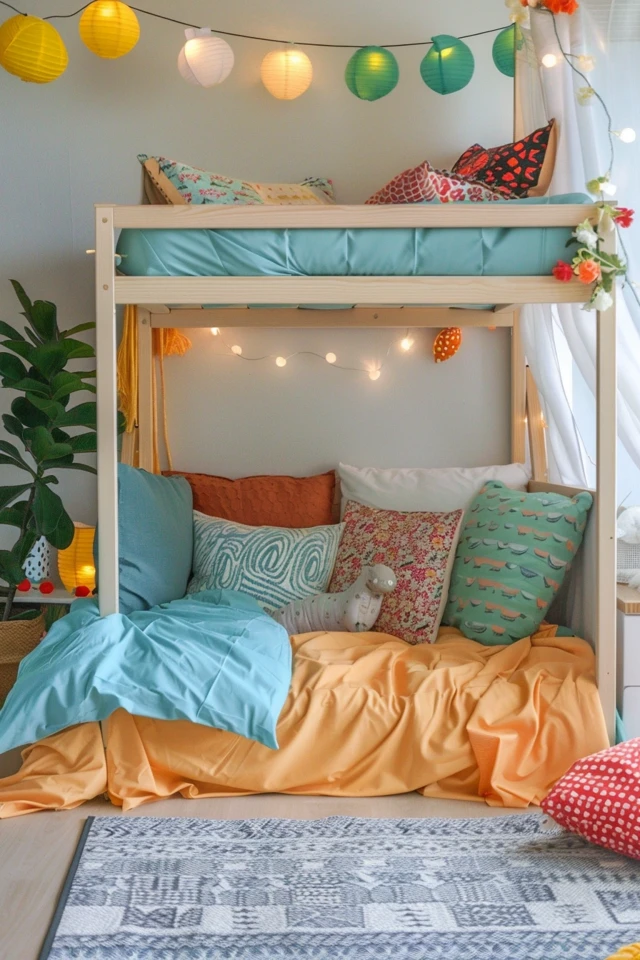
Cushions and Seating
For a bottom bunk fort, giant floor pillows or bean bag chairs are better than rigid furniture. They can be moved around and squished into corners.
Look for covers that are removable and machine washable. In a small, enclosed space, accidents happen, and hygiene is easier to maintain with washable slipcovers.
Acoustic Dampening
If the room has hard floors, the fort will amplify noise. Adding felt acoustic panels to the wall inside the bunk is a pro move. They come in hexagonal shapes and various colors, adding a design element while absorbing screams and laughter.


