
Creative Corner Landscaping Backyard Ideas
Designing a backyard often feels like solving a puzzle, but the corners are usually the pieces that don’t seem to fit. In my years of working on exterior layouts, I have found that homeowners tend to ignore these angled spaces or simply shove a shed there and call it a day. However, a neglected corner is actually a massive opportunity to create depth and extend your living space visually.
When you treat a corner as a destination rather than a dead zone, you make the entire yard feel larger. I had a client recently who had a “trash corner” where old pots and bags of mulch accumulated. We cleared it out, added a gravel stabilizer grid, and turned it into a secluded reading nook that is now their favorite spot for morning coffee.
If you are ready to tackle those awkward angles, this guide will walk you through layout logic, material selection, and planting strategies. If you are looking for visual inspiration, you can visit the Picture Gallery at the end of this blog post.
1. Creating an Intimate Seating Nook
One of the most effective ways to utilize a corner is by installing a detached seating area. This draws people away from the house and into the garden, which psychologically makes the yard feel much bigger.
When positioning this, you need to decide on the “floor” first. I often recommend a floating deck or a crushed granite pad for these areas because they are easier to level than pouring a concrete slab in a tight wedge.
For size, you want a minimum of an 8×8 foot square to comfortably fit two lounge chairs and a side table without feeling claustrophobic. If you plan on a small bistro set for dining, you can get away with a 6-foot diameter circle.
Designer’s Note: The “Floating” Effect
A common mistake I see is pushing the hardscaping right up against the fence boards. This looks cramped and creates a maintenance nightmare for weeds and fence repairs.
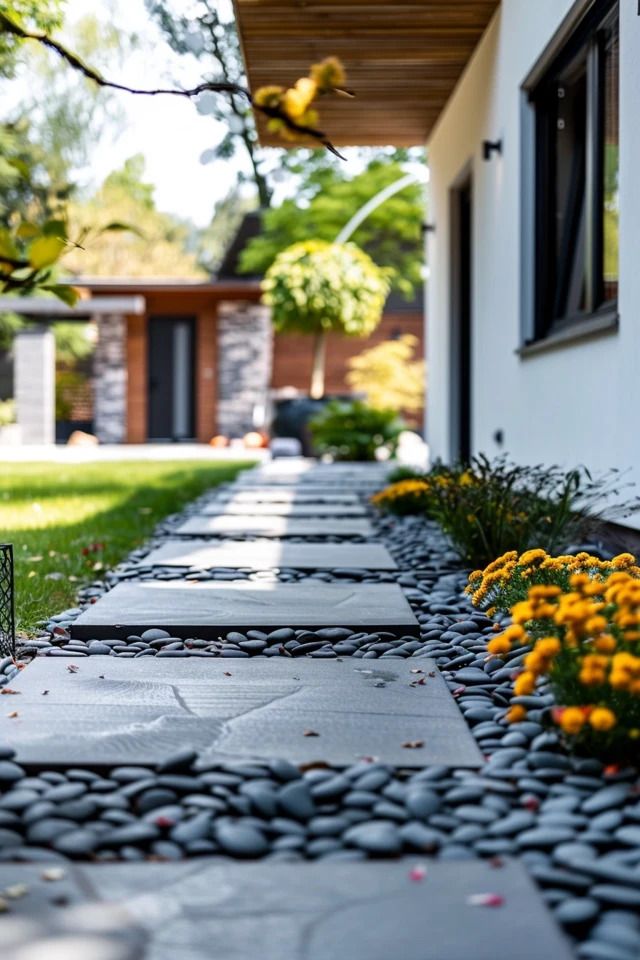
Always leave a 12 to 18-inch gap between your paving or deck and the fence. Fill this gap with river rock or low-shade ground cover like Pachysandra. This negative space allows the corner to “breathe” and looks significantly more high-end.
Key Furniture Measurements:
- Lounge Chairs: Allow 30 inches of width per chair.
- Circulation: Leave 24 inches of clear walking path to enter the nook.
- Side Table: Should be within 18 inches of the chair arm for easy reach.
2. Layering Plants to Soften the “Box” Effect
Backyard corners are usually defined by two fences meeting at a sharp 90-degree angle. This sharp geometry can feel harsh and boxy. The goal of landscaping here is to blur that line so the eye doesn’t know exactly where the yard ends.
To do this, use a tiered planting approach. You need a “thriller” (height), a “filler” (mid-height volume), and a “spiller” (ground cover).
Start with a vertical anchor in the very back corner. Columnar trees are my go-to choice here because they provide height without taking up horizontal width. A Columnar Hornbeam or an ‘Emerald Green’ Arborvitae works well because they stay narrow (about 3–4 feet wide).
Common Mistakes + Fixes
- Mistake: Planting a tree exactly in the corner point.
- Why it fails: As the tree grows, the canopy hits the fence, causing the tree to deform and potentially damaging the fence structure.
- The Fix: Pull the trunk of your anchor tree out at least 3 to 4 feet diagonally from the corner. This allows for canopy spread and airflow.
In front of your tree, plant odd-numbered groups of mid-sized shrubs. Hydrangeas or Boxwoods work well to add volume. Finally, edge the bed with low grasses like Liriope or Mondo Grass to soften the transition to the lawn.
3. Anchoring with Fire and Water Features
If you want a true focal point, a fire pit or a water feature creates immediate impact. Corners are naturally protected from wind by the intersecting fences, making them ideal locations for fire elements.
However, safety is the primary constraint here. You generally cannot place a wood-burning fire pit directly in a corner if you have wooden fences. The radiant heat is too intense.
For wood-burning pits, I adhere to a strict rule: the center of the pit must be at least 10 to 15 feet away from any structure, including fences. If your corner is tight, switch to a propane or natural gas fire table. These have controlled flames and usually require less clearance (check your local manufacturer specs, but 3 to 5 feet is common).
What I’d Do in a Real Project:
- The Water Option: If the corner is near a bedroom window or a neighbor’s patio, skip the fire and go for a bubbling urn fountain.
- Why: The sound of water masks traffic noise and creates privacy without the smoke.
- Setup: Use a recirculating pump system. You don’t need a water main line; just an outdoor electrical outlet nearby. Camouflage the cord under mulch or gravel.
4. Vertical Structures and Shade Solutions
Sometimes the best way to handle a corner is to build up. A triangular pergola or a corner arbor can define the space and provide necessary shade.
Vertical structures also allow you to hang lighting, swings, or hammocks. If you are renting or on a budget, a shade sail is a fantastic temporary alternative. Anchor one point of the triangle to a post in the corner and the other two to the house or secondary posts.
Structural Constraints & Rules of Thumb:
- Height Limits: Most HOA guidelines and city codes limit detached backyard structures to 8 or 10 feet in height. Always check before building.
- Post Placement: Do not sink posts directly against the fence footing. Concrete footings for the fence and your new structure can conflict underground. Offset your structure posts by at least 12 inches.
- Lighting: If you build a pergola, plan for string lights immediately. Run the cable along the top beams. For a corner setup, a “zig-zag” pattern works better than a perimeter outline to ensure the center gets light.
Designer’s Note on Vines:
If you want greenery on your structure, be careful with aggressive vines like Wisteria. They can tear apart wooden trellises. I prefer Star Jasmine or Clematis—they are lighter, smell great, and won’t destroy your carpentry.
5. Functional Corners: Sheds, Compost, and Kids
Not every corner needs to be a showpiece; sometimes, it needs to be the engine room of the garden. However, “functional” doesn’t have to look messy.
If you are placing a shed in the corner, pay attention to the orientation. Don’t face the doors directly toward the main house if you can avoid it. Angle the shed slightly or face the doors toward a side path. This keeps the view from your patio focused on the architecture of the shed, not the clutter inside when the doors are open.
For families with young children, corners are excellent spots for sandboxes or playhouses. It keeps the toys contained in one zone rather than spread across the lawn.
The “Hide-It” Strategy for Utilities:
- Compost/AC Units: If you use a corner for compost bins or pool equipment, build an L-shaped screen.
- Material: Use horizontal slats with 1-inch spacing. This allows air to flow through (crucial for AC units and compost) but visually blocks the mess.
- Green Screen: If you can’t build a wood screen, install a cattle panel trellis and grow evergreen vines. It’s a budget-friendly way to create a living wall.
Final Checklist: Planning Your Corner Transformation
Before you buy a single plant or paver, run through this checklist to ensure your plan is viable. This is the exact mental process I use during a site consultation.
1. Check the Drainage
Corners are often low points where water collects. After a heavy rain, does water sit there?
The Fix: If yes, you cannot plant traditional shrubs there. Install a French drain or build a raised deck to float above the dampness.
2. Map the Sun
Observe the corner at 10 AM, 1 PM, and 4 PM. Is it in deep shade because of the fences?
The Reality: If it’s a dark corner, forget the fire pit (which people usually want in open air) and build a fern garden or a shade-loving reading nook with focused lighting.
3. Locate Utilities
Call 811 (or your local dig line) before digging post holes. Corners are common routes for cable, phone, and power lines running between properties.
4. Determine Access
How will you get materials there? If you plan on a concrete patio, can a wheelbarrow fit through the side gate?
The Pivot: If access is tight, switch to materials you can carry in bags or by hand, like gravel, pavers, or modular wood decking tiles.
Frequently Asked Questions
How do I landscape a corner where nothing grows?
If the soil is poor or filled with tree roots from a neighbor’s yard, stop trying to plant in the ground. Switch to container gardening. Use three large pots of varying heights (e.g., 30 inches, 24 inches, and 18 inches tall). This gives you the lush look without fighting the root competition or bad soil.
What is the best shape for a corner patio?
Avoid square patios in corners; they emphasize the boxiness. A rounded edge, a kidney shape, or a diagonal cut (chamfered edge) works best. It draws the eye smoothly across the landscape rather than stopping it abruptly.
Can I put a hot tub in a backyard corner?
Yes, but maintenance access is the dealbreaker. You must leave at least 18 to 24 inches of clearance on all sides of the tub for servicing the motor and heater. Never wedge a hot tub tight against two walls; if a leak happens, you won’t be able to reach it to fix it.
How do I light a dark backyard corner without wiring?
Solar spotlights have improved drastically. Look for lights with a separate solar panel that can be staked in a sunny spot 10 feet away, connected by a cord to the spotlight in the dark corner. Uplighting the tree in the corner is the best way to make the yard feel expansive at night.
Conclusion
Transforming a backyard corner is one of the highest-return projects you can do for your home’s exterior. You are effectively unlocking square footage that was previously wasted.
Whether you choose to install a cozy fire pit, a lush planting bed, or a functional garden shed, the key is to respect the scale of the space. Remember to pull features away from the fence lines to allow for airflow and maintenance.
Start by observing the light and drainage in your chosen corner, and then layer your design from the ground up. With the right layout, that awkward angle might just become the most popular seat in the house.
Picture Gallery


