
Title: Creative Decorated Gourds Ideas for Your Home
Introduction
As the air turns crisp and the leaves begin to turn, there is a natural urge to bring that warmth inside our homes. However, seasonal decorating often walks a fine line between elegant festivity and cluttered kitsch. In my years of designing interiors, I have found that gourds are among the most versatile, underappreciated elements in a designer’s autumn toolkit. They offer organic shapes, fascinating textures, and a color palette that grounds a room without overwhelming it.
Rather than viewing gourds merely as temporary Halloween props, we should treat them as sculptural objects. Whether you are styling a grand entryway or a compact apartment coffee table, the key lies in intentionality. We move away from the standard bright orange plastic buckets and toward curated, sophisticated displays that celebrate the season through texture and scale.
We are going to explore practical, designer-approved ways to style, paint, and preserve gourds for your home. For a massive dose of visual inspiration, be sure to scroll all the way down because we curated a stunning Picture Gallery at the end of the blog post.
1. Selection and Preparation: The Foundation of Design
Before we discuss where to place these natural elements, we must discuss selection and preparation. A beautifully styled vignette falls apart quickly if the organic materials start to rot or carry pests. In professional styling, we treat the preparation phase as the most critical step.
When visiting a pumpkin patch or market, look for gourds with stems that are tightly attached. The stem is the lifeline of the fruit; once it breaks, decay accelerates. Avoid any gourds with soft spots, bruises, or punctures. Even a tiny nick can introduce bacteria that will turn your centerpiece into a mushy mess within days.
The “Design Cleanse” Protocol
I never put a raw gourd directly onto a client’s fine wood table or linen runner without washing it first. This isn’t just about dirt; it is about preservation.
1. Mix the solution: Create a bath of one part bleach to ten parts water.
2. Soak and scrub: Let the gourds soak for about 20 minutes to kill surface bacteria.
3. Dry completely: This is crucial. Wipe them down and let them air dry upside down on a rack. Moisture trapped on the bottom is the enemy of longevity.
Designer’s Note: Understanding Varieties
There are two main categories you will encounter. “Ornamental gourds” (Cucurbita) have thick skins and vibrant colors but eventually rot like pumpkins. “Hard-shell gourds” (Lagenaria) will dry out and turn woody, lasting for years. If you are planning a permanent painted display, always hunt for dried Lagenaria.
2. Interior Styling: Creating Focal Points
Bringing gourds indoors requires attention to scale and proportion. A common mistake I see in DIY projects is the “scatter method,” where small gourds are placed randomly on every available surface. This creates visual clutter rather than a designed look.
The Dining Room Tablescape
When styling a dining table, function must come first. A centerpiece should never block eye contact across the table.
The Rule of Heights: Keep your arrangement below 15 inches or above 24 inches.
The Linear Grouping: For rectangular tables, use a long, low trough or a series of odd-numbered groupings. I often use a mix of white Lumina pumpkins and warty knucklehead gourds running down the center.
Texture Play: If your table is wood, use a runner (linen or burlap) to separate the gourd from the table. This prevents moisture damage and provides visual contrast.
Mantelscaping with Asymmetry
Symmetry is safe, but asymmetry is interesting. Instead of placing one large gourd on each end of the mantel, try the “waterfall” effect.
Anchor one side: Group 3-5 large gourds on the left side.
Taper the other: Place 1-2 smaller gourds on the right, perhaps elevated on a stack of books or a candlestick.
Fill the gaps: Intersperse dried wheat, eucalyptus, or preserved oak leaves to add softness. The rigid shell of the gourd needs a soft counterpart to feel inviting.
Common Mistakes + Fixes
Mistake: Placing gourds directly on porous surfaces like marble or unsealed wood.
Fix: Always use a barrier. Felt pads, coasters, or a decorative tray are non-negotiable. As gourds age, they can “sweat” or decompose from the bottom up, leaving permanent stains on expensive finishes.
3. Elevated Exterior Entrances and Porches
Your front door sets the expectation for the rest of the home. When I design a porch for fall, I treat it like an outdoor room. The scale here needs to be significantly larger than indoors because you are competing with the architecture of the house and the open sky.
The Triangle Technique on Steps
If you have steps leading up to your door, avoid lining gourds up in straight rows on the edges. It looks rigid and unnatural. Instead, cluster them.
Base Layer: Start with a large heirloom pumpkin or a maximize-sized gourd on the corner of a step.
Middle Layer: Lean a medium-sized gourd against the base.
Top Layer: distinct, smaller gourd with an interesting stem or texture.
Safety Clearance: Always maintain a minimum of 36 inches of clear walking path. Never place decor where a guest might trip or where a delivery person might step.
Container Integration
You don’t need to buy new planters for fall. Utilize your summer urns.
Remove the spent summer annuals but keep the soil.
Place a large, sculptural gourd directly into the center of the urn.
Surround it with trailing ivy or cold-hardy kale.
Pro Tip: If the gourd sits too low, place an overturned plastic nursery pot inside the urn to act as a riser, then cover the mechanics with Spanish moss.
Dealing with Wind and Weather
In many regions, fall brings heavy wind. A hollow dried gourd is light and will blow away.
Weight it down: If you are using dried hard-shell gourds, drill a small hole in the bottom and fill it partially with sand or small pebbles.
Secure the stem: For fresh heavy gourds, they usually stay put. However, if you are stacking them (creating a “topiary”), run a dowel rod through the center of the stack to prevent them from toppling over in a gust.
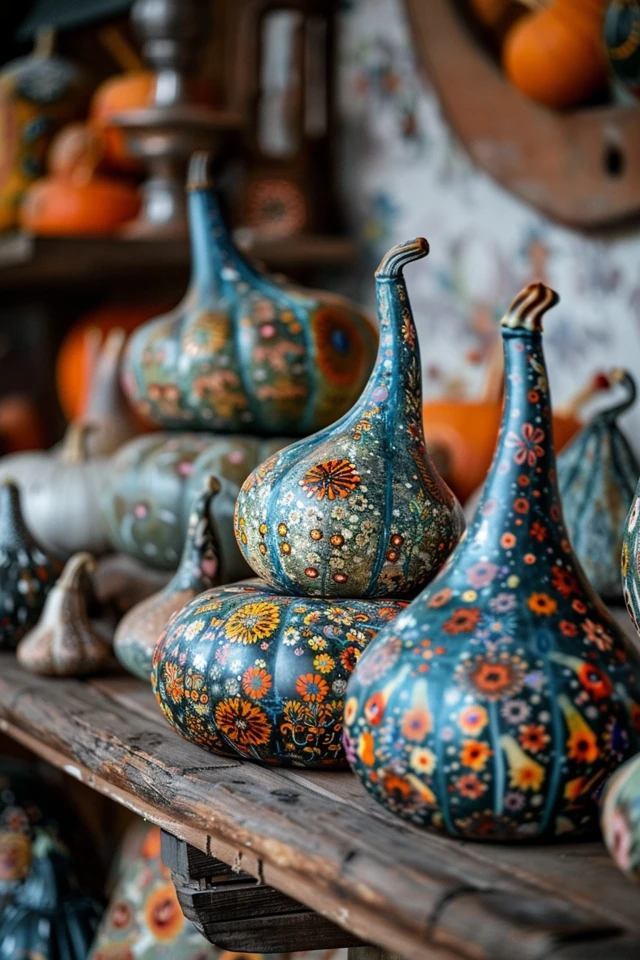
4. Sophisticated Decorating Techniques
This section is where we move from “nature” to “art.” You can alter the appearance of gourds to match your interior color palette. If you have a modern, minimalist home, bright orange and green warts might clash. Paint and texture allow us to bridge that gap.
The Matte Paint Method
High-gloss finishes can sometimes look cheap or plastic-like on gourds. I almost exclusively use matte or chalk paints for a high-end look.
1. Prime: Use a spray primer suitable for plastic or multi-surfaces. This helps the paint adhere to the waxy skin.
2. Paint: Apply two thin coats of chalk paint. Colors like charcoal, sage green, cream, and terra cotta look incredibly chic.
3. Dip-Dye Effect: For a modern twist, paint the whole gourd white. Once dry, tape off the bottom third and paint it gold or black. This geometric block fits perfectly in mid-century modern homes.
Decoupage with Natural Materials
Forget paper napkins; use pressed leaves or ferns.
Apply a layer of matte Mod Podge to a white gourd.
Press a dried fern frond onto the surface.
Apply another layer of medium over the top.
This creates a botanical study look that mimics fine porcelain.
Carving and Drilling (Luminary Gourds)
Instead of carving a face, use a drill with different bit sizes to create patterns.
The Constellation Look: Drill tiny holes in star patterns. When you place a battery-operated LED light inside, it casts a magical glow.
Note on Lighting: Never use real candles in dried gourds. Dried gourds are essentially wood and are highly flammable. Always use LED puck lights or string lights.
What I’d Do in a Real Project: The Monochromatic Study
If I were styling a library or a formal living room, I would strip the color palette entirely.
Palette: Cream, Taupe, and Soft Gold.
Execution: I would paint 10-12 small gourds in varying shades of white and cream.
Display: I would pile them into a large wooden dough bowl or a brass vessel.
Texture: I would leave the stems natural/brown to provide the only contrast. This looks expensive, intentional, and calm.
5. Preservation and Long-Term Display
For those who want to keep their decor for years, working with dried (cured) gourds is the only option. This is a practice in patience but yields durable art pieces.
The Curing Process (Birdhouse Gourds)
If you grow your own or buy them green, you must cure them.
Airflow is King: Place them in a cool, dry place with plenty of ventilation (a garage or shed is ideal).
The Mold Phase: Do not panic. The outside will get moldy and look terrible. This is the skin breaking down.
The Shake Test: After 3 to 6 months, shake the gourd. If you hear seeds rattling inside, it is fully dry.
Cleaning: Soak the dried gourd in soapy water and scrub off the moldy skin with steel wool. Underneath, you will find a beautiful, wood-like shell.
Styling Dried Gourds Year-Round
Dried gourds don’t have to be seasonal. Their woody texture fits well with “Japandi” (Japanese-Scandi) or Boho design styles.
Vessels: Cut the top off a bottle gourd to create a dry vase. Fill it with dried pampas grass or cotton stems.
Bowls: A large bushel gourd cut in half makes an incredible fruit bowl for the kitchen counter (line it with a cloth napkin for food safety).
Storage for Next Year
If you have invested time in painting or curing gourds, store them correctly.
Wrap each gourd individually in newspaper.
Store in a plastic bin with ventilation holes.
* Keep in a temperature-controlled environment if possible. Extreme heat in an attic can cause painted finishes to crack.
6. Final Checklist: The Designer’s Review
Before you consider your project complete, run through this quick checklist. These are the details that separate a DIY look from a professional finish.
1. The Stability Test: Wiggle the table. Do the gourds roll? If yes, use a small dab of museum wax or putty to secure them in place.
2. The Rot Check: Lift every fresh gourd. Is there any moisture underneath? If yes, discard immediately or place a saucer under it.
3. The Height Check: Sit at your dining table. Can you see the person opposite you? If not, the arrangement is too tall.
4. The Color Balance: Step back. Is all the orange on one side of the room? Redistribute the color to balance the visual weight.
5. The Scent Check: If you are using fresh cut gourds, ensure they aren’t beginning to smell. Scent is the strongest sense tied to memory; a rotting smell will ruin the most beautiful room.
7. FAQs
Q: How long do fresh uncut gourds last indoors?
A: If washed with a bleach solution and kept away from direct heat sources (like radiators or sunny windows), fresh hard-shell varieties can last 2 to 3 months. Soft-shell decorative types usually last 3 to 6 weeks.
Q: Can I use hairspray to preserve a gourd?
A: I generally advise against it. While some claim it seals the surface, hairspray is flammable and can leave a sticky residue that attracts dust. A clear acrylic matte spray from a hardware store is a much better, professional option for sealing.
Q: Are decorative gourds toxic to pets?
A: Most ornamental gourds are not highly toxic, but they are very bitter and can cause significant digestive upset (vomiting/diarrhea) if a dog or cat chews on them. The real danger is often a choking hazard or intestinal blockage from swallowing large chunks. Keep small gourds out of reach of curious pets.
Q: Can I eat the gourds I buy for decoration?
A: Generally, no. Ornamental gourds are grown for their hard shells, not their flesh. They are tough, bitter, and potentially indigestible. Stick to pie pumpkins or squash sold specifically in the produce section for cooking.
Conclusion
Decorating with gourds allows us to reconnect with the rhythm of the seasons within our own homes. Whether you choose to create an elaborate, hand-painted centerpiece or simply arrange a thoughtful cluster of natural textures on your porch, the goal is to create a space that feels warm and lived-in.
Remember that design is experimental. Don’t be afraid to mix high-end brass candlesticks with rustic, warty gourds. Don’t be afraid to paint a pumpkin matte black if it suits your style. The most beautiful homes are those that reflect the personality of the people living in them, using nature as a medium for expression.
Picture Gallery


