
Creative DIY Garden Arch Ideas for Your Backyard
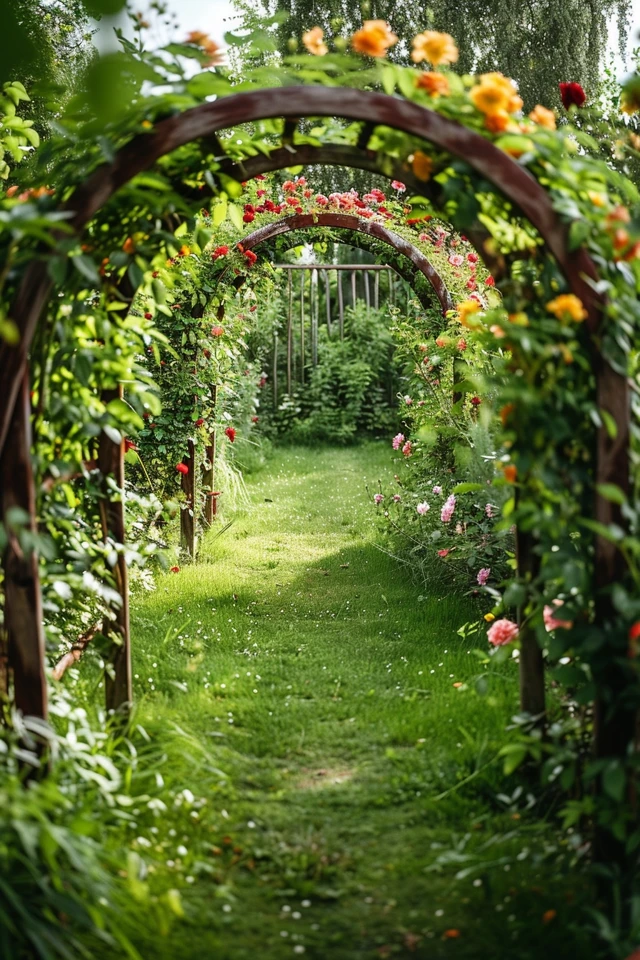
There is something inherently magical about a garden arch. In landscape design, we call these “transition moments.” They signal to a visitor that they are leaving one zone, perhaps a manicured lawn, and entering another, like a wild vegetable patch or a secluded reading nook.
When I design outdoor spaces for clients, I often use arches to frame a view or create a sense of compression and release. However, custom ironwork or high-end carpentry can eat up a budget quickly. Over the years, I have learned that some of the most charming garden features come from creative DIY solutions using accessible materials.
For a huge dose of visual inspiration, be sure to check out the Picture Gallery included at the end of this blog post. Whether you are working with a sprawling estate or a modest rental patio, there is an architectural solution here for you.
1. The Cattle Panel Arch: Industrial Strength Meets Cottage Core
This is arguably the most popular DIY arch method for a reason. Cattle panels are heavy-gauge wire grids typically used for livestock fencing. They are incredibly durable, inexpensive, and structurally sound enough to support heavy squashes or melons.
Why designers love it
The grid pattern creates an instant trellis for climbing plants. Unlike flimsy plastic kits, a cattle panel will not buckle under the weight of a mature wisteria or a heavy crop of pumpkins. It offers a clean, semi-industrial look that disappears entirely once covered in foliage.
Materials and Sizing
- 16-foot Cattle Panel: These are usually 50 inches wide. You will likely need a truck or a trailer to transport them, as they are rigid.
- 4 T-Posts: Look for 5-foot or 6-foot heavy-duty metal posts.
- Heavy Duty Zip Ties or Wire: Stainless steel wire is best for longevity.
Installation Guide
First, measure your path width. I recommend a spacing of at least 4 to 5 feet at the base. If you go too narrow, the arch becomes too tall and steep, making it look awkward.
Drive your T-posts into the ground using a post driver or a sledgehammer. Aim for at least 12 to 18 inches of depth to ensure stability against wind.
This is a two-person job. Carefully bend the panel into an arch shape between the posts. The tension of the panel trying to straighten out is what gives this structure its immense strength. Secure the panel to the T-posts using wire or heavy-duty ties.
Designer’s Note: The “Invisible” Trick
Paint the T-posts and the visible parts of the panel with a matte black or dark green exterior metal paint. This helps the structure visually recede into the background, letting your plants take center stage.
Common Mistakes + Fixes
Mistake: Placing the arch directly against a fence.
Fix: Pull the arch away from boundaries by at least 24 inches. This allows for airflow and gives you room to prune the backside of the vines.
2. The Copper Pipe Trellis: Modern Minimalism
If your aesthetic leans more modern or you are working with a smaller courtyard, copper piping is an elegant choice. Over time, bright copper oxidizes into a beautiful verdigris green or deep brown, adding a sense of age and history to the garden.
The Structural Logic
Copper is soft. It is not designed to hold up hundreds of pounds of woody vines. I use this application primarily for delicate climbers like sweet peas, clematis, or morning glories.
Materials Needed
- 1/2-inch or 3/4-inch Copper Pipe: Do not use anything thinner than 1/2-inch, or it will bend in the wind.
- Copper Elbows and Tees: For creating the corners and cross-bracing.
- Epoxy or Solder: For joining the pieces.
- Rebar: To anchor the pipes into the earth.
Step-by-Step Build
Determine your height and width. A standard comfortable clearance is 7 feet tall and 4 feet wide.
Cut your pipes to length using a basic pipe cutter. This tool is inexpensive and leaves a clean edge.
Assemble your frame on the ground first. You can create a simple ladder shape or a more complex geometric design.
To anchor it, drive 2-foot lengths of rebar halfway into the ground. Slide your copper legs over the rebar. This hides the anchor completely while keeping the copper off the soil, which reduces corrosion speed.
Common Mistakes + Fixes
Mistake: Relying only on glue.
Fix: While heavy-duty construction adhesive works for a season, soldering is the professional way to ensure it lasts for years. If you can’t solder, use screws through the fittings or specific two-part metal epoxy.
3. The Reclaimed Ladder Arch: Rustic and Instant
Sometimes the best materials are the ones already gathering dust in the garage. Using two vintage wooden ladders to create an arch is a brilliant way to add height and rustic charm without building a frame from scratch.
Finding the Right Ladders
You need two straight ladders of equal height. Avoid A-frame stepladders unless you plan to disassemble them. Look for wooden ladders with round rungs, often found at antique stores or estate sales.
Assembly Strategy
Stand the ladders up on either side of your path. You will need to bridge the gap at the top. You can use a third, shorter ladder section laid horizontally, or simple reclaimed lumber screwed into the top rungs of both vertical ladders.
Stability is Key
Old ladders are often top-heavy. You must anchor the feet. I recommend digging small holes for the legs and backfilling with gravel for drainage, then securing the legs to short wooden stakes driven into the ground.
What I’d do in a real project
If I were styling this for a client, I would hang solar lanterns from the center rungs. The rungs act as natural shelving. You can place small potted succulents or herbs on the lower rungs, creating a vertical garden effect before the climbing vines even take hold.
4. Heavy Timber and Lumber Arches: The Permanent Feature
For homeowners who own their property and want a permanent architectural feature, a timber arch is the standard. This requires basic carpentry skills but offers the highest return on investment regarding property value.
Lumber Selection
Do not use untreated pine; it will rot within two years.
- Cedar: Naturally rot-resistant and turns a lovely silver-gray.
- Redwood: Expensive but incredibly durable.
- Pressure-Treated: Budget-friendly, but requires staining to look high-end.
The Golden Ratio of Dimension
When building with wood, scale is critical. A 4×4 post is the minimum for the vertical supports. Anything thinner (like a 2×4) looks spindly and cheap.
For the top header, use 2×6 or 2×8 lumber. This visual weight at the top makes the structure feel grounded and substantial.
Setting the Posts
You have two options here. You can sink the posts into concrete footings, or you can use metal post bases that bolt into existing concrete.
If digging, go deep. The rule of thumb is that 1/3 of the post length should be underground, but for an arch, 24 inches deep with concrete is usually sufficient in non-freezing climates. If you have hard freezes, you must dig below the frost line.
Designer’s Note: The “Knee Brace”
Always add diagonal braces at the top corners (connecting the post to the header). This prevents the arch from “racking” or leaning sideways during high winds. It also adds a craftsman detail that looks custom.
5. The Living Willow Arch: Organic and Ephemeral
This is a technique often used in English cottage gardens. It involves taking long, flexible willow whips (branches) and planting them directly into the ground, then weaving them together as they grow.
Seasonality
This project is best started in late winter or early spring while willow is dormant. You can buy willow rods specifically for this, or harvest them if you have access to a willow tree.
The Weave
Push the thick ends of the willow rods into the soil on either side of your path. As they grow, you gently bend the tops toward each other and tie them with natural jute twine.
Over time, the branches will graft together where they cross, creating a single living organism.
Maintenance Reality Check
A living arch requires pruning twice a year. If you ignore it, it will become a thicket that blocks your path. However, for a renter or someone who wants a zero-waste project, this is unbeatable.
Common Mistakes + Fixes
Mistake: Using dead dry wood.
Fix: If you aren’t planting living willow, you can use dried branches, but you must soak them in water for 24-48 hours to make them pliable enough to weave without snapping.
6. Styling and Planting Strategy
Building the arch is only half the battle. As a designer, I see many people choose the wrong plant for the wrong structure.
Matching Plant Weight to Structure
- Heavy Duty (Cattle Panel/Timber): Wisteria, Grapevines, Climbing Hydrangea, Trumpet Vine. These plants get massive and heavy.
- Medium Duty (Copper/Ladder): Climbing Roses, Jasmine, Honeysuckle.
- Light Duty (Willow/Wire): Clematis, Sweet Peas, Morning Glory, Thunbergia.
The ” Bare Legs” Problem
Many climbing roses and vines tend to lose their leaves at the bottom, leaving “bare legs.” To fix this, plant low-growing perennials around the base of the arch. Catmint, lavender, or hostas (for shade) will cover the bare stems and ground the structure visually.
Lighting
An arch is a tunnel. At night, it can feel like a black hole. Always integrate lighting. Fairy lights wrapped around the frame are classic, but for a more high-end look, install a small downlight at the top center of the arch to illuminate the path below.
Final Checklist: Before You Build
Here is the rundown I use before breaking ground on any vertical garden structure.
- Check Underground Utilities: Call 811 (in the US) before driving T-posts or digging post holes. You do not want to hit a gas line.
- Measure Twice: Ensure your arch is at least 84 inches (7 feet) tall. Vines will hang down, reducing headroom.
- Check Sun Exposure: Most flowering vines require 6+ hours of direct sun. Don’t build a rose arch in deep shade.
- HOA Rules: If you live in a managed community, check if vertical structures are allowed above the fence line.
- Water Access: Ensure your hose or irrigation system can reach the base of the arch easily.
Frequently Asked Questions
How deep should I dig the holes for a wooden arch?
For stability, dig at least 24 inches deep. If you live in an area with frost, you need to dig below the frost line (which can be 36 inches or more) to prevent the ground from heaving the posts out of alignment.
What is the best wood for a budget DIY arch?
Pressure-treated pine is the most cost-effective. However, it has a greenish tint initially. I recommend letting it dry out for a few months and then staining it with a dark walnut or cedar-tone exterior stain to make it look expensive.
Can I grow vegetables on an arch?
Absolutely. This is a great space-saving technique. Pole beans, cucumbers, small melons, and squash thrive on arches. Just ensure the mesh size is large enough (like cattle panels) so you can reach your hand through to harvest the vegetables hanging inside.
How wide should a garden arch be?
Ideally, it should be a minimum of 4 feet wide. This allows two people to walk through comfortably, or one person carrying two bags of groceries or garden tools without brushing against thorny roses.
Conclusion
Adding a vertical element like an arch changes the psychology of your garden. It draws the eye upward, makes small spaces feel larger, and provides a sense of enclosure that humans naturally find comforting.
Whether you choose the industrial reliability of a cattle panel or the soft romance of woven willow, the key is to just start. Your first season might look a little sparse, but by year two or three, you will have a lush, living doorway that feels like it has always been there.
Picture Gallery


