
Creative Drainage Ditch Landscaping Ideas
Introduction
Dealing with water runoff is one of the less glamorous parts of landscape design, but it is often where the biggest transformations happen. Many of my clients come to me frustrated with a muddy trench cutting through their backyard or a concrete culvert that ruins their curb appeal. Instead of viewing these necessary drainage ditches as problems, I like to view them as opportunities to introduce texture and movement into the garden.
The goal is to stop fighting the water and start working with it. By mimicking natural waterways, we can turn an unsightly ditch into a stunning dry creek bed or a lush rain garden that manages stormwater while adding value to your home. Check out our curated Picture Gallery at the end of this blog post for visual inspiration.
Whether you are dealing with a steep slope or a flat yard that collects standing water, the solutions below balance hydraulic engineering with aesthetic beauty. We will cover rock placement, plant selection, and how to bridge these features to make them walkable. Let’s turn that muddy eyesore into your favorite part of the yard.
1. The Natural Dry Creek Bed
The dry creek bed is the most reliable solution for a drainage ditch that sees heavy flow during storms but stays dry the rest of the time. This technique mimics the look of a mountain stream. It provides a structured path for water to flow without eroding your soil.
The key to a successful dry creek bed is avoiding the “landing strip” look. You never want two straight lines of rocks with gravel in the middle. Real streams meander, widen, and narrow.
To achieve a natural look, you need to vary your stone sizes significantly. I always specify a mix of river slickers (smooth stones) ranging from 2 inches to 8 inches, combined with larger boulders. The larger boulders should be buried about one-third of the way into the ground to look like they have been there for centuries, not just dropped on top of the dirt.
Designer’s Note: The 40/60 Rule
One of the biggest mistakes DIYers make is underestimating the volume of rock needed. A good rule of thumb is that 40% of your rock volume should be larger “feature” stones (12 inches or wider), and 60% should be the smaller infill river rock. If you skip the big stones, your ditch will look like a gravel driveway, not a landscaping feature.
Key Construction Steps:
- Excavate and Shape: Dig out the ditch to be wider than you think you need. A 2:1 slope on the sides is gentle enough to prevent rocks from rolling down to the center.
- Install Geotextile Fabric: Never skip this. Use a heavy-duty, non-woven landscape fabric. It separates your rocks from the soil, preventing them from sinking into the mud over time.
- Rock Placement: Place the largest boulders first at the turns of the creek to direct water flow. Fill in the gaps with medium stones, and use the smallest gravel only in the very center bottom where the water moves fastest.
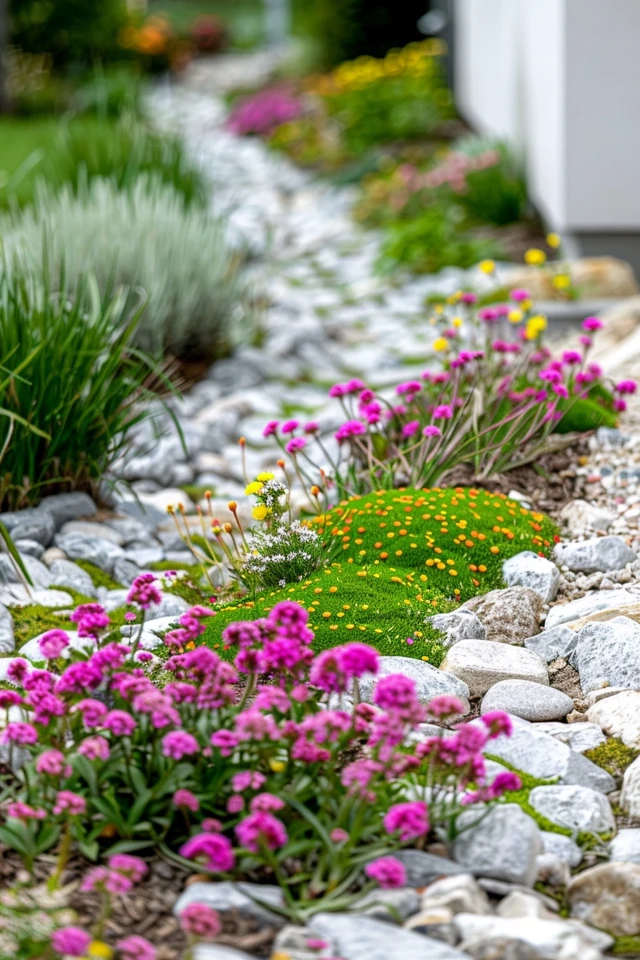
2. The Rain Garden Approach
If your drainage ditch tends to hold water for a few hours after a storm rather than channeling a fast current, a rain garden is your best bet. This design strategy focuses on absorption rather than redirection. It uses deep-rooted plants to soak up excess moisture and filter pollutants before they enter the groundwater.
Rain gardens are incredibly effective for “swales,” which are broad, shallow depressions in the landscape. Unlike a dry creek bed which is mostly rock, a rain garden is 80% plants and 20% hardscape. The aesthetic here is lush, wild, and soft.
You have to be very careful with plant selection here. The plants in the center of the ditch must be able to tolerate “wet feet” (standing water) for 24 to 48 hours, but also survive periods of drought.
Common Mistakes + Fixes:
- Mistake: Planting standard perennials like Lavender or Rosemary in the ditch.
Fix: These will rot instantly. Swap them for moisture-lovers like Cardinal Flower (Lobelia cardinalis) or Swamp Milkweed.
- Mistake: Using lightweight mulch.
Fix: Standard wood chips float away in heavy rain. Use “shredded hardwood mulch” which mats down, or opt for a layer of pea gravel around the base of the plants.
Top Plant Picks for Rain Gardens:
- Center Zone (Wet): Blue Flag Iris, Rushes (Juncus), and Joe Pye Weed.
- Slope Zone (Mesic): Black-eyed Susans, Daylilies, and Switchgrass.
- Top Bank (Dry): Coneflower and Sedum.
3. Hardscaping: Bridges and Crossings
A drainage ditch can divide your yard, making it feel smaller and less usable. Adding a crossing point not only reconnects the space but also adds a significant architectural element. It turns a utility area into a destination.
For a rustic or cottage-style garden, a wooden bridge is a classic choice. However, in modern or transitional landscapes, I prefer using large, flat flagstones to create a “stepping stone” bridge. This looks seamless and doesn’t disrupt the visual flow of the landscape.
When installing a stone crossing, stability is paramount. The stones must be massive enough—usually 4 to 6 inches thick—that floodwaters won’t shift them. They also need a solid base of compacted gravel underneath the liner to prevent tipping when you step on them.
Safety and Scale:
If you choose a wooden bridge, ensure it is anchored to concrete footings buried in the banks. I have seen unanchored bridges float straight into a neighbor’s yard during flash floods.
Measurements to Know:
- Bridge Width: A comfortable walkway should be at least 36 inches wide. If you want two people to walk side-by-side, aim for 48 inches.
- Clearance: Ensure the bottom of the bridge structure is at least 6 inches above the high-water mark of your ditch to prevent debris from getting trapped and causing a dam.
4. Managing Slopes with Retention and Planting
Steep drainage ditches are prone to rapid erosion. If the sides of your ditch are crumbling, simply planting grass won’t be enough. You need to stabilize the banks mechanically and biologically.
Terracing is a highly effective way to handle steep ditch banks. By using stackable stone or pressure-treated timbers, you can create a series of small steps down to the water level. This slows down runoff coming from the lawn and provides flat pockets for planting.
If hardscaping isn’t in the budget, aggressive ground covers are your best friends. You need plants that root at the nodes, meaning they send down new roots wherever their stems touch the ground. This creates a tight mat that holds soil in place.
What I’d Do in a Real Project:
If I am dealing with a steep, eroding ditch, I use a combination of “rip-rap” (large, jagged rock) at the very bottom and heavy planting on the slopes.
My Go-To Stabilization Plants:
- Shade: Pachysandra or Vinca Minor (check local invasive lists, as these are aggressive). For a native option, try Wild Ginger or Ferns.
- Sun: Creeping Phlox or Creeping Jenny (Lysimachia). Creeping Jenny is fantastic because the bright chartreuse color draws the eye and looks like water flowing.
- Texture: Ornamental grasses like Fountain Grass or Liriope are excellent for binding soil with their dense root systems.
5. Camouflaging Concrete Culverts
Sometimes you are stuck with a pre-existing concrete drainage channel or a metal culvert pipe that the city won’t let you remove. These are functionally excellent but aesthetically harsh. The goal here is concealment and softening without blocking the flow.
You cannot plant directly inside a concrete channel. Instead, you have to plant “over” it. We use arching shrubs and large perennials planted right at the edge of the concrete. As they grow, they drape over the unsightly edge, softening the hard lines.
Another effective technique is to use large potted planters along the rim. This draws the eye upward and away from the concrete ditch. Just ensure the pots are heavy enough to withstand wind, or anchor them to the ground.
Designer’s Note: The Trellis Trick
If a pipe exit is particularly ugly, I often install a small trellis bridge or a decorative grate a few feet in front of it. We aren’t blocking the water, but we are screening the dark hole of the pipe from the main viewing angle of the patio.
Effective Screening Plants:
- Weeping Varieties: Weeping Cherry or Weeping Japenese Maples planted on the high bank can hang down and create a curtain.
- Large Hostas: Varieties like ‘Sum and Substance’ have massive leaves that can span 3-4 feet, effectively hiding concrete edges in shady spots.
Final Checklist: Designing Your Drainage Solution
Before you head to the landscape supply yard, run through this checklist to ensure your plan is solid. This is the exact mental process I use when assessing a client’s site.
1. Analyze the Water Flow
- Watch the ditch during a rainstorm. Does the water rush fast (needs large rocks) or sit still (needs rain garden plants)?
- Mark the high-water line so you know where to place plants that can’t handle swimming.
2. Calculate Your Materials
- Measure the length and width of the ditch.
- Calculate cubic yards for rock. (Length x Width x Depth in feet) / 27 = Cubic Yards.
- Always order 10-15% more rock than the math says. You will use it.
3. Check Logistics
- How will you get heavy rock to the ditch? Do you need to rent a Dingo or Bobcat loader?
- Do you need a permit? In some municipalities, altering a drainage easement requires city approval. Always check before digging.
4. Plan the Maintenance
- Even dry creek beds need weeding. Plan to use a leaf blower to keep leaves out of the rocks in the fall.
- Ensure you have access to the area for future maintenance. Don’t plant yourself into a corner.
FAQs
Will a dry creek bed attract mosquitoes?
Actually, a properly designed dry creek bed helps prevent mosquitoes. By improving drainage and preventing puddles from forming in mud, you remove the standing water where mosquitoes breed. If you install a rain garden, the water should absorb within 24 hours, which is faster than the mosquito breeding cycle (usually 7-10 days).
How deep should I dig my drainage ditch landscaping?
For a dry creek bed, I usually recommend a depth of 12 to 18 inches in the center. This allows enough capacity for heavy storms without creating a dangerous trench. The sides should be flared out widely, not dug straight down.
Can I use gravel instead of river rock?
You can use gravel as a base, but I advise against using only gravel. Small gravel washes away easily in heavy rain. It also tends to look like a construction site rather than a garden feature. Using 2-inch to 4-inch river rock as your primary material is much more stable and attractive.
Do I really need landscape fabric underneath the rocks?
Yes, absolutely. Without fabric, heavy rocks will slowly sink into the soft, wet mud of the ditch. Within two years, your rocks will disappear, and weeds will grow up through the mud. The fabric acts as a stabilizer and separates the soil from your stone layer.
Conclusion
Transforming a drainage ditch is one of the most rewarding landscaping projects you can undertake because it solves a headache and creates beauty simultaneously. By using the right mix of stone sizes, selecting plants that thrive in fluctuating moisture, and paying attention to scale, you can turn a muddy trench into a focal point.
Remember that landscaping is a living art form. Your rain garden will evolve, your moss will spread over the rocks, and the plants will fill in to hide the edges. Don’t be afraid to adjust things as you see how the water behaves during the first few storms.
Start with a clear plan, buy quality materials, and respect the power of water. With these strategies, you will stop looking at your ditch with dread and start enjoying the dynamic, natural feature you have created.
Picture Gallery


